Table of Contents
Advertisement
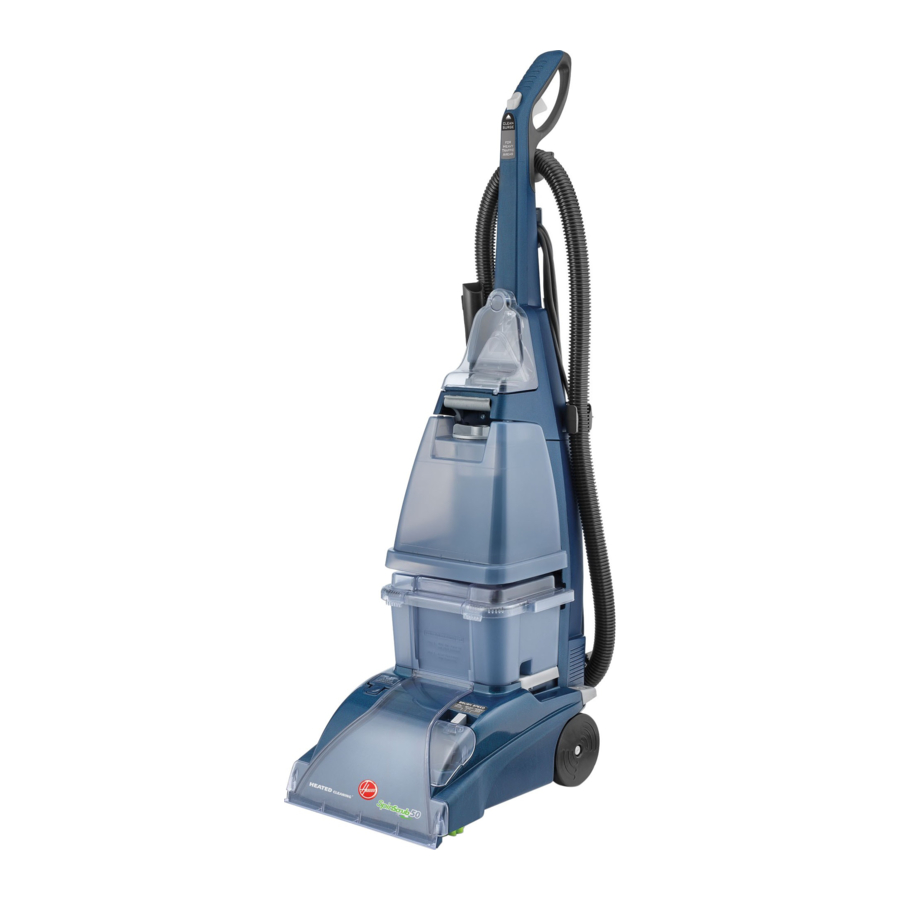
SpinScrub with MAX Extract
The Easy to Use Deep Cleaner
Congratulations on your purchase
SteamVac SpinScrub cleaners have 6 rotating
brushes that deep clean carpets and scrub
bare floors!
SteamVac™ SpinScrub™ Deep Cleaner cleans carpet
fibers by applying hot tap water and cleaning solution.
www.hoover.com
™
™
™
™
™
Advertisement
Table of Contents

Related Manuals for Hoover SpinScrub


Summary of Contents for Hoover SpinScrub
- Page 1 ™ The Easy to Use Deep Cleaner Congratulations on your purchase ™ SteamVac SpinScrub cleaners have 6 rotating brushes that deep clean carpets and scrub bare floors! SteamVac™ SpinScrub™ Deep Cleaner cleans carpet fibers by applying hot tap water and cleaning solution.
-
Page 2: Table Of Contents
• Use extra care when cleaning on stairs. Do not place deep cleaner on stairs. • Use deep cleaner only for its intended use as described in the instructions. • Use only attachments recommended by The Hoover Company; others may cause hazards. -
Page 3: Grounding Instructions
Grounding Instructions This appliance must be grounded. If it should malfunction or breakdown, grounding provides a path of least resis- tance for electrical current to reduce the risk of electric shock. This appliance is equipped with a cord having an equip- ment-grounding conductor (C) and grounding plug (A). -
Page 4: Assemble Handle
The assembled cleaner will look like this drawing. Attach hose holder Position hose holder (B) onto handle by matching tabs on rack with openings on back of handle. Make sure holes for bolts are aligned. Replace clean solution tank (upper tank) by positioning bottom first. -
Page 5: Powered Hand Tool
1-10 Press cord into cord clip on back of handle. Pull cord tight and wrap cord around hooks (A2). 1 - 1 3 Slide crevice tool (I) into holder. Position stair/upholstery nozzle in holder at base of cleaner and snap it into place as shown at arrow. -
Page 6: Product View And Parts
2. How to use Deep Cleaner Description Operate deep cleaner only at voltage specified on data plate on back of cleaner. Plug deep cleaner into a properly grounded outlet. ON/OFF pedal & Handle release pedal Step on pedal (A) to turn deep cleaner on. -
Page 7: B Rush Speed Selector
Do not use without float and float retainer in place. If broken or dis- lodged, take to an Authorized Hoover Service Center or Dealer for repair. MAX Extract™ feature The ‘MAX Extract’ lights tell you two things. -
Page 8: How To Empty
For carpet, carpeted stairs and uphol- stery: Fill cap to fill line (5 ounces) with HOOVER C a r p e t / U p h o l s t e ry Deterge n t . For bare floors :... -
Page 9: How To Clean
3. How to clean Before you begin cleaning a. Vacuum thoroughly - For carpet, use a HOOVER vacuum cleaner with an agi- tator for best results. Vacuum upholstery with a vacuum cleaner with cleaning tool attachments. Use a crevice tool to reach into tufts and folds. -
Page 10: To Clean Nozzle
Carpet Cleaning Read “Before you begin cleaning” instructions on page 9. 1. Fill clean solution tank (upper tank) with HOOVER Carpet/Upholstery Detergent according to instructions for Figs. 2-9 to 2-15. 2. Move speed selector to LO for gen- tle cleaning or Hl for normal cleaning. -
Page 11: Before Using Tool
9. Do not use the deep cleaner on hard- wood floors. 1. Fill clean solution tank with HOOVER Bare Floor Cleaner according to instruc- tions for Figs. 2-9 to 2-15. Do not use any type of wax with your deep cleaner. -
Page 12: After Using Tool
If no surface change is visible, continue to use as described below. 1. Fill clean solution tank with HOOVER Bare Floor Cleaner according to instruc- tions for Figs. 2-9 to 2-15. 2. Hold scrub tool above area to be cleaned and press trigger to dispense solution. -
Page 13: Cleaning Upholstery
W h e re to buy Bulbs may be purchased from authorized Hoover dealers (Depot), Hoover Factory S e rvice Centers, or through The Hoover Company online at www. h o o v e r. c o m . 3-17 Make additional strokes without pressing the trigger to remove more moisture. -
Page 14: Removable Brushes
2. Pull old bulb straight out of socket. 3. Push new bulb straight into socket until locked into place. Excessive fo rce is not required. Reposition lens and secure with scre w. Grasp inner portion of brush (A) and pull brush assembly out slightly to reveal latches (B). -
Page 15: Troubleshooting
Full One Year Warranty (Domestic Use) Your HOOVER® appliance is warr a n t e d in normal household use, in accord a n c e with the Owner’s Manual against original defects in material and workmanship for a period of one full year from date of p u rchase.
Need help?
Do you have a question about the SpinScrub and is the answer not in the manual?
Questions and answers
Brushes on my scrub vac do not spin ?
The brushes on your Hoover SpinScrub vacuum may not spin due to several possible reasons:
1. Brush Drive Binding: The brush system is driven by suction, not belts. Moisture inside the unit can cause the drive mechanism to bind. Fix: Remove the brushes, access the hex drive, and manually rotate it using a hex or Allen wrench to free it.
2. Dirty Filter Screen: A clogged filter screen on the bottom of the unit can prevent proper function. Fix: Clean the filter screen.
3. Speed Selector Off: If the speed selector is set to OFF, brushes won’t spin. Fix: Set the speed selector to Low or Hi.
4. Mode Selector Dial Position: If the dial is set to DRY VAC, the brushes are lifted and won't rotate. Fix: Set the dial to the WASH position for brush operation.
This answer is automatically generated
How much cleaning solution should one use. I lost my manual. I fill tank to water line and I'm not sure if I pour solution in water tANK OR HOW MUCH?
Why is it holding tank leaking
The holding tank is leaking why
The holding tank is leaking is it missing a washer question No
Does the spinscrub have a belt that needs to be replaced
My top came off. Where you cleaner at