
Related Manuals for Toro MB TX 2500


Summary of Contents for Toro MB TX 2500
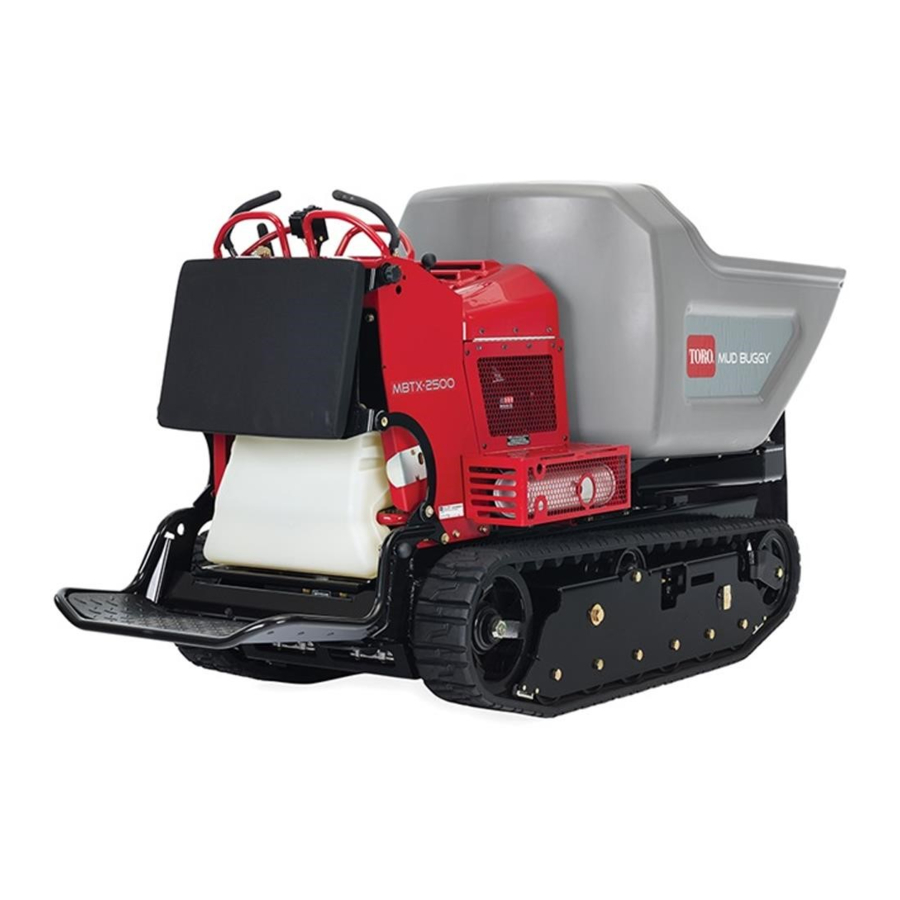
- Page 1 Form No. 3407-540 Rev C MB TX 2500 Tracked Mud Buggy Model No. 68138—Serial No. 400000000 and Up Model No. 68138G—Serial No. 400000000 and Up www.discount-equipment.com *3407-540* C Original Instructions (EN)
- Page 2 We sell worldwide for the brands: Genie, Terex, JLG, MultiQuip, Mikasa, Essick, Whiteman, Mayco, Toro Stone, Diamond Products, Generac Magnum, Airman, Haulotte, Barreto, Power Blanket, Nifty Lift, Atlas Copco, Chicago Pneumatic, Allmand, Miller Curber, Skyjack,...
- Page 3 Whenever you need service, genuine Toro parts, or Proposition 65 Warning additional information, contact an Authorized Service This product contains a chemical Dealer or Toro Customer Service and have the model and serial numbers of your product ready. Figure 1 or chemicals known to the State of...
-
Page 4: Table Of Contents
Contents Safety ............... 4 Safe Operating Practices........4 Safety and Instructional Decals ......7 Product Overview ........... 10 Controls ............10 Specifications ..........10 Operation ..............11 Think Safety First..........11 Adding Fuel ............11 Performing Daily Maintenance......13 Operating the Parking Brake......13 Operating the Throttle........ -
Page 5: Safety
Safety – Never fuel or drain the machine indoors. – Never store the machine or fuel container inside where there is an open flame, such as Improper use or maintenance of the machine can near a water heater or furnace. result in injury. - Page 6 • Do not touch parts which may be hot from embankments, water or other hazards. The operation. Allow them to cool before attempting to machine could suddenly roll over if a wheel or track maintain, adjust, or service. goes over the edge or the edge collapses. Keep a safe distance (twice the width of the machine) •...
- Page 7 Keep nuts and bolts tight. Keep equipment in good condition. • Never tamper with safety devices. • Use only genuine Toro replacement parts to ensure that original standards are maintained. • Use extra care when handling fuels. They are flammable and vapors are explosive.
-
Page 8: Safety And Instructional Decals
Safety and Instructional Decals Safety decals and instructions are easily visible to the operator and are located near any area of potential danger. Replace any decal that is damaged or missing. decal115-4212 115-4212 3. Warning—do not touch the 1. Hydraulic-fluid level hot surface. - Page 9 decal137-0575 137-0575 1. Read the Operator’s 3. Cold-fill line Manual. 2. Transmission fluid...
- Page 10 decal137-3715 137-3715 1. Parking-brake release 7. Explosion hazard—shut off the engine 13. Lower hopper before adding fuel; no fire, open flames, or smoking when adding fuel. 2. Parking brake 8. Machine tipping hazard—do not drive 14. Move the handles in to operate. forward with the hopper raised;...
-
Page 11: Product Overview
Parking Brake Lever Product Overview To engage the parking brake, pull back the lever. (Figure To disengage the parking brake, push the lever forward. Hour Meter The hour meter records the number of hours the engine has operated. It operates when the engine is running. -
Page 12: Operation
Operation • Do not use gasoline containing methanol. • Do not store fuel either in the fuel tank or fuel containers over the winter unless you use a fuel Note: Determine the left and right sides of the stabilizer. machine from the normal operating position. •... - Page 13 Using Stabilizer/Conditioner DANGER In certain conditions during fueling, static Use a fuel stabilizer/conditioner in the machine to provide the following benefits: electricity can be released causing a spark, which can ignite the fuel vapors. A fire or • Keeps fuel fresh during storage of 90 days or less. explosion from fuel can burn you and others For longer storage, drain the fuel tank.
-
Page 14: Performing Daily Maintenance
Performing Daily Operating the Throttle Maintenance The throttle control moves between F and S positions (Figure Before starting the engine each day, perform the Always use the F position when moving the following procedures: machine. • Check the engine-oil level—refer to Checking the Engine-Oil Level (page 20). -
Page 15: Operating The Choke
Operating the Choke Starting the Engine Engage the parking brake. Use the choke to start a cold engine. Engage the choke. Pull up the choke knob to engage the choke before using the key switch (Figure Note: A warm or hot engine may not require choking. -
Page 16: Shutting Off The Engine
Shutting Off the Engine Removing Debris from the Machine Move the throttle between the F and S positions. Park the machine on a level surface, move Engage the parking brake. the motion-control levers to the N EUTRAL LOCK Turn the key switch to the O position and position, engage the parking brake, and lower remove the key. -
Page 17: Transporting The Machine
Transporting the Machine Lifting the Machine Use a heavy-duty trailer or truck with full-width ramps Hoist the machine using 2 lift points under the hopper to transport the machine. Ensure that the trailer or and 2 rear tie-down loops. Tilt the hopper forward to truck has all the necessary brakes, lighting, and locate the 2 lift loops and attach a chain or straps at marking as required by law. -
Page 18: Maintenance
Maintenance Note: Determine the left and right sides of the machine from the normal operating position. Recommended Maintenance Schedule(s) Maintenance Service Maintenance Procedure Interval • Check and adjust the track tension (every 10 hours until 50 hours). After the first 10 hours •... -
Page 19: Pre-Maintenance Procedures
Pre-Maintenance Procedures Releasing the Cushion for Rear Access You can release the cushion for rear access to the machine for maintenance or adjustment. Lower the platform. Loosen the twist knobs on each side of the machine (Figure 16). g185887 Figure 17 1. -
Page 20: Lubrication
Lubrication Engine Maintenance Greasing the Machine Servicing the Air Cleaner Service Interval: Every 50 hours Service Interval: Every 25 hours—Service or replace the air-cleaner foam element (more When operating the machine under normal conditions, often under extremely dusty, dirty lubricate all grease fittings for the bearings and conditions). -
Page 21: Checking The Engine-Oil Level
Checking the Engine-Oil Level Service Interval: Before each use or daily Important: Remember to add 80% of the oil, and then gradually fill it to the Full mark on the dipstick. Important: Do not run the engine with the oil level above the Full mark or below the low mark. -
Page 22: Changing The Engine Oil And Filter
Changing the Engine Oil and Filter Service Interval: Every 100 hours Oil Type:: Detergent oil (API service SJ or higher) Engine Oil Capacity: 1.9 L (2.0 US quarts) g185888 Viscosity: Refer to the table below. g031623 Figure 23 g017552 Figure 22 Torque the plug to 13.6 N∙m (10 ft-lb). -
Page 23: Servicing The Spark Plugs
Removing the Spark Plug Slowly pour approximately 80% of the specified oil into the filler tube (Figure 25). Park the machine on a level surface, move the motion-control levers to the N EUTRAL LOCK position, engage the parking brake, and lower the hopper. -
Page 24: Cleaning The Blower Housing
Installing the Spark Plug Fuel System Maintenance Replacing the Fuel Filter Service Interval: Every 100 hours/Yearly (whichever comes first) (more often under dusty, dirty conditions). Park the machine on a level surface, move the motion-control levers to the N EUTRAL LOCK position, engage the parking brake, and lower the hopper. -
Page 25: Draining The Fuel Tank
Draining the Fuel Tank Removing the Fuel Tank Lower the platform. You can drain the fuel tank by removing it and pouring the fuel out of the fill neck; refer to Removing the Fuel Release the cushion; refer to Releasing the Tank (page 24). -
Page 26: Electrical System Maintenance
Electrical System WARNING Incorrect battery-cable routing could damage Maintenance the machine and cables, causing sparks. Sparks can cause the battery gasses to explode, resulting in personal injury. Servicing the Battery • Always disconnect the negative (black) Service Interval: Every 50 hours battery cable before disconnecting the positive (red) cable. -
Page 27: Servicing The Fuses
Charging the Battery Servicing the Fuses The electrical system is protected by fuses and WARNING requires no maintenance. If a fuse blows, check the Charging the battery produces gasses that component or circuit for a malfunction or short. can explode. Release the cushion from the rear of the machine. -
Page 28: Drive System Maintenance
Adjusting the Track Tension Drive System If you place the tab of the tensioning tool along the Maintenance rear edge of the tension nut, the other end of the tensioning tool should align with the edge of the tension arm as shown in Figure 36. -
Page 29: Servicing The Drive Belt
Clean the drive sprocket, the front wheel, and Push the track under the lugs and between the the road wheels. The road wheels should spin road wheels (Figure 37). freely when clean. Starting at the bottom of the front wheel, install Remove the bolt (1/4 x 1-5/8 inch), spacer, and the track around the wheel by rotating the track (Figure... - Page 30 Release the cushion and remove the fuel tank; refer to Removing the Fuel Tank (page 24). Raise the rear of the machine and support the machine on jack stands. Remove the skid plate (Figure 36). g189571 Figure 41 1. Engine pulley 3.
-
Page 31: Controls System Maintenance
Controls System Maintenance Adjusting the Motion-Control Levers If the motion-control levers do not align horizontally, adjust the right side motion-control lever. Park the machine on a level surface, lower the g189389 hopper, engage the parking brake, shut off the Figure 43 engine, and remove the key. -
Page 32: Hydraulic System Maintenance
• Use cardboard or paper to find hydraulic leaks; never use your hands. Servicing the Hydraulic Drive System Expansion-tank capacity: 1.4 L (1.5 US quarts) Hydraulic-fluid type: Toro® HYPR-OIL™ 500 Important: Always use the correct hydraulic fluid. Unspecified fluids will damage the hydraulic system. - Page 33 Remove the 6 bolts (2 rear, 4 side) from the skid plate and remove the skid plate (Figure 47). g203616 Figure 45 1. Expansion-tank cap 3. Fluid at fill line g203662 Figure 47 2. Sight window 1. Rear bolt (2) 3.
- Page 34 Bleeding the Hydraulic Drive System Bleed the traction hydraulic system whenever you perform maintenance on the hydrostatic transmission or add hydraulic fluid to the expansion tank. Park the machine on a level surface, move the motion-control levers to the N EUTRAL LOCK position, engage the parking brake, and lower...
-
Page 35: Servicing The Hydraulic Lift System
Level for the Lift System g185888 Service Interval: Before each use or daily Reservoir-tank capacity: 1.4 L (1.5 US quarts) Hydraulic-fluid type: Toro Premium All Season Hydraulic Fluid or Mobil® 424 Hydraulic Fluid Important: Always use the correct hydraulic fluid. Unspecified fluids will damage the hydraulic system. - Page 36 Changing the Hydraulic Fluid for Replacing the Hydraulic Filter for the Lift System the Lift System Service Interval: Every 300 hours Service Interval: Every 300 hours Important: Do not substitute an automotive oil Park the machine on a level surface, move filter or severe hydraulic system damage may the motion-control levers to the N EUTRAL...
-
Page 37: Checking The Hydraulic Lines
Cleaning Shut off the engine and check for leaks. Check the fluid level in the reservoir tank, refer (page Removing Debris from the Note: Do not overfill the reservoir tank. Machine Remove the cylinder lock and lower the hopper. Service Interval: Before each use or daily Checking the Hydraulic Every 100 hours Lines... -
Page 38: Storage
Storage Install the spark plugs. Note: Do not install the wire on the spark plugs. Shut off the engine and engage the parking brake. Check and tighten all bolts, nuts, and screws. Repair or replace any part that is damaged. Remove dirt and grime from the external parts of the entire machine, especially the engine. - Page 39 We sell worldwide for the brands: Genie, Terex, JLG, MultiQuip, Mikasa, Essick, Whiteman, Mayco, Toro Stone, Diamond Products, Generac Magnum, Airman, Haulotte, Barreto, Power Blanket, Nifty Lift, Atlas Copco, Chicago Pneumatic, Allmand, Miller Curber, Skyjack,...
- Page 40 Select an option below to find your Equipment We sell worldwide for the brands: Genie, Terex, JLG, MultiQuip, Mikasa, Essick, Whiteman, Mayco, Toro Stone, Diamond Products, Generac Magnum, Airman, Haulotte, Barreto, Power Blanket, Nifty Lift, Atlas Copco, Chicago Pneumatic, Allmand, Miller Curber, Skyjack, Lull,...
Need help?
Do you have a question about the MB TX 2500 and is the answer not in the manual?
Questions and answers