
Related Manuals for Acova Z23290


Summary of Contents for Acova Z23290
-
Page 1: Table Of Contents
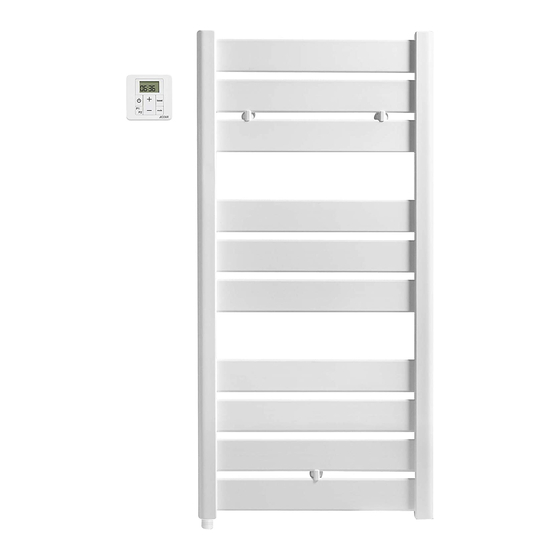
Z 2 3 2 9 0 1 Présentation 1.1 Introduction 1.2 Présentation de votre radiateur sèche-serviettes 1.3 Présentation du soufflant 1.4 Présentation de la commande à distance 1.5 Mise en marche du radiateur, du soufflant et de la commande à distance 2 Installation de votre radiateur sèche-serviettes et de sa commande à... -
Page 2: Présentation
1. Présentation ImPOrTAnT : La commande à distance livrée avec votre appareil est conçue pour une utilisa- tion avec un radiateur sèche-serviettes électrique, qu’il soit équipé ou non d’un soufflant. Dans le cadre de l’utilisation avec un appareil électrique sans soufflant, la 1.1 Introduction fonction boost manuel (voir chapitre 3.1.2) n’est pas active ;... -
Page 3: Présentation De La Commande À Distance
2. Installation de votre radiateur sèche-serviettes et de sa commande à distance mISe en gArde Pour éviter une surchauffe, ne pas couvrir l’appareil de chauffage. remArQUe Il est essentiel de ne pas obstruer l’entrée et la sortie de l’air à 2.1 Choix de l’emplacement du radiateur sèche-serviettes travers le dispositif soufflant. -
Page 4: Choix De L'emplacement De La Commande À Distance
rACCOrdemenT de CLASSe II (marché français) : ③ À nOTer : Au-delà des règles prescrites dans cette notice, l’installation doit être conforme Lors de la pose de votre radiateur sèche- aux normes européennes et françaises en vigueur, telles que CEI 60364.7.701 et NF serviettes, assurez-vous de ne pas le faire C15-100, ainsi qu’aux règles de l’art. -
Page 5: Utilisation
3. Utilisation PRINCIPE DE RACCORDEMENT AVEC FIL PILOTE : Votre appareil est muni d’un fil pilote lui permettant d’être raccordé à une centrale de programmation fil pilote (non fournie avec l’appareil). 3.1 Utilisation de la commande à distance 3.1.1 mise en service N (bleu ou gris) Neutre Phase... - Page 6 mArChe / ArrêT dU bOOST mAnUeL rÉgLAge de L’heUre Un appui sur la touche BOOST vous permet de démarrer le soufflant pour une Le réglage de l’heure peut se faire en respectant la procédure suivante : durée préréglée (voir chapitre 3.3, paramètre 0 pour le modifier). o Vérifiez que la commande à...
- Page 7 Un appui court sur P1 ou P2 vous permet d’activer/désactiver le programme En accédant au paramétrage avancé de votre commande à distance, vous P1 ou P2. L’affichage sur l’écran du symbole P1 ou P2 vous indique son activation. pouvez choisir de déclencher : - une marche forcée du radiateur seul (paramètre par défaut), - ou un boost soufflant, - ou une marche forcée du radiateur + un boost soufflant.
-
Page 8: Utilisation De Votre Radiateur Sèche-Serviettes Et Du Soufflant
3.2 Utilisation de votre radiateur sèche-serviettes et Le voyant marche/arrêt du soufflant indique, lorsqu’il est sous tension, que la du soufflant fonction soufflant est activable par la commande à distance. Le voyant alarme indique un dysfonctionnement de votre soufflant. Consultez 3.2.1 désignation des voyants de votre sèche-serviettes le chapitre 4 pour identifier la cause de cette alarme. -
Page 9: Conseils D'entretien Et De Dépannage
4. Conseils d’entretien et de dépannage n° Paramètre description Valeur par défaut réglage Réglable de 15 à 120 Appui sur touche 4.1 Opérations d’entretien courant Durée du boost minutes par intervalles de 30 minutes 15 minutes Avant toute opération d’entretien, prenez soin d’arrêter votre soufflant par appui - Si paramètre 3 = 0 jusqu’à... -
Page 10: Résolution Des Problèmes
SOUffLAnT Problème diagnostic Opérations à effectuer redémarrage • Éteindre le soufflant à l’aide du bouton , vérifier que le • Attendre quelques minutes voyant ON est éteint. puis appuyer sur le bouton pendant 5 secondes • Vérifier qu’une serviette ou pour réinitialiser le soufflant. -
Page 11: Services Et Garantie
5. Services et garantie COmmAnde À dISTAnCe Problème diagnostic Opérations à effectuer redémarrage Service après-vente Voir chapitre Problème de piles. Changer les piles. 3.1.1 Aucun affichage. En cas de non fonctionnement de votre radiateur sèche-serviettes, ou pour vous La télécommande à Appui long sur On. - Page 12 règlementations environnementales RoHS : conforme à la directive 2011/65/UE DEEE : conforme à la directive 2002/96/CE Traitement des appareils électriques et électroniques en fin de vie. Ce symbole indique que ce produit ne doit pas être traité avec les déchets ménagers.
- Page 13 1 Overview 1.1 Introduction 1.2 Overview of your towel radiator 1.3 Overview of the blower 1.4 Overview of the remote control 1.5 Starting the radiator, the blower and the remote control 2 Installing your towel radiator and its remote control 2.1 Choosing the position of your towel radiator 2.2 Choosing the position of the remote control 2.3 Connecting the appliance...
-
Page 14: Overview
1. Overview ImPOrTAnT: The remote control delivered with your appliance is designed for use with an electric towel radiator, whether fitted with a blower or not. When used with an electrical appliance without a blower, the manual boost function (see chapter 3.1.2) is not enabled; pressing the BOOST key will have no effect 1.1 Overview on the operation of your towel radiator. -
Page 15: Overview Of The Remote Control
2. Installing your towel radiator and its remote control CAUTIOn To avoid overheating, do not cover the heating appliance. nOTe It is important to keep the blower air inlet and outlet clear. ImPOrTAnT The blower on your towel radiator is fitted with a filter detector. 2.1 Choosing the position of your towel radiator If the filter is missing or positioned incorrectly, the blower cannot function (see chapter 3.2.2). -
Page 16: Choosing The Position Of The Remote Control
CLASS II COnneCTIOn (frenCh mArkeT): ③ nOTe: The appliance must be installed as described in this document and in accor- When installing your towel radiator, make dance with the applicable European and French standards, including CEI 60364.7.701 sure it is not resting on the blower or on its and NF C15-100, as well as the rules of good professional practice. -
Page 17: Use
3. Use CONNECTING PRINCIPLE WITH PILOT WIRE: Your appliance is equipped with a pilot wire for connection to a pilot wire programming base unit (not supplied with the appliance). 3.1 Using the remote control 3.1.1 Commissioning N (blue or grey) Neutral Live L (brown) - Page 18 SWITChIng The mAnUAL bOOST On And Off SeTTIng The TIme Press the BOOST key to start the blower for a set amount of time (see chapter The time can be set by following the procedure below: 3.3, parameter 0 to modify it). o Make sure the remote control is switched on.
- Page 19 Press P1 or P2 briefly to activate/deactivate programme P1 or P2. Symbol P1 Access the advanced settings of your remote control to decide whether to or P2 is displayed on the screen to indicate it has been activated. instruct the appliance to perform: - a boost of the radiator alone (default setting), - or a blower boost, - or a radiator boost + blower boost.
-
Page 20: Using Your Towel Radiator And Blower
3.2 Using your towel radiator and blower When the blower is powered, the On/Off Led indicates that the blower function can be activated by the remote control. 3.2.1 name of the various Leds on your towel radiator The alarm Led indicates a blower failure. Refer to chapter 4 to identify the cause of this alarm. -
Page 21: Maintenance And Troubleshooting Tips
4. maintenance and troubleshooting tips Parameter description default setting Setting Adjustable from 15 to 120 Press the Boost time minutes in 15-minute 30 minutes increments 4.1 routine maintenance operations - If parameter 3 = 0 Before you perform any maintenance work, make sure you switch the blower off Adjustable from 15 to 120 or 2: 30 minutes by pressing... -
Page 22: Troubleshooting
bLOWer Problem diagnosis Steps to take restarting • Switch the blower off at the button, make sure the • Wait a few minutes then ON LED is off. press and hold the button for 5 seconds to • Make sure there is no towel reset the blower. -
Page 23: Services And Guarantee
5. Services and guarantee remOTe COnTrOL Problem diagnosis Steps to take restarting After-sales service See chapter Battery problem. Replace the batteries. 3.1.1 No display. If your towel radiator stops working or you require spare parts, contact your The remote control is Press and hold On. - Page 24 environmental regulations RoHS: complies with Directive 2011/65/EU WEEE: complies with Directive 2002/96/EC disposal of end-of-life electrical and electronic appliances. This symbol indicates that this product should not be disposed of with household waste. It must be taken to a suitable collection point to be recycled.
- Page 25 1 Uitleg 1.1 Inleiding 1.2 Presentatie van uw handdoekradiator 1.3 Presentatie van de blazer 1.4 Presentatie van de afstandsbediening 1.5 Inschakeling van de radiator, de blazer en de afstandsbediening 2 de handdoekradiator en de afstandsbediening installeren 2.1 Een plaats kiezen voor de handdoekradiator 2.2 De plaats van de afstandsbediening kiezen 2.3 Het toestel aansluiten 3 gebruik...
-
Page 26: Uitleg
1. Uitleg beLAngrIjk: De afstandsbediening die met uw toestel is meegeleverd, is ontworpen voor gebruik met een elektrische handdoekradiator, al dan niet uitgerust met een blazer. In het geval van gebruik met een elektrisch toestel zonder blazer is de handma- tige boost functie (zie hoofdstuk 3.1.2) niet actief;... -
Page 27: Presentatie Van De Afstandsbediening
2.de handdoekradiator en de afstandsbediening installeren OPgeLeT Om oververhitting te voorkomen het verwarmingstoestel niet bedekken. OPmerkIng De luchtinlaat en –uitlaat van de blazer mogen beslist niet worden 2.1 een plaats kiezen voor de handdoekradiator belemmerd. beLAngrIjk De blazer van uw handdoekradiator is voorzien van een detectie Om volledig te kunnen genieten van het toestel en voor het meeste comfort "aanwezigheid filter". -
Page 28: De Plaats Van De Afstandsbediening Kiezen
kLASSe II-AAnSLUITIng (frAnSe mArkT): ③ LeT OP: De installatie moet behalve aan de voorschriften van deze gebruiksaanwijzing, Laat de handdoekdroger bij plaatsing niet op ook voldoen aan de Europese en Franse normen, zoals IEC 60364.7.701 en N de blazer of op de infrarood ontvanger rusten C 15-100, evenals aan de erkende technische regels. -
Page 29: Gebruik
3. gebruik AANSLUITPRINCIPE MET STUURDRAAD: Uw toestel is uitgerust met een stuurdraad waarmee het verbonden kan worden met een programmeercentrale met stuurdraad (niet meegeleverd). 3.1 de afstandsbediening gebruiken 3.1.1 Ingebruikstelling N (blauw of grijs) Fase L (bruin) Stuurdraad (zwart) Stuurdraad (centrale) AANSLUITPRINCIPE ZONDER STUURDRAAD: Indien de stuurdraad niet is aangesloten, dient deze uit het oogpunt van veiligheid te worden geïsoleerd. - Page 30 de hAndmATIge bOOST AAn-/UITZeTTen TIjdInSTeLLIng Met een druk op de toets BOOST kunt u de blazer gedurende een vooraf De tijd kan worden ingesteld door de volgende procedure te volgen: ingestelde tijd aanzetten (zie hoofdstuk 3.3, instelling 0 om deze aan te passen). o Controleer of de afstandsbediening aan is.
- Page 31 door P1 of P2 kort in te drukken kunt u het programma P1 of P2 Met de geavanceerde instellingen van uw afstandsbediening kunt u naar activeren/deactiveren. De weergave van symbool P1 of P2 geeft aan dat het keuze het volgende in werking zetten: programma is geactiveerd.
-
Page 32: Gebruik Van De Handdoekradiator En De Blazer
3.2 gebruik van de handdoekradiator en de blazer Als het onder spanning staat, geeft het controlelampje aan/uit van de blazer aan dat de blazerfunctie door de afstandsbediening geactiveerd kan worden. 3.2.1 beschrijving van de controlelampjes van de Het alarmlampje geeft een functiefout van de blazer weer. Raadpleeg hoofdstuk handdoekdroger 4 om de oorzaak van deze alarmmelding vast te stellen. -
Page 33: Aanbevelingen Voor Het Onderhoud En Het Verhelpen Van Storingen
4.Aanbevelingen voor het onderhoud Instelling Omschrijving Standaardwaarde Afstelling en het verhelpen van storingen Instelbaar van 15 tot 120 Toets Duur van de boost minuten met intervallen van 30 minuten indrukken 15 minuten 4.1 dagelijks onderhoud - Bij instelling 3 = 0 Zorg ervoor dat de blazer voor aanvang van onderhoudswerkzaamheden wordt Instelbaar van 15 tot 120 of 2: 30 minuten... -
Page 34: Probleemoplossing
bLAZer Probleem diagnose hoe te handelen Opnieuw opstarten • Enkele minuten wachten • De blazer uitzetten met en vervolgens knop knop , controleren of het gedurende 5 seconden controlelampje ON is indrukken om de blazer gedoofd. opnieuw op te starten. •... -
Page 35: Service En Garantie
5. Service en garantie AfSTAndSbedIenIng Probleem diagnose hoe te handelen Opnieuw opstarten After-sales-service Batterijprobleem. Batterijen vervangen. Zie hoofdstuk 3.1.1 Geen weergave. Neem bij een storing van uw handdoekradiator of voor het bestellen van De afstandsbediening On lang indrukken. vervangingsonderdelen contact op met uw installateur of uw dealer. staat uit. - Page 36 milieuvoorschriften RoHS: conform richtlijn 2011/65/EU AEEA: conform richtlijn 2002/96/EG behandeling van elektrische en elektronische apparatuur als ze versleten zijn. Dit symbool duidt erop dat dit product niet samen met huishoudelijk afval mag worden verwerkt. Het dient bij een geschikt recyclingverzamelpunt te worden ingeleverd.