
Subscribe to Our Youtube Channel
Related Manuals for Acova Taiga LCD


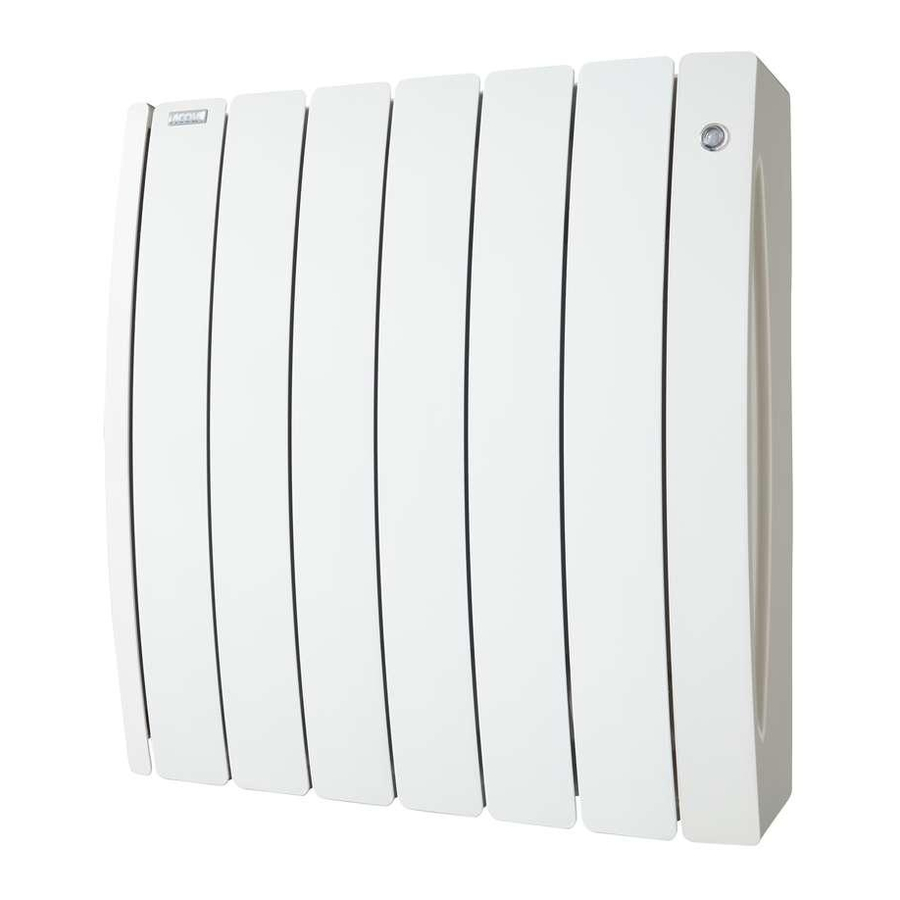
Summary of Contents for Acova Taiga LCD
-
Page 1: Table Of Contents
Z 2 3 2 2 0 1 Présentation 1.1 Introduction 1.2 Présentation de votre radiateur 2 Installation de votre appareil 2.1 Règles d’installation 2.2 Choix de l’emplacement 2.3 Raccordement de l’appareil 3 Utilisation de votre appareil 3.1 Mise en service 3.2 Présentation de l’interface de commande 3.3 Choix du mode de fonctionnement 3.4 Dérogations... -
Page 2: Présentation
1. Présentation 1.2 Présentation de votre radiateur Cet appareil à fluide hydractif est livré prêt à l’emploi. Il est bouchonné et rempli en usine d’une huile minérale thermique haute performance. 1.1 Introduction Ce fluide, spécialement élaboré pour cet usage, ne nécessite aucun entretien particulier. -
Page 3: Installation De Votre Appareil
2. Installation de votre appareil 2.2 Choix de l’emplacement Pour profiter pleinement de votre appareil et pour votre plus grand confort, nous vous recommandons : - de réaliser l’installation si possible à proximité des emplacements à fortes 2.1 règles d’installation déperditions (fenêtres, portes, etc.) ;... -
Page 4: Raccordement De L'appareil
2.3 raccordement de l’appareil À nOTer : Votre appareil étant muni d'une régulation électronique intégrée, notre respon- sabilité ne saurait être engagée en cas d'utilisation avec des centrales de ATTenTIOn programmation fil pilote fonctionnant par coupure de tension d'alimentation Procédez toujours à la coupure de l’alimentation électrique (disjoncteur + fil (consulter la notice de votre centrale). -
Page 5: Utilisation De Votre Appareil
3. Utilisation de votre appareil Indicateur de mode Indicateur Indicateur de 3.1 mise en service comportemental température Si vous souhaitez mettre l’appareil en chauffe lors de la première mise sous Progression tension, il vous suffit de maintenir le bouton pendant 2 secondes, de sélectionner le du programme et d’ajuster la température souhaitée avec les touches - et +. - Page 6 PrOgrAmme P1 InDICATeUr De mODe HOrS-geL Ce programme correspond à un besoin de chauffe de votre Votre radiateur est réglé pour garantir une température minimum de 7°C dans pièce de 5 à 23H (ex. présence permanente). votre pièce, cela vous permet d'éviter tout risque de gel. Cette température n’est pas modifiable par l’utilisateur.
-
Page 7: Dérogations
3.4 Dérogations 3.6 Verrouillage électronique Dans les modes de fonctionnement programmés de votre radiateur Cette fonction permet d’empêcher toute intervention inoppor- (P1, P2 et P3, ou mode AUTO piloté par une centrale externe), il est possible de déroger tune sur l’interface de commande. Dès lors aucun changement localement au fonctionnement de votre radiateur, en modifiant le niveau de température involontaire de mode ou de niveau de température souhaité... -
Page 8: Fonctions Avancées
4 Fonctions avancées (pour utilisateurs ImPOrTAnT Afin de profiter au mieux de cette fonction, votre radiateur doit être positionné près de l’ouvrant sans interposition d’un meuble ou d’un quelconque avertis) objet. 4.3 Étalonnage de la température En appuyant 5 secondes sur la touche MODE, vous accéderez aux fonctions avancées du radiateur décrites ci-après. -
Page 9: Conseils D'entretien Et De Dépannage
5. Conseils d’entretien et de dépannage Le tableau de correspondance ci-dessous résume les 3 codes d’erreur possibles et les actions à entreprendre : message Opérations à Conséquence Diagnostic 5.1 Opérations d’entretien courant d'erreur effectuer À nOTer : Défaut de communication Avant toute opération d’entretien, prenez soin d’arrêter l’appareil. -
Page 10: Services Et Garantie
AUTreS PrObLèmeS : 6. Services et garantie Problème Diagnostic Opérations à effectuer Le radiateur ne L'association entre Service après-vente Associer à nouveau le répond pas aux radiateur et centrale radiateur et la centrale CPL. ordres de la centrale. ne fonctionne pas. En cas de non fonctionnement ou de besoin en pièces détachées, contactez votre installateur ou votre revendeur. - Page 11 règlementations environnementales RoHS : conforme à la directive 2011/65/UE DEEE : conforme à la directive 2002/96/CE Traitement des appareils électriques et électroniques en fin de vie. Ce symbole indique que ce produit ne doit pas être traité avec les déchets ménagers. Il doit être remis à un point de collecte approprié qui se chargera de son recyclage.
- Page 12 1 Overview 1.1 Introduction 1.2 Overview of your radiator 2 Installing your appliance 2.1 Installation restrictions 2.2 Positioning your appliance 2.3 Connecting the appliance 3 Using your appliance 3.1 Commissioning 3.2 Overview of the control panel 3.3 Operating mode selection 3.4 Override 3.5 Stopping the radiator 3.6 Electronic lock...
-
Page 13: Overview
1. Overview 1.2 Overview of your radiator This electrical appliance with circulating fluid is delivered ready to use. It is plugged and filled with a high-performance thermal mineral oil before leaving the factory. 1.1 Introduction This fluid was specially designed for this use and requires no special maintenance. -
Page 14: Installing Your Appliance
2. Installing your appliance 2.2 Positioning your appliance To get the most out of your appliance and enjoy the highest standards of comfort, we recommend that you: - install the appliance near places with high heat loss (windows, doors, etc.) 2.1 Installation restrictions wherever possible;... -
Page 15: Connecting The Appliance
2.3 Connecting the appliance nOTe: Your appliance is equipped with an integrated electronic control system so we cannot accept any liability should the appliance be used with Pilot Wire CAUTIOn: programming base units that function by disconnecting the supply voltage (refer Always turn off the electricity supply (circuit-breaker + pilot wire) before making to the instructions supplied with your control unit). -
Page 16: Using Your Appliance
3. Using your appliance Mode indicator Temperature Energy consumption 3.1 Commissioning indicator indicator If you wish your appliance to start heating the first time it is powered, simply Program hold down the button for 2 seconds, select COMFORT mode and adjust the progress desired temperature using the - and + keys. - Page 17 PrOgrAmme P1 FrOST PrOTeCTIOn mODe InDICATOr This programme can be selected when you need to heat your Your radiator maintains a minimum room temperature of 7°C to prevent any risk room from 5 am to 11 pm (e.g. permanent presence). of frost.
-
Page 18: Override
3.4 Override 3.6 electronic lock In your radiator's programmed operating modes (P1, P2 and P3, or AUTO mode This function prevents unwanted operation of the control panel. operated by an external base unit), you can locally override the operation of your When it is activated, unintentional mode or desired temperature level radiator by modifying the desired temperature level. -
Page 19: Advanced Functions
4 Advanced functions (for advanced ImPOrTAnT In order to get the most out of this function, your radiator has to be positioned near the aperture without any furniture or other obstruction in between. users) 4.3 Temperature calibration Press and hold the MODE key for 5 seconds to access the radiator's advanced Refer to the introduction to this chapter to access the functions menu and how functions as described below. -
Page 20: Maintenance And Troubleshooting Tips
5. maintenance and troubleshooting tips The equivalent table below summarises the 3 error codes possible and the steps to take: error Consequence Diagnosis Steps to take 5.1 routine maintenance operations message nOTe: Communication fault with Before carrying out any maintenance operation on your appliance, ensure that the radiator regulation: the it is switched off. -
Page 21: Services And Guarantee
OTHer PrObLemS: 6. Services and guarantee Problem Diagnosis Steps to take The radiator does The connection After-sales service not respond to the between the radiator Re-connect the radiator to base unit and the base unit is the PLC base unit. If your appliance stops working or you require spare parts, contact your installer commands. - Page 22 environmental regulations RoHS: complies with Directive 2011/65/EU WEEE: complies with Directive 2002/96/EC Disposal of end-of-life electrical and electronic appliances. This symbol indicates that this product should not be disposed of with household waste. It must be taken to a suitable collection point to be recycled. By disposing of this product correctly, you will help prevent potential negative consequences for the environment and human health.
- Page 23 1 Uitleg 1.1 Inleiding 1.2 Presentatie van uw radiator 2 Het toestel installeren 2.1 Installatievoorschriften 2.2 Een plaats kiezen 2.3 Het toestel aansluiten 3 gebruik van het toestel 3.1 Ingebruikstelling 3.2 Presentatie van de bedieningsinterface 3.3 De bedrijfsmodus kiezen 3.4 Afwijkingen 3.5 De radiator uitzetten 3.6 Elektronische vergrendeling 3.7 Terug naar fabrieksinstellingen...
-
Page 24: Uitleg
1. Uitleg 1.2 Presentatie van uw radiator Het elektrische toestel is gevuld met een hydroactieve vloeistof en is klaar voor gebruik. Het wordt in de fabriek afgedicht en gevuld met een hoogwaardige thermische 1.1 Inleiding minerale olie. Deze vloeistof, die speciaal voor dit gebruik is ontwikkeld, heeft geen bijzonder onderhoud nodig. -
Page 25: Het Toestel Installeren
2. Het toestel installeren 2.2 een plaats kiezen Om volledig te kunnen genieten van het toestel en voor het meeste comfort raden wij het volgende aan: - installeer het toestel, indien mogelijk, dicht bij plekken waar sprake is van sterk 2.1 Installatievoorschriften warmteverlies (ramen, deuren, enz.);... -
Page 26: Het Toestel Aansluiten
2.3 Het toestel aansluiten LeT OP: Aangezien uw toestel is voorzien van een geïntegreerd elektronisch regelsysteem, wijzen wij elke aansprakelijkheid af voor gebruik met een OPgeLeT programmeercentrale met stuurdraad die werkt door uitschakeling van de Sluit altijd de elektrische voeding af (stroomonderbreker + stuurdraad) voor u voedingsspanning (raadpleeg gebruiksaanwijzing... -
Page 27: Gebruik Van Het Toestel
3. gebruik van het toestel Modusindicator Temperatuur- Indicator 3.1 Ingebruikstelling indicator energieverbruik Als u het toestel wilt laten verwarmen zodra het onder spanning is gebracht, is Voortgang het voldoende om de knop 2 seconden ingedrukt te houden, de COMFORT-modus programma en de gewenste temperatuur aan te passen met de toetsen - et +. - Page 28 PrOgrAmmA P1 InDICATOr VOrSTVrIJ-mODUS Dit programma komt overeen met een warmtebehoefte in het Uw radiator is zodanig afgesteld dat een minimumtemperatuur van 7 °C in uw vertrek vanaf 5.00 u tot 23.00 u (bijv. permanente aanwezigheid). kamer wordt gegarandeerd ter voorkoming van bevriezingsgevaar. Deze temperatuur kan niet worden aangepast door de gebruiker.
-
Page 29: Afwijkingen
3.4 Afwijkingen 3.6 elektronische vergrendeling In de geprogrammeerde bedrijfsmodi van uw radiator (P1, P2 en P3, of Met deze functie kan elke ongewenste ingreep op de bedie- AUTO-modus die door een externe centrale wordt aangestuurd), is het mogelijk om ningsinterface worden voorkomen. Daarna zijn geen onbedoelde lokaal de werking van uw radiator te wijzigen door het gewenste temperatuurniveau te wijzigingen van modus of van gewenst temperatuurniveau meer veranderen. -
Page 30: Geavanceerde Functies
4 geavanceerde functies (voor ervaren beLAngrIJK Om optimaal van deze functie gebruik te maken, moet de radiator dicht bij het openslaande raam staan zonder tussenplaatsing van een meubel of gebruikers) ander voorwerp. 4.3 Temperatuurijking Door 5 seconden op de toets MODE te drukken, krijgt u toegang tot de geavanceerde functies van de radiator die hieronder worden beschreven. -
Page 31: Aanbevelingen Voor Het Onderhoud En Het Verhelpen Van Storingen
5.Aanbevelingen voor het onderhoud In onderstaande tabel staat een overzicht van de 3 mogelijke foutcodes en de te ondernemen acties: en het verhelpen van storingen Foutmel- Hoe te gevolg Diagnose ding handelen 5.1 Dagelijks onderhoud Geen communicatie met LeT OP: de regeling van de radiator: De radiator stopt Neem contact op... -
Page 32: Service En Garantie
OVerIge PrObLemen: 6. Service en garantie Probleem Diagnose Hoe te handelen De verbinding De radiator reageert Aftersales service tussen de radiator De radiator opnieuw met de niet op commando’s en de centrale PLC-centrale verbinden van de centrale. Neem bij een storing of voor vervangingsonderdelen contact op met uw functioneert niet. - Page 33 milieuvoorschriften RoHS: conform richtlijn 2011/65/EU AEEA: conform richtlijn 2002/96/EG behandeling van elektrische en elektronische apparatuur als ze versleten zijn. Dit symbool duidt erop dat dit product niet samen met huishoudelijk afval mag worden verwerkt. Het dient bij een geschikt recyclingverzamelpunt te worden ingeleverd. Als u zorgt dat dit product op de juiste wijze onbruikbaar wordt gemaakt, draagt u bij tot het voorkomen van mogelijk negatieve gevolgen voor het milieu en de menselijke gezondheid.
Need help?
Do you have a question about the Taiga LCD and is the answer not in the manual?
Questions and answers