
Related Manuals for Proline BOX602SS


Summary of Contents for Proline BOX602SS
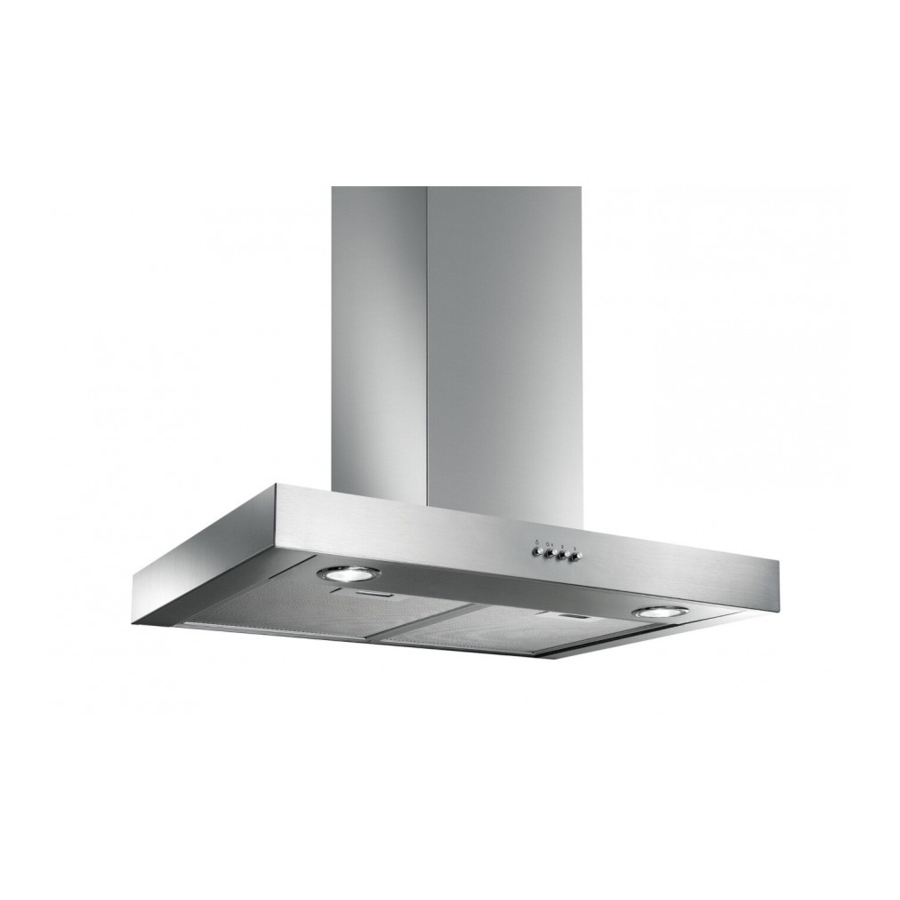
- Page 1 BOX602SS BOX902SS Hotte décorative Range hood Afzuigkap MANUEL D’UTILISATION OPERATING INSTRUCTIONS HANDLEIDING...
-
Page 2: Mises En Garde Importantes
MISES EN GARDE IMPORTANTES Cet appareil est destiné à un usage domestique uniquement. Toute utilisation autre que celle prévue pour cet appareil, ou pour une autre application que celle prévue, par exemple une application commerciale, est interdite Cet appareil peut être utilisé par des enfants âgés d'au moins 8 ans et par des personnes ayant des capacités physiques, sensorielles ou mentales réduites ou dénuées d’expérience ou de connaissance, s'ils (si elles) sont correctement surveillé(e)s ou si des instructions relatives à... -
Page 3: Instructions De Sécurité Générales
INSTRUCTIONS DE SÉCURITÉ GÉNÉRALES • Lisez attentivement cette notice et conservez-la en lieu sûr pour pouvoir vous y reporter ultérieurement. En cas de vente, de cession ou de déménagement, assurez-vous qu’elle reste avec le produit. • Le constructeur décline toute responsabilité en cas d’inconvénient, dommage ou incendie provoqué à l’appareil et dû... -
Page 4: Avant L'installation
DESCRIPTION La hotte peut être utilisée en version aspirante à évacuation extérieure, ou filtrante à recyclage intérieur. AVANT L’INSTALLATION Avant d’installer votre appareil, vérifiez qu’il est en parfait état. S’il est endommagé, ne poursuivez pas l’installation et contactez votre service après-vente. Assurez-vous également que les dimensions de la hotte et de son conduit sont compatibles avec votre cuisinière et hauteur de plafond. - Page 5 INSTALLATION Cet appareil doit impérativement être installé par 2 personnes. La hotte est équipée de chevilles de fixation convenant à la plupart des parois/plafonds. Il est cependant nécessaire de s’adresser à un technicien qualifié afin de s’assurer que le matériel est approprié au type de paroi/plafond.
- Page 6 2. Marquez sur le mur l’emplacement des 4 trous figurant sur le gabarit, puis percez-les en utilisant une mèche de 8mm de diamètre. Attention : le gabarit est prévu pour 2 dimensions de hottes différentes, veillez à vous aligner sur les dimensions de votre hotte.
- Page 7 4. Marquez et percez 2 autres trous centrés tout en haut du mur, afin d’y fixer ensuite le conduit d’évacuation. Vissez alors la patte de fixation. 5. Selon le type d’évacuation existant dans votre logement, montez la cheminée. Évacuation murale Évacuation au plafond...
- Page 8 Pour utiliser la hotte en mode recyclage, fixez le conduit de recyclage sur la patte en haut du mur à l’aide des 2 vis fournies (diamètre 2,9mm, profondeur 6,5mm). 6. Positionnez la hotte sur les 2 vis du haut. Ouvrez la trappe des filtres à graisse afin d’accéder aux fixations des 2 vis situées à...
- Page 9 7. Assurez-vous que la hotte est d’aplomb à l’aide d’un niveau, puis serrez les vis. 8. Détachez le boîtier d’alimentation situé à l’avant de la hotte, et relevez-le puis fixez-le avec les 2 vis déjà en position sur le dessus de la hotte. Serrez les vis.
- Page 10 9. Installez une gaine (non fournie) de la bonne dimension. 10. Étirez puis fixez la gaine au conduit de recyclage, ou reliez-la à l’évacuation extérieure. Dans le cas d’une évacuation extérieure, vous pouvez placer la valve anti-retour avant de positionner la gaine : cela évitera les retours d’air.
-
Page 11: Branchement Électrique
Montage Accrochez le filtre à charbon actif d’abord à l’arrière de la languette métallique de la hotte, puis à l’avant avec les deux pommeaux. Démontage Enlevez le filtre à charbon actif en tournant de 90° les pommeaux qui le fixent à la hotte. Branchement électrique Pour votre sécurité, demandez à... - Page 12 UTILISATION Évacuation extérieure Les vapeurs sont évacuées vers l'extérieur à travers un conduit d'évacuation fixé à la bride de raccord qui se trouve au-dessus de la hotte. Attention ! La gaine d’évacuation et le collier de fixation ne sont pas fournis et doivent être achetés à part.
-
Page 13: Conseils D'économie D'énergie
Fonctionnement La hotte est équipée d’un panneau de contrôle doté d’une commande de vitesse d’aspiration et d’une commande d’éclairage du plan de cuisson. Utilisez la puissance d’aspiration maximum en cas de concentration très importante des vapeurs de cuisson. a. Interrupteur lumières ON/OFF. b. -
Page 14: Nettoyage Et Entretien
NETTOYAGE ET ENTRETIEN Attention ! Avant toute opération de nettoyage ou d’entretien, débranchez la hotte du circuit électrique en enlevant la prise ou en coupant l’interrupteur général de l’habitation. L’intérieur et l’extérieur de la hotte doivent être nettoyés régulièrement (environ une fois par mois). Pour cela, utilisez un chiffon humidifié... -
Page 15: Specifications
Dans l’éventualité où l’éclairage ne devait pas fonctionner, vérifier si les lampes ont été introduites et vissées correctement dans leur logement, avant de contacter le service après-vente. SPECIFICATIONS Voici la fiche produit de votre hotte, conformément au règlement Européen No 65/2014. Marque Proline Référence BOX602SS, BOX902SS Consommation d’énergie annuelle (AEC kWh/an 122.4 hotte Classe d’efficacité... - Page 16 Hotline Darty Quels que soient votre panne et le lieu d'achat de votre produit en France, avant de vous déplacer en magasin Darty, appelez le 0 978 970 970 7j/7 , 24h/24. Hotline New Vandenborre Le service après-vente est joignable du lundi au samedi au +32 2 334 00 00 & +32 2 334 00 Darty France 129, avenue Galliéni 93140 BONDY...
- Page 17 WARNINGS This appliance is intended for domestic household use only and should not be used for any other purpose or in any other application, such as for non‐domestic use or in a commercial environment. This appliance can be used by children aged from 8 years and above and persons with reduced physical, sensory or mental capabilities or lack of experience and knowledge if they have been given supervision or instruction concerning use of the appliance in a safe way and understand the hazards involved.
-
Page 18: Important Safety Instructions
IMPORTANT SAFETY INSTRUCTIONS • Carefully read this instruction book and keep it in a safe place for future reference. In the case of sale, cession or move, make sure it is kept together with the product. • The manufacturer declines all responsibility, for any eventual inconveniences, damages or fires caused by not complying with the instructions in this manual. -
Page 19: Before Installation
The hood is designed to be used either for ducting or filter version. BEFORE INSTALLATION Before proceeding with the installation of your appliance, check that it is not damaged. Otherwise, do not proceed with the installation and contact your dealer. You should also make sure that the dimensions of the appliance and its conduit are compatible with your kitchen and ceiling height. -
Page 20: Detailed Installation Procedure
Detailed installation procedure 1. Take the dimensions of your cooker in order to have the range hood centred above it. Stick the installation and drilling pattern on the wall above your cooker, taking care to comply with the required minimum distance. Note: The minimum distance between the supporting surface for the cooking equipment on the hob and the lowest part of the range hood must be not less than 50cm from electric cookers and 65cm from gas or mixed cookers. - Page 21 3. In the holes that you just drilled, insert the 4 wall plugs (8mm diameter, 40mm depth) and the 4 screws (5mm diameter, 45mm depth), all supplied. 4. Mark the position of 2 other holes at the top centre of the wall for installation of the discharge conduit. Screw the bracket in place.
- Page 22 5. Depending on the type of discharge in your home, mount the chimney. Ceiling discharge Wall discharge To use the appliance in filter version, fit the discharge conduit to the bracket at the top of the wall with the supplied 2 screws (2.9mm diameter, 6.5mm depth).
- Page 23 6. Position the range hood on the 2 upper screws. Open the grease filter door to access the 2 screws inside the box, on each side. Remove the grease filters and position the 2 internal screws with the supplied washers. 7.
- Page 24 9. Install an exhaust pipe (not supplied) with correct dimension. 10. Stretch out the pipe and fit it to the filter conduit, or connect it to the external discharge point. In case of discharging air to the outside, you can add the non‐return valve before putting the pipe in place: this will help avoid backflow of air.
-
Page 25: Electrical Connection
Assembly Hook the charcoal filter at the back on the metal tongue of the hood first, then on the front with the two knobs. Disassembly Remove the charcoal filter by turning the knobs fixing it to the hood by 90°. Electrical connection For your safety, ask a qualified technician to perform the electrical installation of the hood. -
Page 26: Filter Version
In the horizontal runs the exhausting pipe must be slightly slanted (about 10°) and directed upwards to vent the air easily from the room to the outside. Beware! If the hood is supplied with active charcoal filter, then it must be removed. Connect the hood and discharge holes on the walls with a diameter equivalent to the exhaust pipe (flange and ring). -
Page 27: Cleaning And Maintenance
CLEANING AND MAINTENANCE Beware! Before performing any cleaning or maintenance operation, isolate the hood from the electrical supply by switching off at the connector and removing the connector fuse. Or if the appliance has been connected through a plug and socket, then the plug must be removed from the socket. The cooker hood should be cleaned regularly internally and externally (about once a month). - Page 28 If the lights do not work, make sure that the lamps are fitted properly into their housings before you call for technical assistance. SPECIFICATIONS Below is the sheet of range hood according to EU regulation No 65/2014. Brand Proline Model number BOX602SS, BOX902SS Annual energy consumption (AEC kWh/year 122.4 hood Energy efficiency class *...
- Page 29 WAARSCHUWINGEN Dit apparaat is alleen bestemd voor huishoudelijk gebruik en mag niet voor andere doeleinden of toepassingen worden gebruikt, zoals niet- huishoudelijk gebruik of in een commerciële omgeving. Dit apparaat mag worden gebruikt door kinderen vanaf 8 jaar oud en personen met beperkte fysische, visuele of mentale mogelijkheden, of die gebrek aan ervaring en kennis hebben, indien ze onder toezicht staan of gepaste instructies hebben gekregen zodat ze het apparaat op een veilige...
-
Page 30: Belangrijke Veiligheidsinstructies
BELANGRIJKE VEILIGHEIDSINSTRUCTIES • Lees deze gebruiksaanwijzing zorgvuldig door en bewaar deze op in een veilige plaats voor latere raadpleging. Bij verkoop, overdracht of een verhuis, zorg dat de gebruiksaanwijzing zich altijd bij het product bevindt. • De fabrikant is niet verantwoordelijk voor eventuele problemen, schade of brand in geval de instructies in deze handleiding niet worden nageleefd. - Page 31 De afzuigkap is ontworpen om zowel voor de leiding- als de filterversie te worden gebruikt. VOOR INSTALLATIE Controleer of uw apparaat niet beschadigd is voordat u met de installatie begint. Als schade wordt waargenomen, voer de installatie niet uit en neem contact op met uw handelaar. Controleer tevens of de afmetingen van het apparaat en de bijhorende afvoerleiding overeenstemmen met uw keuken en de hoogte van het plafond.
- Page 32 INSTALLATIE Dit apparaat moet door 2 personen geïnstalleerd worden. Muurpluggen zijn meegeleverd om de afzuigkap aan de meeste soorten muren/plafonds te bevestigen. Een vakbekwame technicus moet echter controleren of de materialen geschikt zijn voor de muur/plafond waarop u de afzuigkap wilt installeren. De muur/wand moet stevig genoeg zijn om het gewicht van de afzuigkap te kunnen dragen.
- Page 33 2. Markeer op de muur de positie van de 4 gaten die op de sjabloon zijn aangegeven en boor de gaten met behulp van een boorbit van 8 mm diameter. Opgelet: De sjabloon is opgesteld voor de afmetingen van 2 verschillende afzuigkappen; zorg dat u de afmetingen van uw apparaat volgt.
- Page 34 4. Markeer de positie van de 2 andere gaten in het midden aan de bovenkant van de muur om de afvoerleiding te installeren. Schroef de beugel op zijn plaats vast. 5. Afhankelijk van het soort afvoer in uw woning, monteer het rookkanaal. Afvoer via de muur Afvoer via het plafond...
- Page 35 Om het apparaat in de filterversie te gebruiken, bevestig de afvoerleiding aan de beugel aan de bovenkant van de muur met de 2 meegeleverde schroeven (2,9 mm diameter, 6,5 mm diep).
- Page 36 6. Positioneer de afzuigkap op de 2 bovenste schroeven. Open het luikje van de vetfilter aan weerskanten om bij de 2 schroeven in de behuizing te komen. Verwijder de vetfilters en plaats de 2 interne schroeven met de meegeleverde sluitringen op hun juiste positie. 7.
- Page 38 9. Installeer een uitlaatpijp (niet meegeleverd) met de juiste afmetingen. 10. Trek de pijp uit en bevestig deze aan de filterleiding of verbind de pijp met het externe afvoerpunt. In geval de lucht naar buiten wordt afgevoerd, kunt u een terugslagklep toevoegen voordat u de pijp op zijn plaats aanbrengt: dit voorkomt het terugstromen van lucht.
-
Page 39: Elektrische Aansluiting
11. Als u koolstoffilters wilt installeren (niet meegeleverd) om het apparaat in de filtermodus te gebruiken, volg onderstaande instructies. Na het installeren van de koolstoffilters, breng de vetfilters opnieuw op de juiste plaats aan. Plaatsen Haak de koolstoffilter eerst vast aan de achterkant van het metalen lipje van de afzuigkap en vervolgens aan de voorkant met de twee knoppen. - Page 40 UW APPARAAT GEBRUIKEN Leidingversie In dit geval worden de dampen buiten het gebouw geleid door middel van een speciale pijp die verbonden is met de flens aan de bovenkant van de afzuigkap. Opgelet! De uitlaatpijp en de ring zijn niet meegeleverd en moeten afzonderlijk worden gekocht. De diameter van de uitlaatpijp moet met de diameter van de flens overeenstemmen.
-
Page 41: Tips Om Energie Te Besparen
Werking De afzuigkap is voorzien van een bedieningspaneel met regelknoppen voor de aanzuigsnelheid en een lichtknop om de lampen in of uit te schakelen. Gebruik de hoge aanzuigsnelheid in geval er een hoge concentratie aan damp in de keuken aanwezig is. a. -
Page 42: Reiniging En Onderhoud
REINIGING EN ONDERHOUD Opgelet! Voordat u de afzuigkap reinigt of onderhoudt, haal de afzuigkap van de stroom af door de aansluiting te ontkoppelen en de zekering te verwijderen. Of als het apparaat via een stekker op de voeding is aangesloten, haal de stekker uit het stopcontact. Maak de binnen- en buitenkant van de afzuigkap regelmatig schoon (circa eenmaal per maand). - Page 43 NIET-wasbare actieve koolstoffilter De verzadiging van de koolstoffilter treedt na enige tijd op, afhankelijk van het soort bereidingen en hoe vaak u de vetfilters reinigt. De filter moet echter minstens om de vier maanden vervangen worden. De koolstoffilter mag NIET gewassen of hersteld worden. De lampen vervangen Ontkoppel het apparaat van de voeding.
- Page 44 SPECIFICATIES Hieronder vindt u de technische fiche van de afzuigkap die in overeenstemming is met EU- verordeningsnr. 65/2014 Merk Proline Modelnummer BOX602SS, BOX902SS Jaarlijks energieverbruik (AEC 122,4 kWh/jaar afzuigkap Energie-efficiëntieklasse * Hydrodynamische efficiëntie (FDE 16,6 % afzuigkap Hydrodynamische efficiëntieklasse * Lichtefficiëntie (LE...
- Page 45 Hulplijn Nederland Hiervoor kunt u contact opnemen met het BCC Service Center: 0900 0555 (12 cent p/m) geopend van maandag t/m vrijdag van 8.30 tot 18.00 uur. Hulplijn New Vandenborre Die dienst na verkoop is bereikbaar van maandag t/m zaterdag aan hulplijn 02 334 00 00.
Need help?
Do you have a question about the BOX602SS and is the answer not in the manual?
Questions and answers