Advertisement
Item #1005 832 077
Model #11252AIWNCN
USE AND CARE GUIDE
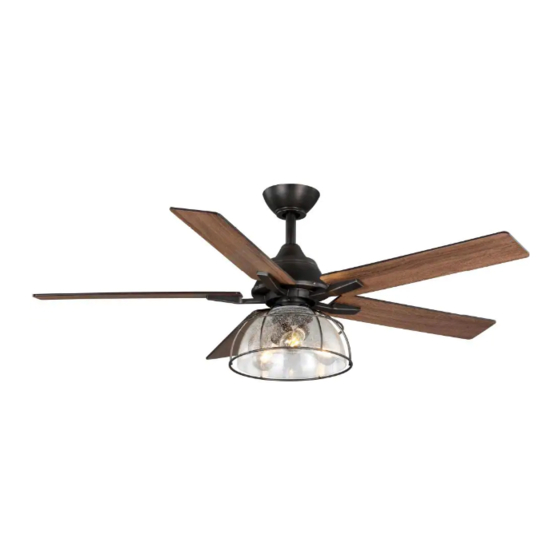
CASUN 52 INCH CEILING FAN
Questions, problems, missing parts? Before returning to the store,
call Home Decorators Collection Customer Service
8 a.m. - 7 p.m., EST, Monday-Friday, 9 a.m. - 6 p.m., EST, Saturday.
1-844-400-FANS (3267)
HOMEDEPOT.COM/HOMEDECORATORS
THANK YOU
Advertisement
Table of Contents

Related Manuals for Home Decorators Collection CASUN 11252AIWNCN


Summary of Contents for Home Decorators Collection CASUN 11252AIWNCN
- Page 1 USE AND CARE GUIDE CASUN 52 INCH CEILING FAN Questions, problems, missing parts? Before returning to the store, call Home Decorators Collection Customer Service 8 a.m. - 7 p.m., EST, Monday-Friday, 9 a.m. - 6 p.m., EST, Saturday. 1-844-400-FANS (3267) HOMEDEPOT.COM/HOMEDECORATORS...
-
Page 2: Table Of Contents
Table of Contents Assembly ............... 7 Table of Contents ............2 Safety Information ............2 Operation ..............Warranty .................3 Care and Cleaning ............Pre-installation .............. 3 Troubleshooting ............Installation ..............FCC Statement ............Safety Information READ AND SAVE THESE INSTRUCTIONS WARNING: To reduce the risk of electrical shock or fire, do not use this fan with any solid-state fan speed con- To reduce the risk of electric shock, ensure electricity has trol device. -
Page 3: Warranty
Warranty We warrant the fan motor to be free from defects in workmanship and material present at time of shipment from the factory for a period of lifetime after the date of purchase by the original purchaser. We also warrant the light kit, to be free from defects in workmanship and material present at time of shipment from the factory for a period of five years after the date of purchase by the original purchaser, excluding any glass or acrylic components and wooden blades, to be free from defects in workmanship and material at the time of ship- ment from the factory for a period of two years after the date of purchase by the original purchaser. - Page 4 Pre-Installation (continued) HARDWARE INCLUDED NOTE: Hardware shown to actual size Part Description Quantity Blade holder screw (preassembled) Blade screw Fiber washer Light kit screw (preassembled) Wire nuts Cross pin (not to scale) (preassembled) Hitch pin (preassembled) Lock pin (not to scale) (preassembled) Hanger ball set screw (preassembled) Fan motor assembly coupling set screw (preassembled) Mounting bracket screw (preassembled)
- Page 5 Pre-Installation (continued) PACKAGE CONTENTS Part Description Quantity Part Description Quantity Blade Fan motor assembly Blade holder LED bulb Mounting bracket Remote control Canopy Remote control holder Canopy cover 12V Battery Hanger ball (preassembled) Metal cage Downrod (preassembled) Glass shade Coupling cover Light kit HOMEDEPOT.COM/HOMEDECORATORS Please contact 1-844-400-FANS (3267) for further assistance.
-
Page 6: Installation
Installation MOUNTING OPTIONS WARNING: To reduce the risk of fire, electric shock, or personal injury, mount the fan to an outlet box marked acceptable for fan support. An outlet box commonly used for the support of lighting fixtures may not be acceptable for fan support and may need to be replaced. -
Page 7: Assembly
Assembly — Hanging the Fan Attaching the downrod to the Attaching the mounting bracket to fan motor assembly the electrical box □ Loosen the two fan motor assembly coupling set screws WARNING: To reduce the risk of fire, electric shock, or (JJ) from the fan motor assembly (J) coupling. - Page 8 Assembly — Hanging the Fan (continued) Attaching the coupling cover, and Hanging the fan motor assembly canopy to the downrod from the mounting bracket □ Slip the coupling cover (H), canopy cover (E) and □ Lift the fan motor assembly (J) into position, and place canopy (D) onto the downrod (G).
- Page 9 Assembly — Hanging the Fan (continued) Making the electrical connections WARNING: To avoid possible electrical shock, ensure the electricity is turned off at the circuit breaker or main fuse box before wiring. Black White Green WARNING: Check to see that all connections are tight, including the ground, and that no bare wire is visible at the wire nuts, except for the ground wire.
- Page 10 Assembly — Hanging the Fan (continued) Securing the fan motor assembly to the mounting bracket □ Remove two mounting bracket screws (KK) from the mounting bracket (C). □ Attach the canopy (D) to the mounting bracket (C) by using the two mounting bracket screws (KK) previously removed.
- Page 11 Assembly — Attaching the Fan Blade Fastening the blade assemblies to the fan motor assembly Attach the fan blades (A) to the blade holders (B) by □ using three blade screws (BB) and fiber washers (CC). Tighten screws (BB) and fiber washers (CC) securely. □...
- Page 12 Assembly — Installing the Light Kit Fastening the light kit assembly to the fan motor assembly Remove the preassembled light kit screw (DD) on the metal □ cage (O). Reverse the metal cage (O) then attach the glass shade (P) and light kit (Q). Tighten light kit screws (DD) securely. □...
-
Page 13: Operation
Operation REMOTE CONTROL OPERATING INSTRUCTIONS Install a 12V battery (N) into the remote control (L). Fasten the battery cover screw (MM) after installation. To prevent damage to the remote control, remove the battery if not used for long periods of time. Do not short-circuit, disassemble, heat up, WARNING: connect improperly, or dispose of used batteries in fire. - Page 14 Operation (continued) NOTE: On start up your ceiling fan will oscillate back and forth. This is NORMAL OPERATION for DC ceiling fan as it goes through its calibration cycle. The fan is NOT DEFECTIVE. 1. Fan button. - Press and release the button to turn the fan on or off.
-
Page 15: Care And Cleaning
Operation (continued) INSTALLING THE REMOTE CONTROL HOLDER □ Attach the remote control holder (M) with the two remote control holder mounting screws (LL). Care and Cleaning Do not □ Check the support connections, brackets, and blade □ Do not use water when cleaning. Water could damage the attachments twice a year. -
Page 16: Troubleshooting
Troubleshooting WARNING: Ensure the power is off at the electrical panel box before you attempt any repairs. Refer to the section “Making the Electrical Connections” on page 9. Problem Solution Check main and branch circuit fuses or breakers. □ Check line wire connections to the fan and switch wire connections in the switch housing. □... -
Page 17: Fcc Statement
FCC Statement This equipment has been tested and found to comply with the limits for a Class B digital device, pursuant to Part 15 of the FCC Rules. These limits are designed to provide reasonable protection against harmful interference in a residential installation. This equipment generates, uses, and can radiate radio frequency energy and, if not installed and used in accordance with the instructions, may cause harmful interference to radio communications. - Page 19 Questions, problems, missing parts? Before returning to the store, call Home Decorators Collection Customer Service 8 a.m. - 7 p.m., EST, Monday-Friday, 9 a.m. - 6 p.m., EST, Saturday 1-844-400-FANS (3267) HOMEDEPOT.COM/HOMEDECORATORS Retain this manual for future use.
Need help?
Do you have a question about the CASUN 11252AIWNCN and is the answer not in the manual?
Questions and answers
My new box did not have a remote control in the package. How do I get it sent to me? I have attached the receipt for the purchase.
You can contact Home Decorators Collection Customer Service at 1-844-400-3267 for assistance with obtaining a remote control for the CASUN 11252AIWNCN ceiling fan.
This answer is automatically generated