Table of Contents
Advertisement
Available languages
Available languages
Quick Links
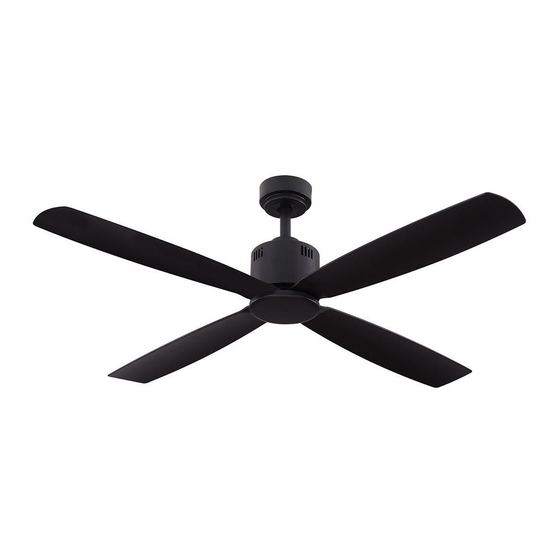
KITTERIDGE 52-INCH INDOOR CEILING FAN
to continually create quality products designed to enhance your home. Visit us online to see our full line of products available for your home
USE AND CARE GUIDE
Questions, problems, missing parts? Before returning to the store,
call Home Depot Customer Service
8 a.m. - 7 p.m., EST, Monday-Friday, 9 a.m. - 6 p.m., EST, Saturday
1-800-986-3460
HOMEDEPOT.COM/HOMEDECORATORS
improvement needs. Thank you for choosing Home Decorators Collection!
THANK YOU
Item #/ Model #: 34777-HBUG
Item #/ Model #: 34777-HBUW
Item #/ Model #: 34777-HBUM
Item #/ Model #: 34777-HBUB
(1004292203)
(1004292254)
(1004292201)
(1004292211)
Advertisement
Chapters
Table of Contents

Related Manuals for Home Decorators Collection 34777-HBUG


Summary of Contents for Home Decorators Collection 34777-HBUG
- Page 1 8 a.m. - 7 p.m., EST, Monday-Friday, 9 a.m. - 6 p.m., EST, Saturday 1-800-986-3460 HOMEDEPOT.COM/HOMEDECORATORS THANK YOU to continually create quality products designed to enhance your home. Visit us online to see our full line of products available for your home improvement needs. Thank you for choosing Home Decorators Collection!
-
Page 2: Table Of Contents
Table of Contents Table of Contents ..............2 Assembly ................7 Safety Information ............... 2 Operation ................15 Warranty ................3 Care and Cleaning ............. 15 Pre-Installation ..............3 Troubleshooting ..............16 Installation ................6 FCC Statement ..............17 Safety Information READ AND SAVE THESE INSTRUCTIONS. -
Page 3: Warranty
Warranty We warrant the fan motor to be free from defects in workmanship and material present at time of shipment from the factory for a period of lifetime after the date of purchase by the original purchaser. We also warrant that all other fan parts, excluding any glass or acrylic blades, to be free from defects in workmanship and material at the time of shipment from the factory for a period of one year after the date of purchase by the original purchaser. - Page 4 Pre-Installation (continued) HARDWARE INCLUDED NOTE: Hardware not shown to actual size. Description Part Quantity Canopy screw (not to scale) (preassembled) Blade screw (not to scale) Fiber washer (not to scale) Wire nuts (not to scale) Hitch pin (not to scale) (preassembled) Lock pin (not to scale) (preassembled) Set screw (not to scale) (preassembled) Wall control mounting screw (not to scale)
- Page 5 Pre-Installation (continued) PACKAGE CONTENTS Part Quantity Part Quantity Description Description Blade Coupling cover Mounting bracket Fan motor assembly Canopy Bottom cover Hanger ball (preassembled) Wall control Downrod (preassembled) HOMEDEPOT.COM/HOMEDECORATORS Please contact 1-800-986-3460 for further assistance.
-
Page 6: Installation
Installation MOUNTING OPTIONS WARNING: To reduce the risk of fire, electric shock, or NOTE: You may need a longer downrod to maintain proper blade clearance when installing on a steep, sloped personal injury, mount to outlet box marked “acceptable for fan support of 35 lbs. (15.9 Kg) or less” using the ceiling. -
Page 7: Assembly
Assembly - Standard Ceiling Mount Preparing for mounting Routing the wires □ Route the wires exiting the top of the fan motor WARNING: Make sure power is off before attempting assembly (G) into the coupling cover (F). installation. □ Make sure the slot openings are on top and route the □... - Page 8 Assembly - Standard Ceiling Mount (continued) Hanging the fan Attaching the fan to the electrical box WARNING: To reduce the risk of fire, electric shock □ Carefully lift the fan motor assembly (G) up to the mounting or personal injury, mount to outlet box marked bracket (B).
- Page 9 Assembly - Standard Ceiling Mount (continued) Making the electrical connections To avoid possible electrical shock, ensure WARNING: the electricity is turned off at the circuit breaker or main fuse box before wiring. Check to see that all connections are tight, WARNING: including the ground, and that no bare wire is visible at the wire nuts, except for the ground wire.
- Page 10 Assembly - Standard Ceiling Mount (continued) Attaching the fan blades Mounting the fan □ Attach the fan blades (A) to the fan motor assembly (G) WARNING: When using the standard ball/downrod mounting, the by using the blade screws (BB) and fiber washers (CC). tab in the ring at the bottom of the mounting bracket must rest in the groove of the hanger ball.
- Page 11 Assembly - Flushmount Preparing for mounting Routing the wires □ Loosen three mounting screws (II) in the coupler located WARNING: Make sure power is off before attempting on the top center of the motor housing until the inside installation. channel is clear. □...
- Page 12 Assembly - Flushmount (continued) Hanging the fan Attaching the fan to the electrical box WARNING: To reduce the risk of fire, electric shock WARNING: The hook as shown is only to balance the or personal injury, mount to outlet box marked fan while attaching wiring.
- Page 13 Assembly - Flushmount (continued) Making the electrical connections To avoid possible electrical shock, ensure WARNING: the electricity is turned off at the circuit breaker or main fuse box before wiring. Check to see that all connections are tight, WARNING: including the ground, and that no bare wire is visible at the wire nuts, except for the ground wire.
- Page 14 Assembly - Flushmount (continued) Attaching the fan blades Mounting the fan □ Attach the fan blades (A) to the fan motor assembly (G) WARNING: The locking slots of the celling canopy are provided only as an aid to mounting. Do not leave the fan assembly unattended by using the blade screws (BB) and fiber washers (CC).
-
Page 15: Operation
Operation WALL CONTROL INSTALLATION BLACK AC IN L LIVE 120V WHITE POWER Before you begin, TURN OFF THE ELECTRICITY at the main NEUTRAL TO MOTOR L SUPPLY circuit panel or fuse box. If you feel unsure of this procedure, GROUND have a qualified electrician install this unit. -
Page 16: Care And Cleaning
Care and Cleaning WARNING: Make sure the power is off before cleaning your fan. □ Because of the fan’s natural movement, some connections may become loose. Check the support connections, brackets, and blade attachments twice a year. Make sure they are secure. It is not necessary to remove the fan from the ceiling. □... -
Page 17: Fcc Statement
(2) this device must accept any interference received, including interference that may cause undesired operation. The following responsible party designated in FCC §2.909 is responsible for this declaration: Model Number: 34777-HBUG, 34777-HBUW, 34777-HBUM, 34777-HBUB Company Name: Eurofase Inc Company Address: 60 Industrial Parkway, Unit 802, Cheektowaga, NY... - Page 18 Questions, problems, missing parts? Before returning to the store, call Home Depot Customer Service 8 a.m. - 7 p.m., EST, Monday-Friday, 9 a.m. - 6 p.m., EST, Saturday 1-800-986-3460 HOMEDEPOT.COM/HOMEDECORATORS Retain this manual for future use.
- Page 19 Apreciamos la plena confianza que has depositado en la colección Home Decorators al comprar este ventilar de techo. Nos esforzamos en crear continuamente productos de calidad diseñados para mejorar tu hogar. Visítanos por Internet para ver nuestra línea completa de productos disponibles a fin de satisfacer la necesidades de mejoras de tu hogar. ¡Gracias por elegir Home Decorators Collection!
- Page 20 Tabla de contenido Tabla de contenido..............2 Ensamblaje ................7 Información de seguridad ............. 2 Funcionamiento ..............15 Garantía ................3 Mantenimiento y limpieza ............ 16 Solución de problemas............16 Preinstalación................ 3 Instalación ................6 Declaración de FCC............... 17 Información de seguridad LEE Y GUARDA ESTAS INSTRUCCIONES.
-
Page 21: Garantía
Garantía Garantizamos de por vida, a partir de la fecha de adquisición por el comprador original, que el motor del ventilador no presenta defectos de fabricación ni de materiales al momento del envío desde la fábrica. También garantizamos por un año, a partir de la fecha de adquisición por el comprador original, que las demás piezas del ventilador, sin incluir aspas de vidrio o acrílico, no presentan ningún defecto de fabricación ni de material al momento de la salida de la fábrica. - Page 22 Preinstalación (continuación) SE INCLUYEN HERRAJES NOTA: Los herrajes no se muestran en tamaño real. Parte o pieza Descripción Cantidad Tornillo de la cubierta (no se muestra a escala - preensamblado) Tornillo del aspa (no se muestra a escala) Arandela de fibra (no se muestra a escala) Tuercas para cable (no se muestran a escala) Pasador de enganche (no se muestra a escala - preensamblado) Pasador de seguridad (no se muestra a escala - preensamblado)
- Page 23 Preinstalación (continuación) CONTENIDO DEL PAQUETE Parte o pieza Descripción Cantidad Parte o pieza Descripción Cantidad Cubierta del acoplamiento Aspa Soporte de montaje Ensamblaje del motor del ventilador Cubierta inferior Cubierta Esfera de soporte (preensamblada) Control de pared Tubo bajante (preensamblado) HOMEDEPOT.COM/HOMEDECORATORS Favor de comunicarse con el 1-800-986 3460 para asistencia adicional.
-
Page 24: Instalación
Instalación OPCIONES DE MONTAJE ADVERTENCIA: Para reducir el riesgo de incendio, NOTA: Tal vez necesites un tubo bajante más largo descarga eléctrica o lesiones, montar sólo en una caja para mantener la altura mínima adecuada de las aspas, al instalar el ventilador en un techo eléctrica clasificada como “apropiada para sostener inclinado. - Page 25 Ensamblaje - Montaje Estándar en Techo Preparación para el montaje Disposición de los cables □ Pasa los cables que salen por la parte superior del CUIDADO: Asegúrate de que la electricidad está conjunto motor-ventilador (G) a través de la cubierta del cortada antes de proceder a la instalación.
-
Page 26: Ensamblaje
Ensamblaje - Montaje estándar en techo (continuación) Cómo colgar el ventilador Instalar el ventilador en la caja eléctrica ADVERTENCIA: Para reducir el riesgo de incendio, □ Con cuidado levanta el conjunto motor-ventilador (G) hasta el descarga eléctrica o lesiones, montar sólo en una caja soporte de montaje (B). - Page 27 Ensamblaje - Montaje estándar en techo (continuación) Cómo hacer las conexiones eléctricas ADVERTENCIA: Para evitar posible descarga eléctrica, asegura que no circule electricidad en el cortacircuitos ni en la caja principal de fusibles antes de cablear. ADVERTENCIA: Verifica que todas las conexiones estén bien ajustadas, incluida la conexión a tierra, y que no haya ningún cable pelado visible en las tuercas para cable (excepto el cable a tierra).
- Page 28 Ensamblaje - Montaje estándar en techo (continuación) Cómo montar el ventilador Cómo montar las aspas del ventilador CUIDADO: Cuando uses el montaje de tubo bajante- □ Fija cada aspa de ventilador (A) al conjunto motor- esfera estándar, la pestaña en el aro en la parte inferior ventilador (G) usando los tornillos correspondientes (BB) y del soporte de montaje tiene que encajar en la ranura de las arandelas de fibra (CC).
- Page 29 Ensamblaje - A ras Preparación para el montaje Disposición de los cables □ Afloja los tres tornillos de montaje en el acoplador ubicado CUIDADO: Asegúrate de que la electricidad está en el centro de la carcasa del motor hasta despejar el cortada antes de proceder a la instalación.
- Page 30 Ensamblaje - A ras (continuación) Cómo colgar el ventilador Instalar el ventilador en la caja eléctrica CUIDADO: El gancho, tal y como se muestra, es solo CUIDADO: Para reducir el riesgo de incendio, descarga eléctrica o lesiones, montar sólo en una caja eléctrica para sostener el ventilador mientras se conectan los cables.
- Page 31 Ensamblaje - A ras (continuación) Cómo hacer las conexiones eléctricas ADVERTENCIA: Para evitar posible descarga eléctrica, asegura que no circule electricidad en el cortacircuitos ni en la caja principal de fusibles antes de cablear. ADVERTENCIA: Verifica que todas las conexiones estén bien ajustadas, incluida la conexión a tierra, y que no haya ningún cable pelado visible en las tuercas para cable (excepto el cable a tierra).
- Page 32 Ensamblaje - A ras (continuación) Cómo montar el ventilador Cómo montar las aspas del ventilador □ Fija cada aspa de ventilador (A) al conjunto motor- CUIDADO: Las ranuras de cierre de la cubierta del techo ventilador (G) usando los tornillos correspondientes sólo sirven de ayuda durante el montaje.
-
Page 33: Funcionamiento
Funcionamiento INSTALACIÓN DEL CONTROL DE PARED Negro AC IN L activo FUENTE DE Antes de comenzar la instalación, CORTA LA FOR LIGHT ALIMENTACIÓN Blanco ELECTRICIDAD en el panel del circuito principal o DE 120 V neutral TO MOTOR L en la caja de fusible. De no sentirte seguro con Tierra este procedimiento, recurre a un electricista Negro... -
Page 34: Mantenimiento Y Limpieza
Mantenimiento y limpieza CUIDADO: Asegúrate de que la electricidad esté apagada antes de limpiar el ventilador. □ Debido al movimiento natural del ventilador, algunas conexiones pueden aflojarse. Revisa dos veces al año las conexiones de soporte, los soportes y los accesorios de las aspas. Comprueba que estén seguros. No es necesario desmontar el ventilador del cielo raso. □... -
Page 35: Declaración De Fcc
La siguiente parte responsable designada en la norma FCC §2.909 responde por esta declaración: Modelo # 34777-HBUG, 34777-HBUW, 34777-HBUM, 34777-HBUB Nombre de la Compañía: Eurofase Inc Domicilio social de la compañía: 60 Industrial Parkway, Unit 802, Cheektowaga, NY Nombre completo: Kent Yin Título: Gerente de desarrollo del producto... - Page 36 ¿Preguntas, problemas, partes o piezas faltantes? Antes de devolver a la tienda, llamar al servicio al cliente de Home Decorators Collection de lunes a viernes, entre 8:00 a.m. y 7:00 p.m. (hora del Este), y los sábados de 9:00 a.m. a 6:00 p.m. (hora del Este).
Need help?
Do you have a question about the 34777-HBUG and is the answer not in the manual?
Questions and answers