
Summary of Contents for RayTek ThermoView Pi20
- Page 1 ThermoView Pi20 Fixed Thermal Imager Operating Instructions Rev. B 09/2011 55301...
- Page 2 This device is controlled by export laws and regulations. When re- exporting this product from your country, an export license provided by your country's government may be required!
- Page 3 Thank you for purchasing this Raytek product. Register today at www.raytek.com/register to receive the latest updates, enhancements and software upgrades! © Raytek Corporation. Raytek, DataTemp and the Raytek Logo are registered trademarks of Raytek Corporation. All rights reserved. Specifications subject to change without notice.
- Page 4 This warranty extends only to the original purchaser (a purchase from Raytek or a licensed distributor of Raytek is an original purchase). This warranty shall not apply to fuses, batteries, or any product which has been subject to misuse, neglect, accident, or abnormal conditions of operation.
-
Page 5: Table Of Contents
ABLE OF ONTENTS 1 SAFETY INSTRUCTIONS ..........................7 2 DESCRIPTION ..............................8 2.1 S ..........................9 YSTEM RCHITECTURE 3 TECHNICAL DATA ............................10 3.1 M ....................... 10 EASUREMENT PECIFICATIONS 3.2 O .......................... 11 PTICAL PECIFICATIONS 3.3 E ........................13 LECTRICAL PECIFICATIONS 3.4 G ......................... - Page 6 7.7 D ..................42 IGITAL NALOG UTPUT ODULE 7.7.1 Changing the Output Type ........................ 44 7.8 E ............................. 45 THERNET WITCH 7.9 F / RJ45 E ..................... 46 IBER PTIC THERNET ONVERTER 7.10 J ............................47 UNCTION 7.11 D ........................48 OFTWARE 8 MAINTENANCE ............................
-
Page 7: Safety Instructions
Safety Instructions This document contains important information, which should be kept at all times with the instrument during its operational life. Other users of this instrument should be given these instructions with the instrument. Updates to this information must be added to the original document. The instrument can only be operated by trained personnel in accordance with these instructions and local safety regulations. -
Page 8: Description
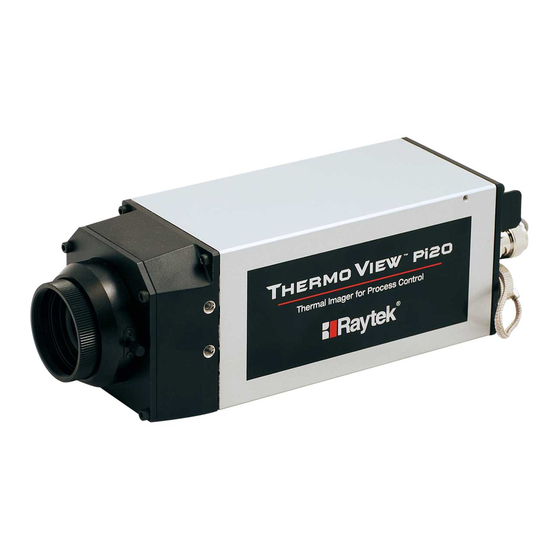
For long Ethernet cable runs beyond 90 m (295 ft), additional fiber optic Ethernet accessories are available. The ThermoView Pi20 process imager is a noncontact and highly sensitive infrared thermal camera. The infrared radiation emitted from measured objects is detected and converted to an electrical signal by a two-dimensional uncooled focal plane array detector. -
Page 9: System Architecture
Description Power Switch Ethernet Communication Video Output Power Input RS232 Interface Alarm Output Earth Ground (not supported) Figure 2: Rear View 2.1 System Architecture Windows Computer DTPi Software Ethernet Communication Ethernet Switch (XXXPi20SWH1) optional Fiber Optic Digital I/O Module Digital/Analog I/O Module Pi20 Camera Pi20 Camera (XXXPi206060) -
Page 10: Technical Data
Technical Data 3.1 Measurement Specifications Measuring Temperature Pi20LT, range 1 -40 to 120°C (-40 to 248°F) Pi20LT, range 2 0 to 500°C (32 to 932°F) Pi20HT 200 to 2000°C (392 to 3632°F) Minimum Detectable Temperature Difference (NETD) Pi20LT, range 1 0.08°C at 30°C measuring temperature Pi20LT, range 2 0.3°C at 30°C measuring temperature... -
Page 11: Optical Specifications
Technical Data 3.2 Optical Specifications The following optical specification is based on the theoretical calculated spot size derived on the pitch of the camera detector array and the lens focal length. Typically, for accurate temperature measurements, the target area needs to be 2 to 3 times larger than that determined by the calculated theoretical spot sizes, which corresponds to 7 x 7 pixels. - Page 12 Technical Data 45° Lens (RC) Field of View (FOV) 45.2° x 33.7° (horizontal x vertical) Instant. Field of View (IFOV) 2.46 mrad Distance to Spot Size Ratio (D:S) 406:1 Focus Range 30 cm to ∞ (12 in to ∞) Measuring distance Thermal image (H x V) Minimum detectable spot size (H x V) 0.3 m...
-
Page 13: Electrical Specifications
Technical Data 3.3 Electrical Specifications Primary Interface Ethernet (default IP address: 192.168.200.254) Optional Interface RS232 (special accessory cable is required) Video Output NTSC, composite video (BNC connector) LED (green) lights at power supply ON. Power Supply + 11 to 13 VDC (12 VDC nominal) Power Consumption 8 W (typ), 13 W (max) 3.4 General Specifications... -
Page 14: Dimensions
Technical Data 3.5 Dimensions M2.5 screw, 4 mm (0.16 in) depth (same on other side) 2 x M4 screw, 5 mm (0.2 in) depth (same on other side) 3 x M4 screw, 5 mm (0.2 in) depth Figure 4: Camera with Manual Focus (…MA, …MB) M2.5 screw, 4 mm (0.16 in) depth (same on other side) 2 x M4 screw, 5 mm (0.2 in) depth (same on other side) 3 x M4 screw, 5 mm (0.2 in) depth... -
Page 15: Scope Of Delivery
Technical Data 3.6 Scope of Delivery The delivery package includes the following: Pi20 ThermoView process imager Straight Ethernet cable, 7.5 m (25 ft) long Power supply cable, 7.5 m (25 ft) long Ethernet Crossover Adapter for direct connection to older PC’s Industrial DIN rail mounted power supply (XXXPi20PS1) ThermoView Start-up Software Application (TSA) Operations manual on CD... -
Page 16: Basics
Basics 4.1 Measurement of Infrared Temperatures Every object emits an amount of infrared radiation (IR) according to its surface temperature. The intensity of the infrared radiation changes with the temperature of the object. Depending on the material and surface properties, the emitted radiation lies in a wavelength spectrum of approximately 1 to 20 µm. -
Page 17: Installation
Installation 5.1 Ambient Temperatures Without water cooling, the camera is designed for ambient operating temperatures between -15 to 50°C (5 to 122°F). With water cooling equipment, it can be used in environments at higher temperatures. For more details, see section 7.4 Cooling Enclosure, page 30. -
Page 18: Geometry
Installation 5.4 Geometry The camera provides different lens models (factory installed) to accommodate a wide range of applications. Each individual lens provides different thermal images (Field of View) and minimum detectable spot sizes (Instantaneous Field of View). The optical diagram below shows the principal graphical representation for measuring distance over the field of view. -
Page 19: Focusing
Installation Figure 7: Field of View Calculator 5.5 Focusing After the camera has been mounted, it is important to make sure that the optimum focus has been established for the given mounting distance. It is important to focus the camera correctly to obtain the sharpest image of the target you wish to view. -
Page 20: Mounting
Installation 5.6 Mounting The camera installation requires the most planning effort. The camera needs to be accurately mounted in relationship to the product (target). Adjustments to align the camera with the target may have to be designed into the camera mounting to provide the required alignment accuracy. Avoiding or removing physical mounting limitations and obstructions in the camera’s optical path, may also be required. -
Page 21: Cable Connections
Installation 5.7 Cable Connections Before connecting and disconnecting any connector, make sure that the power switch is off! To maintain EMI compliance to CE standards the attached Ferrite cores need to be placed on the Ethernet and power supply cables! You have to assemble the Ferrite cores after cables have been pulled through pipes, holes, etc. -
Page 22: Connecting The Rs232 Cable
Installation Pin Description Color +12 VDC Ground Black Figure 10: Power Connector Be very careful in wiring the pig tailed end of the power cable – making sure that the conductor colors on the cable match the correct terminals on the power supply! The cable shield must be connected to earth ground! The power supply is factory set to 12 VDC - do not adjust the power supply voltage in the field! -
Page 23: Ethernet Communication
Installation Figure 11: NTSC Video Output Example The video output is not used with TSA and DTPi software. 5.8 Ethernet Communication For connecting the camera to the PC, a dedicated Ethernet connection is required. Camera IP Address The factory default IP address for the camera is 192.168.200.254. The camera’s address is not free of choice: It has to be unique in the network, meaning that no other device in the network (including the PC network adapter) may run at the same IP address. - Page 24 Installation 2. Click on <Properties>: 3. Under <This connection uses the following items>, select <Internet Protocol (TCP/IP)> and click on <Properties>: 4. Activate the radio button <Use the following IP address> and make the following settings: IP address: 192.168.200.x where x is an address between 1 and 255 (except 254, which is already used by the camera by factory default) Subnet mask: 255.255.255.0...
-
Page 25: Changing The Ethernet Settings For The Camera
Installation 5. Close all dialog boxes by clicking <OK>. 5.8.2 Changing the Ethernet Settings for the Camera To change the IP address of the camera, you can use the TSA or the DTPi software. Pi20 Rev. B 09/2011... -
Page 26: Industrial Power Supply
Installation 5.9 Industrial Power Supply The DIN-rail mount industrial power supply delivers isolated dc power and provides short circuit and overload protection. The power supply is able to power a single camera, as well as Analog and Digital I/O Modules, and a media converter (if used). -
Page 27: Thermoview Start-Up Application
ThermoView Start-up Application The ThermoView Start-up Application software (TSA) is a simple and easy to use software program that interfaces to the Pi20 camera (all variations). The software is provided free-of-charge on CD, along with the operations manual. The intention of the software is to provide a basic imaging display of the camera to allow the user to validate that all camera functions are operating properly. -
Page 28: Accessories
Short Ethernet Cable to allow the I/O modules to easily be connected to switch inside Junction Box (XXXPi20ECS) Serial RS232 cable to re-configure IP address (XXXPi20SC) Raytek SDK (XXXPi20SDK) – software development kit for users who build up their own application for the camera DataTemp Pi Software (XXXPi20DTPi) 7.2 Spares... -
Page 29: Mounting Bracket
Accessories 7.3 Mounting Bracket The mounting bracket provides a ¼” – 20 holes for tripod mounting. Tripod Mounts Front End of Camera Base Mount Secures Camera Figure 14: Dimensions for the Mounting Bracket Pi20 Rev. B 09/2011... -
Page 30: Cooling Enclosure
Accessories 7.4 Cooling Enclosure When the camera is installed in dirty and hot environments, the enclosure provides water cooling and air purge for protection. 7.4.1 Technical Data Scope of delivery Enclosure with cooling jacket and Zinc Selenide window Air barrier flange 2x cable glands Environment Rating... -
Page 31: Cooling
Accessories 4x M6x1 Figure 15: Dimensions 7.4.2 Cooling By forcing water circulation, it is possible to maintain cooled internal housing temperatures. It helps to verify the flow capacity needed and cooling water temperature before proceeding with the installation. Before installation, it is also necessary to verify the environmental temperature and install the housing at the correct distance from the heating source. -
Page 32: Installation
Accessories 7.4.4 Installation Locate 2x M4 screws on camera. Place conduction plate onto camera as shown, making sure to line up holes on camera with hole and slot on conduction plate. Install 2x M4 screws and secure conduction plate onto camera. Place the housing internal rail onto conduction plate as shown on first slot, making sure to place rail with correct orientation by having rail... - Page 33 Accessories Secure ground cable to camera as shown (color of cable/ring terminals used for display only). Disassemble Ethernet cable connector loosening nut as shown. Remove cable from RJ45 jack by lifting tab, note wiring for reassembly. Pass Ethernet cable through cable gland on rear enclosure flange then reassemble connector.
- Page 34 Accessories Place conduction plate onto inside surface of enclosure and slide rail onto internal rail of enclosure then slide camera forward. Internal Rail Cables removed for clarity Secure ground to enclosure using 1x tooth washer, 1x flat washer, and rail screw from enclosure as shown.
-
Page 35: Outdoor Enclosure
Accessories 7.5 Outdoor Enclosure When the camera is mounted in outdoor environments, the enclosure ensures weatherproofed installations by providing a high protection rate, a sunshield, and thermostat control heater in cooler climates. 7.5.1 Technical Data Scope of delivery Enclosure with sunshield and Germanium window Double thermostat control heater Cable glands Environment... -
Page 36: Installation
Accessories Figure 17: Dimensions and Footprint 7.5.2 Installation Locate 2x M4 screws on camera. Place conduction plate onto camera as shown, making sure to line up holes on camera with hole and slot on the conduction plate. Install 2x M4 screws and secure conduction plate onto camera. - Page 37 Accessories Place housing internal rail onto conduction plate as shown. Secure conduction plate to rail by installing 2x Screws (truss), 4x curved washers (2x per screw), and 2x flat washers. Insert each screw half a turn past after making contact with curved washer and slide camera forward.
- Page 38 Accessories Pass Ethernet cable through enclosure cable gland as shown and reassemble connector. Inset power cable with isolated cable ends through cable gland on enclosure. Using power and Ethernet cables that have been passed through cable glands on rear of enclosure, install cables onto camera (turn on camera if needed).
- Page 39 Accessories Tighten rear cover 3x screws, then tighten 2x setscrews on outer slide as shown. Slide camera forward if needed and ensure that camera conduction plate makes contact with inside surface of enclosure in order to ensure adequate thermal conductivity. Sunshield Install front Germanium window cover by tightening 3x screws then install sunshield as...
-
Page 40: Digital Input / Relay Output Module
Accessories 7.6 Digital Input / Relay Output Module The module interfaces to DTPi software only. Type 6060 Digital Input Channels Dry contact low level: close to GND high level: open Relay Output Channels Contact rating (resistive) 120 V @ 0.5 A (AC) 30 V @ 1 A (DC) Type form A (normally open) - Page 41 Accessories Figure 18: Digital Input Wiring Figure 19: Relay Output Wiring Pi20 Rev. B 09/2011...
-
Page 42: Digital I/Oand Analog Output Module
Accessories 7.7 Digital I/O and Analog Output Module The module interfaces to DTPi software only. Type 6024 Analog Output Channels Output type 0/4 to 20 mA (for switching to a voltage signal, see section 7.7.1 Changing the Output Type, page 44. Digital Output Channels Output type... - Page 43 Accessories Figure 20: Analog Output Wiring Figure 21: Digital Output Wiring Pi20 Rev. B 09/2011...
-
Page 44: Changing The Output Type
Accessories Figure 22: Digital Input Wiring 7.7.1 Changing the Output Type The output type of the module 6024 is determined by the setting of internal jumpers on the analog board. The default jumper setting is <Current Signal>. To change the analog output to <Voltage Signal>, you have to open the module and set the jumpers J7-J8 for the analog output AO0 and J9-J10 for the analog output AO1, as illustrated in the figure below: Jumper Setting... -
Page 45: Ethernet Switch
Accessories 7.8 Ethernet Switch The Industrial 5 Port Gigabit Ethernet Switch allows input/output modules, camera and PC to be connected on a single network. Type EKI-2725 Communications Ports 100Base-TX, 10/1000Base-T Transmission speed 10/100/1000 MBit/s (Auto Negotiation) Transmission distance 100 m (328 ft) 4-wire Cat.5e, Cat.6 RJ-45 cable General Rating... -
Page 46: Fiber Optic / Rj45 Ethernet Converter
Accessories 7.9 Fiber Optic / RJ45 Ethernet Converter The Fiber Optic / RJ45 Ethernet Converter (type Advantech EKI-2526M) assures high reliability and stability in harsh environments, making it a robust bridge between enterprise fiberoptic backbones and Ethernet devices, like the Pi20 camera. -
Page 47: Junction Box
Accessories 7.10 Junction Box The junction box provides the space to the mount the industrial power supply, I/O modules, Fiber Optic / RJ45 Ethernet Converter, and/or the Ethernet switch. Technical Data: sheet steel, powder-coated Dimensions (W x H x D) 380 x 300 x 210 mm (15 x 11.8 x 8.3 in) Net Weight 9.8 kg (22 lb) -
Page 48: Datatemp Pi Software
Accessories 7.11 DataTemp Pi Software The ThermoView camera is easily interfaced to the DataTemp Pi software (DTPi). This software is fully featured to allow for real time viewing, saving and playback of images from the ThermoView camera. The software is intuitive, easy-to-use and is designed to be set up and operational for your application within minutes. -
Page 49: Maintenance
Maintenance It is recommended to carry out periodic temperature calibrations at least once a year to maintain product quality and ensure the reliability of temperature indications. There are no user-serviceable parts in the camera. Periodically inspect and insure that all camera mounting screws remain tightly fastened. -
Page 50: Appendix
Appendix 9.1 Determination of Emissivity Emissivity is a measure of an object’s ability to absorb and emit infrared energy. It can have a value between 0 and 1.0. For example a mirror has an emissivity less of 0.1, while the so-called “Blackbody“ reaches an emissivity value of 1.0. - Page 51 Appendix ETALS Emissivity Material 8 – 14 µm Aluminum Unoxidized 0.02-0.1 Oxidized 0.2-0.4 Alloy A3003, Oxidized Roughened 0.1-0.3 Polished 0.02-0.1 Brass Polished 0.01-0.05 Burnished Oxidized Chromium 0.02-0.2 Copper Polished 0.03 Roughened 0.05-0.1 Oxidized 0.4-0.8 Gold 0.01-0.1 Haynes Alloy 0.3-0.8 Inconel Oxidized 0.7-0.95 Sandblasted...
- Page 52 Appendix ETALS Emissivity Material 8 – 14 µm Oxidized 0.2-0.5 Electrolytic 0.05-0.15 Platinum Black Silver 0.02 Steel Cold-Rolled 0.7-0.9 Ground Sheet 0.4-0.6 Polished Sheet Molten Oxidized 0.7-0.9 Stainless 0.1-0.8 Tin (Unoxidized) 0.05 Titanium Polished 0.05-0.2 Oxidized 0.5-0.6 Tungsten 0.03 Polished 0.03-0.1 Zinc Oxidized...
- Page 53 Appendix ETALS Emissivity Material 8 – 14 µm Asbestos 0.95 Asphalt 0.95 Basalt Carbon Unoxidized 0.8-0.9 Graphite 0.7-0.8 Carborundum Ceramic 0.95 Clay 0.95 Concrete 0.95 Cloth 0.95 Glass Plate 0.85 “Gob” Gravel 0.95 Gypsum 0.8-0.95 0.98 Limestone 0.98 Paint (non-al.) 0.9-0.95 Paper (any color) 0.95...
-
Page 54: Configuring Of I/O Modules
Appendix 9.3 Configuring of I/O Modules 9.3.1 Overview It is recommended to use an Ethernet switch to connect the Ethernet port of the I/O Module to the computer, as shown in the on page 9. Figure 3 9.3.2 Installing the Configuration Software For the module IP address setting, you will need to use the ADAM.NET Utility software found on the ADAM support CD. - Page 55 Appendix ① ④ ② ③ Figure 25: ADAM-6000 Module under the ADAM.NET Utility Software If network Firewall is enabled on your computer, you may not be able to connect with your ADAM-6000 module. You need to add ADAM.NET Utility into the list of exceptions.
-
Page 56: Defining Of Firewall Exceptions
5. In the following dialog, click <Browse> and locate the imaging software (TSA or DTPi) which you wish to allow. Typically, the program is located at "C:\Program Files\Raytek\DTPI". 6. Verify that the imaging software (TSA or DTPi) is shown in the exception list and press the <OK>...
Need help?
Do you have a question about the ThermoView Pi20 and is the answer not in the manual?
Questions and answers