Table of Contents
Advertisement
Helpful Information...........................................................................x
Care, Finishing And Storage............................................................ x
Warranty........................................................................................... x
Parts List........................................................................................... x
Assembly...........................................................................................
Before You Begin.................................................................. 1
Step 1 Install Hardware To Diagonal Stand........................
Step 2 Install Hardware To Pivot Section............................. 1
Step 3 Install Hardware To Mounting Ends.........................
Step 4 Base Feet To Diagonal Stand.................................... 2
Step 5 Pivot Sections to Diagonal......................................... 2
Step 6 Ratchet Wheels to Poles........................................... 3
Step 7 Assembling the Frame in Different Sizes................... 3
Step 9 Brace Assembly........................................................
............................................................................
TM
TM
.............................................................................. 7
Quilting Instructions......................................................................... 7
Preparing The Fabric Layers For Installation.....................7
Installing The Quilt Fabrics..................................................7
Trouble Shooting....................................................................9
Tying Quilts...........................................................................10
Making And Using Cloth Leaders.....................................................10
Copyright November 2000 Jim M. Bagley
GraceWood, Inc. Reproduction Prohibited,
Patent Pending
Quilting With The Grace NM-EZ3
Quilting Frame
Table Of Contents
1
2
4
5
6
1
TM
1
Advertisement
Table of Contents

Summary of Contents for Grace Company NM-EZ3
-
Page 1: Table Of Contents
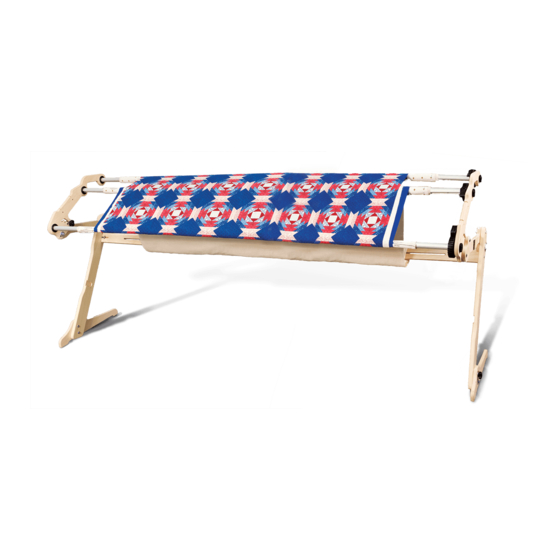
Quilting With The Grace NM-EZ3 Quilting Frame Table Of Contents Helpful Information................x Care, Finishing And Storage............x Warranty................... x Parts List................... x Assembly................... Before You Begin..............1 Step 1 Install Hardware To Diagonal Stand......Step 2 Install Hardware To Pivot Section......1 Step 3 Install Hardware To Mounting Ends...... -
Page 2: Warranty
P.O. Box 27823 Salt Lake City, UT 84127 For shipping of materials to the Grace Company address package (postage prepaid) to: The Grace Company, 801 West Layton Avenue, SLC, UT 84104 Materials may be returned only with a valid RMA# or Returned Merchandise Authorization Number which may be obtained by calling GraceWood, Inc. -
Page 5: Assembly
Using the parts list as a reference, take the parts out of the box and make sure that you have them all. (If there is something missing or broken, contact The Grace Company. We will promptly ship any needed item.) Tools Needed <... -
Page 6: Step 3 Install Hardware To Mounting Ends
Step 3: Hardware to Pole Mounting Ends Parts Needed: Right and Left Mounting Ends 4 - 5/16" x 2" Carriage Bolts 4 - 1/4" Smaller Flat Washers 4 - Jamb Nuts < Note direction carriage bolt goes through the part. <... -
Page 7: Step 6 Ratchet Wheels To Poles
Parts Needed: 3 - Ratchet Wheels 6 - Screws 3 - Quilting Poles Note: The terms pole and rail are used interchangeably. < Identify the three (longer) poles with bolts coming out of both ends, and line them up on the floor so that the holes drilled through the poles are all on the left. -
Page 8: Step 8 Ratchet Stops And Poles With Wheels To Mounting Ends
opposite the cog wheel) into the shorter rail (end without the bolt-- see right ). < Connect the two rails using the metal connector sleeve. Line up the holes in the sleeve with the holes in the raise. Fasten the sleeve to the rails by putting a connecter bolt though the smaller sleeve hole. -
Page 9: Step 9 Brace Assembly
1/4" away from the Stop. Finger Tighten Only! < Set aside this assembly until Step10. Step 9: Brace Assembly Parts Needed: 2 - Braces 2 - 5/16" x 1 1/2" Hex Bolts 2 - 5/16" Large Flat Washers 2 - 1/4" x 3 1/2" Hex Bolts 2 - 1/4"... -
Page 10: Folding The Ez3
Lock Nuts! The washer must be able to spin freely. Your Frame is Now Assembled!! Folding the NM-EZ3 < Frame must not be tilted when it is to be folded. (See Tilting the NMEZ3 in next section.) <... -
Page 11: Tilting The Ez3
Tilting the NM-EZ3 Quilting on the NM-EZ3 Preparing the Fabric Layers For Installation < Make sure that each layer of fabric is the correct size and has straight edges and square corners. The short time and small effort that you spend measuring and squaring will result in much time saved later in the quilting process. - Page 12 have the same give as the rest of the fabric. This may cause the seam to be too tight. Use a slightly larger, looser machine stitch than normal in sewing/piecing the lengths of the back fabric together. You also can sew your back fabrics together using crosswise piecing.
-
Page 13: Trouble Shooting
Top. < Line up the edge of the Quilt Top/Batting to the inside rear pole as shown. < Tack the center the Top/Batting to the center of the rear pole. Tack the corners. Make sure that the Quilt Top is centered with the Backing already installed. -
Page 14: Tying Quilts
Problem: Fabric pulls/tears out at the Thumbtacks when tension is applied. Solution: Seat the Tack all the way in. The Head of the Tack, not the post of the Tack, should hold the Fabric. Use a Tack Hammer to seat the Tacks if your hand is not strong enough. - Page 15 < Purchase: 2-2/3 Yards of Fabric (Mattress Ticking or Canvas work best). < Step 1. Cut the fabric as shown in illustration above. < Step 2. Finish the cut edges of the leaders with either a serge stitch or with a very straight 1/2" hem allowance.


Need help?
Do you have a question about the NM-EZ3 and is the answer not in the manual?
Questions and answers