
Related Manuals for Faaborg Rehab Technic Charder MS 6000

Summary of Contents for Faaborg Rehab Technic Charder MS 6000
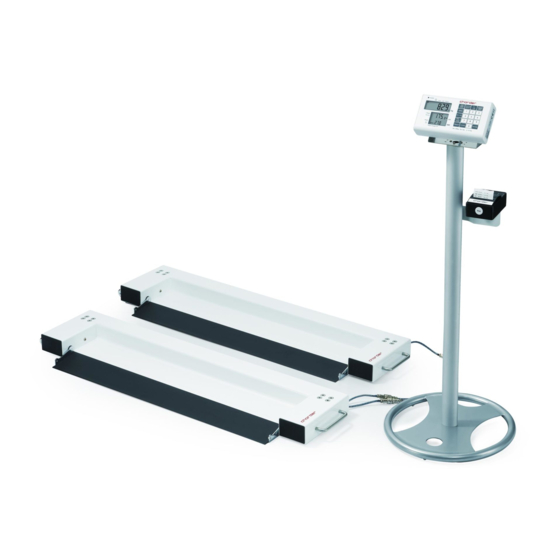
- Page 1 Please keep the instruction manual at hand all the time for future reference. MS 6000 BED SCALE USER MANUAL - 0 -...
-
Page 2: Table Of Contents
TABLE OF CONTENTS Preface ......................2 General Information ..................2 Safety Instruktions ..................2 Environmental ....................3 Cleaning ......................3 Maintenance ....................3 Weighing Operation ..................4 Warranty-Liability ..................4 Disposing of the Scale .................. 5 Explanation of Graphic Symbols..............6 EMC Guidance and Manufacturer's Declaration .......... -
Page 3: Preface
Preface Thank you for choosing Faaborg Rehab Technic’s product. All features of this product were designed to state of the art and are optimized for simple and straightforward use. If you have any queries or experience any problems not addressed in the operating instructions, please contact your Faaborg Rehab Technic’s service... -
Page 4: Environmental
applicable standards. If you have any problem, contact your local CHARDER MEDICAL service partner. Environmental All batteries contain toxic compounds; disposal of batteries should be delegated to a competent organisation, complying with the deposit of Poisonous Waste Regulation 1972. ... -
Page 5: Weighing Operation
Weighing Operation Before reading detailed instructions on how to use all the weighing functions that are built into your scale, please read the following important guidelines: Always be sure that the display shows `Zero` before use, if it does not then please press the ZERO key. ... -
Page 6: Disposing Of The Scale
functioning shall be rendered null and void. If CHARDER provides and individual warranty, this means that the unit supplied will be free of faults for the length of the warranty period. Disposing of the Scale This product is not to be treated as regular household waste, but should be handed into an electrical/electronic equipment recycling centre. -
Page 7: Explanation Of Graphic Symbols
Explanation of Graphic Symbols SN-T13000001 Designation of the serial number of every device, applied at the device. (Number as an example) “Please note the accompanying documents“ or “Observe operating instructions” Identification of manufacturer of medical product including address Charder Electronic Co., Ltd. No.103, Guozhong Rd., Dali Dist., Taichung City 412, Taiwan (R.O.C.) Type B applied part... - Page 8 Carefully read this operation manual before setup and commissioning, even if you are already familiar with Charder scales. Transport and storage temperature +60°C limit indicating the upper and the lower limit (Transport and storage temperature -20°C on packaging) - - 7...
-
Page 9: Emc Guidance And Manufacturer's Declaration
EMC Guidance and Manufacturer's Declaration Guidance and manufacturer’s declaration-electromagnetic emissions The MEDICAL SCALE MS6000 is intended for use in the electromagnetic environment specified below. The customer or the user of the MEDICAL SCALE MS6000 should assure that it is used in such an environment. Electromagnetic Emission test Compliance... - Page 10 Guidance and manufacturer’s declaration-electromagnetic immunity The MEDICAL SCALE MS6000 is intended for use in the electromagnetic environment specified below. The customer or the user of the MEDICAL SCALE MS6000 should assure that it is used in such an environment. IEC 60601 test Compliance Electromagnetic Immunity test...
- Page 11 3 A/m 3 A/m Power The MEDICAL SCALE frequency(50/60 MS6000 power Hz) magnetic frequency magnetic field IEC 61000- fields should be at levels characteristic of a typical location in a typical commercial or hospital environment. NOTE UT is the a.c. mains voltage prior to application of the test level. Guidance and manufacturer’s declaration-electromagnetic immunity The MEDICAL SCALE MS6000 is intended for use in the electromagnetic environment specified below.
- Page 12 Field strengths from fixed RF transmitters, as determined by an electromagnetic site survey should be less than the compliance level in each frequency range Interference may occur in the vicinity of equipment marked with the following symbol: Radiated RF 3 V/m 80MHz to 2,5 3 V/m IEC 61000-4-3 NOTE1 At 80 MHz and 800 MHz, the higher frequency range applies.
- Page 13 Recommended separation distance between portable and mobile RF communications equipment and the MEDICAL SCALE The MEDICAL SCALE MS6000 is intended for use in an electromagnetic environment in which radiated RF disturbances are controlled. The customer or the user of the MEDICAL SCALE MS6000 can help prevent electromagnetic interference by maintaining a minimum distance between portable and mobile RF communications equipment (transmitters) and the MEDICAL SCALE MS6000 as recommended below, according to the maximum output power of...
-
Page 14: Specification
Specification Model MS 6000 Capacity 500kg x 200g Accuracy ± 300g Verification according to Class III 2009/23/EC Weight Unit LCD Display 1.0 inch LCD display with 5 and 1/2 digits Whole Dimension- 109 X 7.5 X 25.5 cm Dimension Weighing Area- 88 X 18 cm ON/OFF, ZERO, HOLD/BMI, PRINT, PRE-TARE, CLEAR, ENTER, M1-10, Functions... -
Page 15: Power Adapter Standards
Power Adapter Standards CAUTION: The device is only compatible with restricted power adaptors in dashed block below. -
Page 16: Preparation For Measurements
Preparation for Measurements Hold the handle of weigh bridge Place weigh bridges under bed next to the bed casters. Installing weigh bridges and power on the scale before pushing the bed on it. Please refer to installing instruction. Set the unit on a stable, level surface. When the bubble indicator is in the centre of the circle, MS6000 is leveled correctly. - Page 17 Push bed forward and move to the weigh bridges after assembly and power on the scale. We strongly recommend two people to operate the procedure. Before moving bed on the weigh bridge, please turn on the scale!! You must make sure that the connecting cable is not caught under the measuring foot, otherwise faulty measurements may result.
-
Page 18: Installing Weight Bridge
Installing Weight Bridge Charder Bed Scale has been properly labeled for easy assembling. The packing also includes Weigh Bridge, connecting wire and Indicator. Connect both the weigh bridges using Weigh Bridge connecting wire and then connect Indicator with “Weigh Bridge – 2”. Weigh Bridge –... -
Page 19: Panel
Panel Key Functions Description ON/OFF To switch ON/OFF the scale ZERO To zero the system M 1~10 To save 10 sets of PRE-TARE value PRE-TARE function for subtraction of a PRE-TARE known bed weight or any other object before &... -
Page 20: Lcd Symbol Description
MONITOR For tracking the change in weight of Patient. WEIGHT To turn ON/OFF and adjust volume level of ALARM Alarm function CLEAR To clear the wrong entry while entering digits. ENTER To confirm & apply. Entering digits LCD Symbol Description Definitions Stable symbol: To indicate that the weight is stable. -
Page 21: Date & Time Setting Procedure
Date & Time Setting Procedure Switch ON the scale using ON/OFF key and then long press key for 3 seconds to enter the TIME SETTING mode. Press key after successful change to move to next step. EX: To input Dec 25, 2008, 8:00am. Enter year using 0~9 keys. -
Page 22: Normal Weighing Procedure (Patient On The Bed)
Normal Weighing Procedure (patient on the bed) Turn On the scale using ON/OFF key. **(before moving bed on the weigh bridge) Call the PRE-TARE value (bed weight) from memory (refer Recall PRE-TARE value section) and then press Enter, scale will automatically perform Tare... -
Page 23: Weight Tracking Procedure
To print out the weighing result, press PRINT key. Weight Tracking Procedure Prepare the bed; place pillow cushion or any other necessary things on the bed. Switch on the scale use ON/OFF Push the bed on the scale, the display will show total bed weight on upper LCD. - Page 24 Use 0~9 keys to set the increase in weight limit and press ENTER. Now the lower display will start blinking and point to (-) weight limit. (**), press 0~9 keys to set the decrease in weight limit, the minus (-) sign will appear in front of the weight decrease value, after setting the values press ENTER.
-
Page 25: Using The Bed Scale
Using the Bed Scale The Bed Scale is provided with the integrated hold function to determine the average weight. It enables people to be weighed accurately although they are not still on the bed. Note: Determining average weight is not possible incase of big fluctuation between weight. -
Page 26: Using The Bmi Feature
Using the BMI Feature Follow the normal weighing procedure. Long press BMI key for 3 seconds, after the weight stabilizes and the stable sign displays on the LCD, the middle LCD will display previous height value. Key in the height of the patient using 0~9 key. The BMI value will also change as the height value will increase or decrease. -
Page 27: Using The Tare Function
Using the Tare Function Tare allows the user to zero the instrument to cancel the weight of a bed/ clothes from the reading of the instrument, thus giving the true weight of the person/patient being tested. Place the bed scale under the bed and push it on the scale. ... - Page 28 Press ENTER key to store pre- tare weight; the instrument will make double beep sound. B. Enter Weight Using 0~9 Keys: DESCRIPTION EXAMPLE Long press PRE-TARE key for 3 seconds, the extreme left digit will blink. Enter pre-tare weight using 0~9 keys.
- Page 29 Press numeral key 0 ~ 9 to assign the position to pre-tare weight. Press ENTER key to store pre- tare weight; the instrument will make double beep sound. C. RECALL PRE-TARE VALUE DESCRIPTION EXAMPLE Long press M1~10 key for 3 seconds;...
-
Page 30: Set Up Your Device
Set Up your Device Switch ON the scale and long press [ZERO] key for 3 seconds, first “SETUP” and then “A.OFF” will display successively. AUTO-OFF TIME SETUP This enables operator to select the auto turn OFF time of the device. BUZZER ON/OFF SETUP This enables operator to select beep sound ON/OFF. -
Page 31: Printing Function
Printing Function Weight, BMI and Height results can be printed for records using RS232 interface cable (included in accessory kit). After weighing and calculating BMI simply press PRINT key to print out the results. The format presented below is the standard format of results print- out and cannot be changed. - Page 32 RS232 Pin out Connecting with PC 1. Start Hyper Terminal Start Hyper Terminal program from clicking Start Menu → Programs → Accessories → Communication → Hyper Terminal. 2. New Connection Description Give new connection a name then click OK. 3. Select Your COM Port Click Connect to select your COM port.
-
Page 33: Instructions For Printing And Connecting
Instructions for Printing and Connecting prompt displays on the LCD, please change the scale batteries or use exclusive adaptor to operate the scale. Locate adaptor plug on the right side of indicator. RS232 Connector AC Jack Connector CAUTION: Always connect the AC adaptor with the indicator before connecting to the mains power supply. -
Page 34: Instructions For Replacing Batteries
Instructions for Replacing Batteries Open the battery housing cover Take out the battery housing Rechargeable Battery and AA-size Battery Housing - 33 -... - Page 35 Rechargeable Battery Housing AA-size Battery Housing Make sure that all the batteries are properly placed Place the battery housing back and make sure that the housing pin is connecting to the right point - 34 -...
- Page 36 Place the housing back Close the battery housing cover - 35 -...
-
Page 37: Error Message
ERROR Message - 36 -... -
Page 38: Troubleshooting
Troubleshooting Troubleshooting for defective modes: Original purchaser can enjoy the benefits under the effective Warranty against functional defects in material and workmanship subject to the terms and conditions listed in the yearly Warranty Program & Return Policy. Our warranty service program includes the following: 1. - Page 39 Incorrect position or other external objects within weighing area The weighing-scale is not put in a solid & firm ground area, such as carpet floor or lawn. 3. Connection failure for data transmission to PC or printer Wrong connection wires or faulty wires for transmission between the digital indicator &...
- Page 40 Non-automatic Weighing Instruments Directive Please see separate document showing on sticker of device for above CE marking. Authorized EU Representative: Faaborg Rehab Technic ApS Smedemestervej 9, DK-5600 Faaborg Denmark Phono no.: +45 70 20 55 53/ E-mail: office@faaborg-rehab.dk Manufactured by: Charder Electronic Co., Ltd.
Need help?
Do you have a question about the Charder MS 6000 and is the answer not in the manual?
Questions and answers