Table of Contents
Advertisement
Quick Links
How to use this manual
A Few Words About Safety
How to use this manual
SERVICE INFORMATION
The service and repair information contained in this manual is intended for use by qualified, professional technicians. Attempting
service or repairs without the proper training, tools, and equipment could cause injury to you and/or others. It could also damage
this Honda product or create an unsafe condition.
This manual describes the proper methods and procedures for performing service, maintenance, and repairs. Some procedures
require the use of special tools. Any person who intends to use a replacement part, service procedure, or a tool that is not
recommended by Honda must determine the risks to their personal safety and the safe operation of this product.
If you need to replace a part, use Honda Genuine parts with the correct part number or an equivalent part. We strongly recommend
that you do not use replacement parts of inferior quality.
For Your Customer's Safety
Proper service and maintenance are essential to the customer's safety and the reliability of this product. Any error or oversight
while servicing this product can result in faulty operation, damage to the product, or injury to others.
Improper service or repairs can create an unsafe
condition that can cause your customer or others to
be seriously hurt or killed.
Follow the procedures and precautions in this man-
ual and other service materials carefully.
For Your Safety
Because this manual is intended for the professional service technician, we do not provide warnings about many basic shop safety
practices (e.g., Hot parts-wear gloves). If you have not received shop safety training or do not feel confident about your knowledge
of safe servicing practices, we recommend that you do not attempt to perform the procedures described in this manual.
Some of the most important general service safety precautions are given below. However, we cannot warn you of every
conceivable hazard that can arise in performing service and repair procedures. Only you can decide whether or not you should
perform a given task.
Failure to properly follow instructions and precau-
tions can cause you to be seriously hurt or killed.
Follow the procedures and precautions in this man-
ual carefully.
Important Safety Precautions
Make sure you have a clear understanding of all basic shop safety practices and that you are wearing appropriate clothing and
using safety equipment. When performing any service task, be especially careful of the following:
• Read all of the instructions before you begin, and make sure you have the tools, the replacement or repair parts, and the skills
required to perform the tasks safely and completely.
• Protect your eyes by using proper safety glasses, goggles, or face shields anytime you hammer, drill, grind, or work around
pressurized air, pressurized liquids, springs, or other stored-energy components. If there is any doubt, put on eye protection.
• Use other protective wear when necessary, for example gloves or safety shoes. Handling hot or sharp parts can cause severe
burns or cuts. Before you grab something that looks like it can hurt you, stop and put on gloves.
• Protect yourself and others whenever you have equipment hoisted in the air. Anytime you lift this product with a hoist, make sure
that the hoist hook is securely attached to the product.
Make sure the engine is off before you begin any servicing procedures, unless the instruction tells you to do otherwise. This will
help eliminate several potential hazards:
• Carbon monoxide poisoning from engine exhaust. Be sure there is adequate ventilation whenever you run the engine.
• Burns from hot parts. Let the engine and exhaust system cool before working in those areas.
• Injury from moving parts. If the instruction tells you to run the engine, be sure your hands, fingers and clothing are out of the way.
Gasoline vapors and hydrogen gasses from batteries are explosive. To reduce the possibility of a fire or explosion, be careful when
working around gasoline or batteries.
• Use only a nonflammable solvent, not gasoline, to clean parts.
• Never store gasoline in an open container.
• Keep all cigarettes, sparks, and flames away from the battery and all fuel-related parts.
0-1
Advertisement
Table of Contents

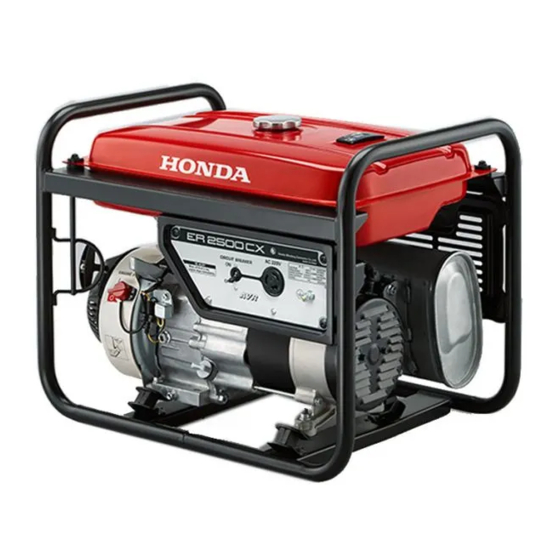
Related Manuals for Honda ER2500CX


Summary of Contents for Honda ER2500CX
- Page 1 Honda must determine the risks to their personal safety and the safe operation of this product. If you need to replace a part, use Honda Genuine parts with the correct part number or an equivalent part. We strongly recommend that you do not use replacement parts of inferior quality.
- Page 2 How to use this manual OUTLINE OF CHANGES INTRODUCTION This supplement covers the construction, function, and SPECIFICATIONS servicing procedures of the Honda ER2500CX SK type generator. SERVICE INFORMATION For service information that is not covered in this MAINTENANCE supplement, please refer to the ER2500CX base shop manual (part number 82Z4100).
- Page 3 How to use this manual SYMBOLS The symbols used throughout this manual show specific service procedures. If supplementary information is required pertaining to these symbols, it will be explained specifically in the text without the use of the symbols. Replace the part(s) with new one(s) before assembly. Use the recommended engine oil, unless otherwise specified.
- Page 4 OUTLINE OF CHANGES How to use this manual Item After Before Control panel (SK type) SCREW (3 x 3.8 mm) (2) CONTROL WIRE HARNESS VOLT METER NUT (3 mm) (2) SET PLATE RECEPTACLE PACKING AC OUTPUT RECEPTACLE (16A - 250 V) SCREW (4 x 12 mm) (4)
- Page 5 MEMO...
-
Page 6: Specifications
dummytext 1. SPECIFICATIONS SPECIFICATIONS·································· 1-2 PERFORMANCE CURVES ······················ 1-3... -
Page 7: Dimensions And Weights
SPECIFICATIONS SPECIFICATIONS SPECIFICATIONS DIMENSIONS AND WEIGHTS Model ER2500CX Type Description code ECCC Overall length 591 mm (23.3 in) Overall width 432 mm (17.0 in) Overall height 462 mm (18.2 in) Dry weight 40.0 kg (88.2 lbs) Operating weight 51.1 kg (112.7 lbs) -
Page 8: Performance Curves
SPECIFICATIONS CHARACTERISTICS Model ER2500CX Type Voltage Momentary 15% max. variation Average 7% max. rate Average 5 sec. max. time Voltage stability ± 1% within Frequency Momentary 15% max. variation Average 7% max. rate Average 5 sec. max. time Frequency stability ±... - Page 9 dummyhead dummyhead MEMO...
-
Page 10: Service Information
dummytext 2. SERVICE INFORMATION MAINTENANCE STANDARDS ················· 2-2 HARNESS AND TUBE ROUTING ············· 2-3 TORQUE VALUES ································· 2-2... -
Page 11: Maintenance Standards
dummyhead dummyhead SERVICE INFORMATION MAINTENANCE STANDARDS SERVICE INFORMATION ENGINE Part Item Standard Service limit Engine Engine speed (60 Hz) 3,750 ± 150 min (rpm) – ELECTRICAL PARTS Part Connector Terminal number Standard Main winding SK type 2 – 4 1.2 – 1.6 Ω (at 20 °C/68 °F) Exciter winding SK type 1 –... -
Page 12: Harness And Tube Routing
dummyhead dummyhead SERVICE INFORMATION HARNESS AND TUBE ROUTING WIRE BAND FILED WINDING FILED WINDING WIRE CONNECTOR WIRE CONNECTOR (+) MARK 0 - 5 mm (0 - 0.20 in) MAIN WINDING EXCITER WINDING 4P CONNECTOR 4P CONNECTOR Terminal Wire color Terminal Wire color Terminal Wire color... - Page 13 dummyhead dummyhead SERVICE INFORMATION SK TYPE CIRCUIT BREAKER TERMINAL VOLT METER WHITE MARK CIRCUIT BREAKER TERMINAL TERMINAL 45° 30° 30° RECEPTACLE TERMINAL VOLT METER RECEPTACLE TERMINAL TERMINAL WHITE TAPE RECEPTACLE TERMINAL WIRE BAND Terminal Wire color 0 - 5 mm (0 - 0.20 in) number Terminal Wire color...
-
Page 14: Governor System
dummytext 6. GOVERNOR SYSTEM GOVERNOR ARM/CONTROL BASE GOVERNOR ADJUSTMENT ···················· 6-3 REMOVAL/INSTALLATION ····················· 6-2... -
Page 15: Governor Arm/Control Base Removal/Installation
dummyhead dummyhead GOVERNOR SYSTEM GOVERNOR ARM/CONTROL BASE REMOVAL/INSTALLATION GOVERNOR SYSTEM Remove the fuel tank (base manual 82Z4100: page 5-3). After installation, adjust the no load engine speed (page 6-3). GOVERNOR ROD/ANTI-SURGE SPRING REMOVAL/INSTALLATION: Remove the governor arm to a point where the groove [1] of the throttle arm lines up with the governor rod [2], and then lift the governor rod out of the hole of the throttle... -
Page 16: Governor Adjustment
dummyhead dummyhead GOVERNOR SYSTEM GOVERNOR ADJUSTMENT Remove the fuel tank (base manual 82Z4100: page 5-3). Loosen the 6 mm nut [1] and move the governor arm [2] to fully open the throttle [3]. Rotate the governor arm shaft [4] as far as it will go in the same direction the governor arm moved to open the throttle and tighten 6 mm nut. - Page 17 dummyhead dummyhead MEMO...
-
Page 18: Generator System
dummytext 7. GENERATOR SYSTEM GENERATOR SYSTEM MAIN WINDING INSPECTION················ 7-10 TROUBLESHOOTING ···························· 7-2 EXCITER WINDING INSPECTION ·········· 7-10... - Page 19 dummyhead dummyhead GENERATOR SYSTEM GENERATOR SYSTEM TROUBLESHOOTING GENERATOR SYSTEM SK type: CIRCUIT BREAKER RECEPTACLE MAIN WINDING VOLT METER GND1 GND2 GENERATOR GROUND GROUND TERMINAL EXCITER WINDING FIELD WINDING Black Brown Yellow Orange Blue Light blue Green Light green Pink White Gray GENERATOR BLOCK CONTROL PANEL BLOCK...
- Page 20 dummyhead dummyhead GENERATOR SYSTEM No AC Output Before troubleshooting, make sure that the circuit breaker is in the ON position. Abnormal Check the engine speed. Adjust the governor (page 6-3). STANDARD: SK type: 3,750 ± 150 min (rpm) Normal No or low output Start the engine, check the main winding Inspect if the stator winding [1] for voltage with the main winding 4P connector...
- Page 21 dummyhead dummyhead GENERATOR SYSTEM From page 7-3 No continuity or faulty insulation Replace the stator ( base manual Disconnect the exciter winding 4P connector 82Z4100: page 7-10). Check for continuity and insulation between the stator windings and the stator core using muitimeter in minimum range. Main winding Exciter winding Stator...
- Page 22 dummyhead dummyhead GENERATOR SYSTEM From page 7-4 Abnormal resistance Disconnect the brush terminals, and remove the brush holder [1]. Replace the stator ( base manual Clean and inspect the slip rings. Check the rotor resistance at the 82Z4100: page 7-10). slip rings.
- Page 23 dummyhead dummyhead GENERATOR SYSTEM From page 7-5 From page 7-5 Normal No or low voltage Assemble the all parts to the generator, start Disconnect the main winding 4P connector the engine and measure the AC out put Normal Connect a known good 12 v battery to the brush voltage after more 30 minutes.
- Page 24 dummyhead dummyhead GENERATOR SYSTEM Low or high AC Output Abnormal Check the engine speed. Adjust the governor (page 6-3). STANDARD: SK type: 3,750 ± 150 min (rpm) Normal Discolored Inspect the stator winding [1] for discoloration. Replace the stator ( base manual 82Z4100: page 7-10).
- Page 25 dummyhead dummyhead GENERATOR SYSTEM From page 7-7 No continuity or faulty insulation Replace the stator ( base manual Disconnect the following: 82Z4100: page 7-10). - Main winding 4P connector - Exciter winding 4P connector Check for continuity and insulation between the stator windings and the stator core using muitimeter in minimum range.
- Page 26 dummyhead dummyhead GENERATOR SYSTEM Generator will not deliver rated out put Abnormal Check the engine speed. Adjust the governor (page 6-3). STANDARD: SK type: 3,750 ± 150 min (rpm) Normal Low engine speed Engine power is dropped. Connect the rated load (power factor = 1.0) Overhaul the engine.
- Page 27 dummyhead dummyhead GENERATOR SYSTEM MAIN WINDING INSPECTION Remove the generator end cover (base manual 82Z4100: page 7-9). Start the engine and measure the AC voltage between the main winding 4P connector terminals with connector disconnected. Voltage Type Terminal No. (Color) (About) No.2 (Red) and No.4 (Blue) 220 VAC...
-
Page 28: Other Electrical
dummytext 10. OTHER ELECTRICAL CONTROL PANEL DISASSEMBLY/ VOLT METER INSPECTION ·················· 10-3 ASSEMBLY ········································ 10-2 10-1... - Page 29 dummyhead dummyhead OTHER ELECTRICAL CONTROL PANEL DISASSEMBLY/ASSEMBLY OTHER ELECTRICAL SK TYPE CONTROL PANEL CASE SCREW (3 x 3.8 mm) (2) 0.4 N·m (0.04 kgf·m, 0.3 lbf·ft) SCREW (4 x 7 mm) (2) 1.5 N·m (0.2 kgf·m, 1.1 lbf·ft) WASHER (2) CIRCUIT BREAKER NUT (3 mm) (2) 0.25 N·m...
- Page 30 dummyhead dummyhead OTHER ELECTRICAL VOLT METER INSPECTION Out put voltage is normal but volt meter needle does not swing: Start the engine and check whether there is voltage at the volt meter terminal. Rated voltage: 220 VAC If there is no specified voltage at terminal, replace the volt meter.
- Page 31 dummyhead dummyhead MEMO...
-
Page 32: Wiring Diagrams
dummytext 15. WIRING DIAGRAMS SK TYPE ············································ 15-2 15-1... -
Page 33: Wiring Diagram
dummyhead dummyhead WIRING DIAGRAM SK TYPE WIRING DIAGRAM CIRCUIT BREAKER RECEPTACLE MAIN WINDING VOLT METER GND1 GND2 GENERATOR GROUND GROUND TERMINAL EXCITER WINDING FIELD WINDING Black Brown Yellow Orange Blue Light blue Green Light green Pink White Gray GENERATOR BLOCK CONTROL PANEL BLOCK Violet 15-2... - Page 34 INDEX dummytext INDEX CONTROL PANEL DISASSEMBLY/ASSEMBLY ······· 10-2 MAIN WINDING INSPECTION······························· 7-10 EXCITER WINDING INSPECTION ························· 7-10 MAINTENANCE STANDARDS ································2-2 GENERATOR SYSTEM TROUBLESHOOTING ··········7-2 PERFORMANCE CURVES ·····································1-3 GOVERNOR ADJUSTMENT ···································6-3 SPECIFICATIONS·················································1-2 GOVERNOR ARM/CONTROL BASE REMOVAL/ TORQUE VALUES ················································2-2 INSTALLATION ····················································6-2 VOLT METER INSPECTION ·································...
Need help?
Do you have a question about the ER2500CX and is the answer not in the manual?
Questions and answers