
Related Manuals for Honda GX240


Summary of Contents for Honda GX240
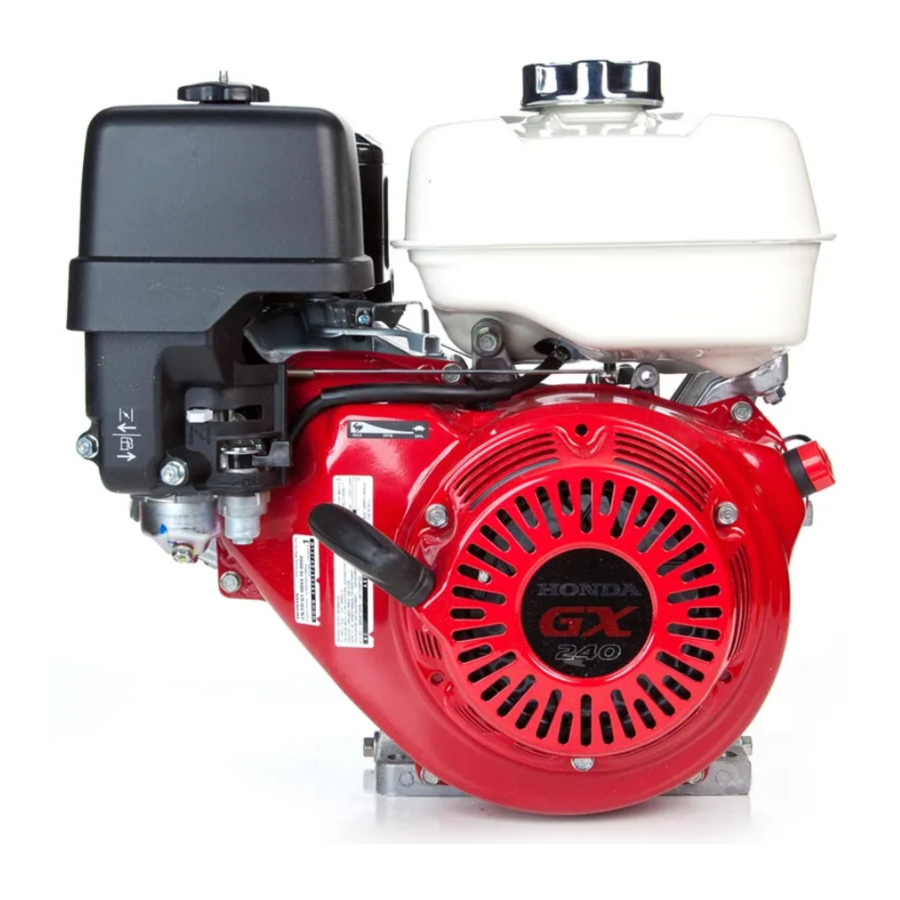
- Page 1 GX240 GX270 GX340 GX390 UT2/RT2 Technical Manual ©2010 American Honda Motor Co., Inc. PTR54179 All Rights Reserved...
-
Page 3: Table Of Contents
This manual covers engine selection, engine installation design and engine installation testing, so the combination of a Honda engine and your equipment will make the best possible product. Please feel free to contact your Honda Engine Distributor at any time for additional technical information or to discuss your engine application needs. -
Page 4: Design Features
GX240 • GX270 • GX340 • GX390 (UT2/RT2) Technical Manual NTRODUCTION Honda engines are designed for minimal maintenance. When maintenance is required, the task is kept simple by providing convenient maintenance access and procedures. Honda engines use proven engine technology and design innovations to make them highly reliable engines. -
Page 5: Recommended Power Range
GX240 • GX270 • GX340 • GX390 (UT2/RT2) Technical Manual ECOMMENDED OWER ANGE Maximum Operation Operate the engine at not more than 90% of the maximum horsepower available at a given rpm. Recommended maximum operating hp = 0.9 x maximum hp... - Page 6 GX240 • GX270 • GX340 • GX390 (UT2/RT2) Technical Manual GX340 GX390 (N·m) (lbf·ft) (N·m) (kgf·m) (kgf·m) (lbf·ft) NET TORQUE NET TORQUE (KW) (HP) (KW) (HP) (PS) NET POWER NET POWER RECOMMENDED OPERATING SPEED RANGE RECOMMENDED OPERATING SPEED RANGE (min...
-
Page 7: Output Confirmation Methods
GX240 • GX270 • GX340 • GX390 (UT2/RT2) Technical Manual Output Confirmation Methods Governor Rod Measurement When the engine is properly matched and operating at its continuous rated load, the carburetor throttle angle should be approximately half way between full open and full closed positions. -
Page 8: Engine Enclosures
GX240 • GX270 • GX340 • GX390 (UT2/RT2) Technical Manual Maximum Operating Temperatures Spark plug Seat 270 °C (482 °F) Engine Oil 140 °C (284 °F) Gasoline at Carburetor Float Bowl 60 °C (140 °F) Gasoline at Carburetor Float Bowl (after 5 min. hot soak) <70 °C (158 °F) -
Page 9: Fuel System
GX240 • GX270 • GX340 • GX390 (UT2/RT2) Technical Manual YSTEM If the engine is supplied with an incomplete fuel system (no fuel tank, no fuel hose, etc.), the OEM is responsible for ensuring evaporative emission requirements/regulations are met, including certification. -
Page 10: Carburetor Controls
GX240 • GX270 • GX340 • GX390 (UT2/RT2) Technical Manual Carburetor Controls Types of cable: Two types can be used, flexible wire core or solid wire. Installation: The throttle and choke control levers are provided with holes for optional cable attachment. The following illustrations show installation examples for a solid wire cable and for a flexible, braided wire cable. -
Page 11: Exhaust System
Fabricated Exhaust Systems The muffler type and the shape and length of the exhaust pipe(s) affect emissions performance and engine power. If you use a muffler other than a recommended Honda muffler, observe the following precautions to maintain the engine’s peak performance: •... -
Page 12: Engine Mounting
GX240 • GX270 • GX340 • GX390 (UT2/RT2) Technical Manual Rigid Engine Mount Muffler Installation. The frame must be rigid to prevent cracking when the exhaust pipe and muffler are connected. The muffler should be installed securely with bolts and nuts. -
Page 13: Electrical System
GX240 • GX270 • GX340 • GX390 (UT2/RT2) Technical Manual Engine Acceleration/Vibration Using a vibration meter, measure the vibration amplitude at the base on three axis (vertical, lateral and horizontal). Direction Allowable G value (Peak) (RMS) Vertical 10 (98 m/s 6.9 (68 m/s... -
Page 14: Charging Coil Selection
GX240 • GX270 • GX340 • GX390 (UT2/RT2) Technical Manual Manual start Use a two-position engine switch with continuity between its terminals as shown. Wire Color EXT+ EXT – (Red) (Black) Switch Position Charging Coil Selection Four types of coils are available:... -
Page 15: Wiring Diagrams
GX240 • GX270 • GX340 • GX390 (UT2/RT2) Technical Manual IRING IAGRAMS No Charge Coil Models ENGINE STOP SWITCH EXT ( + ) EXT ( - ) Black Brown Yellow Orange Blue Light blue ENGINE STOP Green Light green SWITCH... -
Page 16: A Charging System
GX240 • GX270 • GX340 • GX390 (UT2/RT2) Technical Manual 10A Charging System CONTROL BOX MAIN FUSE FLYWHEEL CHARGE COIL COMBINATION SWITCH OIL LEVEL SPARK IGNITION BATTERY STARTER MOTOR REGULATOR/ SWITCH PLUG COIL RECTIFIER COMBINATION Black Brown SWITCH Yellow Orange... - Page 17 GX240 • GX270 • GX340 • GX390 (UT2/RT2) Technical Manual 1A/3A Charging System CONTROL BOX ( Bl ) ( Bl ) ( R ) ( R ) MAIN FUSE CIRCUIT SILICON PROTECTOR RECTIFIER COMBINATION SWITCH OIL LEVEL SPARK IGNITION CHARGE...
-
Page 18: Power Transmission
GX240 • GX270 • GX340 • GX390 (UT2/RT2) Technical Manual OWER RANSMISSION V-Belt Connections Be sure there is no static axial load applied PULLEY CRANKSHAFT to the crankshaft. Axial Install the pulley as close to the base of the PTO shaft as possible. When installing... -
Page 19: Starting Performance
GX240 • GX270 • GX340 • GX390 (UT2/RT2) Technical Manual To reduce resonance, install a stay between the engine and attachment as shown below. Starting Performance The engine must be able to start with the attachment at the lowest recommended ambient temperature. -
Page 20: Installation Considerations
GX240 • GX270 • GX340 • GX390 (UT2/RT2) Technical Manual NSTALLATION ONSIDERATIONS Maintenance Points Accessibility When the engine is installed in an enclosure, provide an access panel or use an engine enclosure that can be opened and closed easily. See also Serviceability page 40. - Page 21 GX240 • GX270 • GX340 • GX390 (UT2/RT2) Technical Manual Right Side Fuel cap FUEL FILLER CAP Oil filler/cap dipstick Engine oil drain plug FUEL TANK Electric starter Electrical connections ELECTRICAL ELECTRIC STARTER CONNECTIONS (applicable types) OIL FILLER CAP/DIPSTICK OIL DRAIN PLUG...
-
Page 22: Dimensional Drawings
GX240 • GX270 • GX340 • GX390 (UT2/RT2) Technical Manual IMENSIONAL RAWINGS GX240-270 Without Reduction Unit: mm (in) 150 (5.9) 278 (10.9) With control box type: 462 (18.2) CONTROL BOX CRANKSHAFT (P. T. O.) (If equipped) Without control box type: 428 (16.9) 116 (4.6) - Page 23 GX240 • GX270 • GX340 • GX390 (UT2/RT2) Technical Manual With Reduction Unit: mm (in) * L/H:209.9 (8.26) 150 (5.9) * R:187.2 (7.37) * L/H:68.1 (2.68) CONTROL BOX * R:90.8 (3.57) (If equipped) P. T. O. SHAFT With control box type: 462 (18.2) Without control box type: 428 (16.9)
- Page 24 GX240 • GX270 • GX340 • GX390 (UT2/RT2) Technical Manual Without Fuel Tank Unit: mm (in) CONTROL BOX STARTER MOTOR 184.3 (7.26) 294.6 (11.60) 103 (4.06) M8X1.25 DEPTH 18 (0.71) 105 (4.13) DEPTH 4.5 (0.18) (6PLCS) 195.5 (7.70) DEPTH 4 (0.16 )
- Page 25 GX240 • GX270 • GX340 • GX390 (UT2/RT2) Technical Manual Unit: mm (in) 13 (0.51) EVAP PURGE JOINT 34.5 (1.36) OIL DRAIN 96 (3.78) 57.5 (2.26) 101.8 (4.01) 307 (11.17) 432 (17.01) 150.1 (5.91) CONTROL BOX STARTER MOTOR © 2010 American Honda Motor Co., Inc — All Rights Reserved...
- Page 26 GX240 • GX270 • GX340 • GX390 (UT2/RT2) Technical Manual GX340-390 Without Reduction Unit: mm (in) 158.7 (6.25) 301.3 (11.86) With control box type: 498.6 (19.63) CONTROL BOX CRANKSHAFT (P. T. O.) Without control box type: 460 (18.1) (If equipped) 141.5 (5.57)
- Page 27 GX240 • GX270 • GX340 • GX390 (UT2/RT2) Technical Manual With Reduction Unit Unit: mm (in) 233.2 (9.18) 158.7 (6.25) 68.1 (2.68) P. T. O. SHAFT 460 (18.1) 141.5 (5.57) 200.6 (7.9) 155 (6.1) REDUCTION UNIT * H:452 (17.8) * L:440 (17.3) 195.5 (7.70)
- Page 28 GX240 • GX270 • GX340 • GX390 (UT2/RT2) Technical Manual Without Fuel Tank Unit: mm (in) CONTROL BOX STARTER MOTOR 197.3 (7.77) 312 (12.28) OIL FILLER CAP OIL FILLER CAP 103 (4.06) 105 (4.13) 195.5 (7.70) © 2010 American Honda Motor Co., Inc — All Rights Reserved...
- Page 29 GX240 • GX270 • GX340 • GX390 (UT2/RT2) Technical Manual Unit: mm (in) EVAPORATIVE 17 (0.67) PURGE JOINT 27 (1.06) OIL DRAIN 73 (2.87) 103 (4.06) 100 (3.94) 321 (12.63) GX340R2 EDN2, EDE2 104.6 (4.12) 345 (13.58) GX390R2 EDT6, EDS6 457 (18.0)
-
Page 30: Pto Dimensional Drawings
GX240 • GX270 • GX340 • GX390 (UT2/RT2) Technical Manual PTO D IMENSIONAL RAWINGS H Type (with reduction) Unit: mm (in) 45 ° 45 ° M8 x 1.25 (2 PLACES) M8 x 1.25 85.7 (3.37) (4 PLACES) 6.31- 6.36 (0.248-0.250) 63 (2.5) -
Page 31: P Type
GX240 • GX270 • GX340 • GX390 (UT2/RT2) Technical Manual P Type Unit: mm (in) 45 ° 45 ° 30 ° 30 ° 89 (3.5) 14NF2 Thread R. H. 5/16-24UNF-2B (2 PLACES) 26-27 (1.0-1.1) 5/16-24UNF-2B (4 PLACES) 72.5 (2.85) 3/8-16UNC-2B (4 PLACES) 103 (4.1) -
Page 32: S Type
GX240 • GX270 • GX340 • GX390 (UT2/RT2) Technical Manual S Type Unit: mm (in) SNC TYPE: 5/16-24UNF-2B TAP (2 PLACES) 45 ° 45 ° 30 ° 30 ° SM32 TYPE: M8 x 1.25 63 (2.5) (2 PLACES) M8-1.25 41 (1.6) 7.00 - 7.03... -
Page 33: W Type
GX240 • GX270 • GX340 • GX390 (UT2/RT2) Technical Manual W Type Unit: mm (in) 45° 45° 30° 30° 80 (3.1) Φ7.15(Φ0.281) (2 PLACES) 55 (2.2) 15.5 (0.61) M8 x 1.25 (4 PLACES) 75 (3.0) Φ8.51(Φ0.335) (4 PLACES) 103 (4.1) CRANKSHAFT (P. -
Page 34: Dimensions And Weights
GX240 • GX270 • GX340 • GX390 (UT2/RT2) Technical Manual IMENSIONS AND EIGHTS GX240 P.T.O. VARIATION Model P.T.O. GX240R2 GX240RT2 GX240U2 GX240UT2 Overall E type 360 mm (14.2 in) length H type 425 mm (16.7 in) L type 405 mm (15.9 in) 405 mm (15.9 in) - Page 35 GX240 • GX270 • GX340 • GX390 (UT2/RT2) Technical Manual EQUIPMENT VARIATION Indicates the difference compared with values of P. T. O. variation above. Variation No balancer type Cyclone air cleaner Starter motor type Control box type Low profile type *1...
-
Page 36: Gx270
GX240 • GX270 • GX340 • GX390 (UT2/RT2) Technical Manual GX270 P.T.O. VARIATION Model P.T.O. GX270UT2 Overall length E type 340 mm (13.4 in) H type 425 mm (16.7 in) P type 380 mm (15.0 in) Q type S type 355 mm (14.0 in) -
Page 37: Gx340
GX240 • GX270 • GX340 • GX390 (UT2/RT2) Technical Manual GX340 P.T.O. VARIATION Model P.T.O. GX340R2 GX340RT2 GX340U2 GX340UT2 Overall E type 365 mm (14.4 in) length H type 452 mm (17.8 in) L type 440 mm (17.3 in) P type 405 mm (15.9 in) -
Page 38: Gx390
GX240 • GX270 • GX340 • GX390 (UT2/RT2) Technical Manual GX390 P.T.O. VARIATION Model P.T.O. GX390RT2/R2 GX390T2 GX390UT2/T2 Overall length H type 452 mm (17.8 in) L type 440 mm (17.3 in) P type 405 mm (15.9 in) Q type 405 mm (15.9 in) -
Page 39: Specifications
GX240 • GX270 • GX340 • GX390 (UT2/RT2) Technical Manual PECIFICATIONS GX240 Model GX240R2 GX240RT2 GX240U2 GX240UT2 Description code GCBPK GCBJT GCBPK GCBJT Type 4 stroke, overhead valve, single cylinder, inclined by 25° Displacement 270 cm3 (16.5 cu–in) Bore x stroke 77.0 x 58.0 mm (3.0 x 2.3 in) -
Page 40: Gx340
GX240 • GX270 • GX340 • GX390 (UT2/RT2) Technical Manual Starting system Recoil, Recoil and Starter motor Stopping system Ignition exciter coil circuit open Carburetor Horizontal type, butterfly valve Air cleaner Dual element type, Cyclone type, Oil bath type, Low profile type... -
Page 41: Gx390
GX240 • GX270 • GX340 • GX390 (UT2/RT2) Technical Manual GX390 Model GX390R2 GX390RT2 GX390U2 GX390UT2 GX390T2 Description code GCBHK GCBCT GCBHK GCBCT GCBDT Type 4 stroke, overhead valve, single cylinder, inclined by 25° Displacement 389 cm (23.7 cu–in) Bore x stroke 88.0 x 64.0 mm (3.5 x 2.5 in) -
Page 42: Serviceability
GX240 • GX270 • GX340 • GX390 (UT2/RT2) Technical Manual ERVICEABILITY The following Maintenance section is duplicated from the applicable shop manual and is accurate at the time of publication of this manual. Page number cross references refer to the shop manual it was copied from. It is provided for your reference in considering serviceability issues. -
Page 43: Engine Oil Level Check
GX240 • GX270 • GX340 • GX390 (UT2/RT2) Technical Manual Engine Oil Level Check Place the engine on a level surface. Remove the oil filler cap (1), and wipe the oil level gauge (2) clean. Insert the oil filler cap without screwing it into the oil filler neck (3). -
Page 44: Engine Oil Change
GX240 • GX270 • GX340 • GX390 (UT2/RT2) Technical Manual Engine Oil Change Drain the oil in the engine while the engine is warm. Warm oil drains quickly and completely. Place the engine on a level surface, and place a suitable container under the drain plug bolt. - Page 45 GX240 • GX270 • GX340 • GX390 (UT2/RT2) Technical Manual Cyclone Type: A dirty air filter will restrict air flow to the carburetor, reducing engine performance. If the engine is operated in dusty areas, clean the air cleaner more often than specified in the MAINTENANCE SCHEDULE.
-
Page 46: Sediment Cup Cleaning
GX240 • GX270 • GX340 • GX390 (UT2/RT2) Technical Manual Inner Filter (paper) Type: Tap the inner filter (1) lightly several times on a hard surface to remove excess dirt, or blow compressed air lightly (207 kPa (2.11 kgf/cm , 30 psi) or less) through the paper filter from the inside out. -
Page 47: Spark Plug Check/Adjustment
GX240 • GX270 • GX340 • GX390 (UT2/RT2) Technical Manual Spark Plug Check/Adjustment CAUTION If the engine has been running, the engine will be very hot. Allow it to cool before proceeding. Remove the spark plug cap, and then remove the spark plug (1) using a spark plug wrench (2). -
Page 48: Spark Plug Replacement
GX240 • GX270 • GX340 • GX390 (UT2/RT2) Technical Manual Spark Plug Replacement CAUTION If the engine has been running, the engine will be very hot. Allow it to cool before proceeding. Remove the spark plug cap, and then remove the spark plug (1) using a spark plug wrench (2). -
Page 49: Idle Speed Check/Adjustment
GX240 • GX270 • GX340 • GX390 (UT2/RT2) Technical Manual Separated Protector Type Remove the muffler cover, if equipped. Remove the 4 x 6 mm tapping screws (1), and exhaust deflector (2), if equipped. Remove the 5 x 8 mm tapping screws (3), R. muffler protector (4), and L. -
Page 50: Valve Clearance Check/Adjustment
GX240 • GX270 • GX340 • GX390 (UT2/RT2) Technical Manual Valve Clearance Check/Adjustment Remove the head cover bolt (1), the head cover (2), and the head cover packing (3). Disconnect the spark plug cap from the spark plug. Set the piston near top dead center of the cylinder compression stroke (both valves fully closed) by pulling the recoil starter slowly. - Page 51 GX240 • GX270 • GX340 • GX390 (UT2/RT2) Technical Manual Hold the rocker arm pivot (1) and loosen the pivot adjusting nut (2). Turn the rocker arm pivot to obtain the specified clearance. VALVE CLEARANCE: IN: 0.15 ± 0.02 mm EX: 0.20 ±...
-
Page 52: Fuel Tank And Filter Cleaning
GX240 • GX270 • GX340 • GX390 (UT2/RT2) Technical Manual Fuel Tank and Filter Cleaning WARNING Gasoline is highly flammable and explosive. You can be burned or seriously injured when handling fuel. • Keep heat, sparks, and flame away. • Handle fuel only outdoors. -
Page 53: Evaporative Emissions
GX240 • GX270 • GX340 • GX390 (UT2/RT2) Technical Manual VAPORATIVE EMISSIONS Types with OEM provided fuel tanks The OEM is responsible for meeting the EVAP emissions regulations for products sold in California (California Air Resources Board) and the 49 sates (U.S. Environmental Protection Agency). This regulations concern evaporative emissions from the fuel system. - Page 54 GX240 • GX270 • GX340 • GX390 (UT2/RT2) Technical Manual © 2010 American Honda Motor Co., Inc — All Rights Reserved...
Need help?
Do you have a question about the GX240 and is the answer not in the manual?
Questions and answers