
Related Manuals for Movincool CMW30


Summary of Contents for Movincool CMW30
- Page 1 SERVICE MANUAL CMW30 Unit Serial Number Range: 0411XXXXCW3 to Present (From April 2011 to Present) DocID: 00G00085EA...
- Page 2 All rights reserved. This book may not be reproduced or copied, in whole or in part, without the written permission of the publisher. DENSO SALES CALIFORNIA, INC. reserves the right to make changes without prior notice. MovinCool ® , Office Pro ® and SpotCool ® are registered trademarks of DENSO Corporation.
-
Page 3: Table Of Contents
Table of Contents Table of Contents Operation Section 1. PRECAUTIONS FOR SAFETY Foreword............... 6 Definition of Terms . - Page 4 Table of Contents 6. CONNECTION AND SETTING Power Supply Requirements ............31 Wall Mounted Controller (WMC) Connection .
- Page 5 Table of Contents Repair Section 8. TROUBLESHOOTING Troubleshooting ..............47 Self-Diagnostic Codes .
-
Page 6: Precautions For Safety
Operation Section 1. PRECAUTIONS FOR SAFETY 1.1 Foreword • This manual has been published to service the MovinCool CMW30. Use this manual only when servicing this unit. 1.2 Definition of Terms Describes precautions that should be observed in order to prevent injury to WARNING the user during installation or unit operation. -
Page 7: Specifications
Operation Section 2. SPECIFICATIONS 2.1 Exterior Dimension Diagram 53.8 4 x DIA. 0.6 DIA. 14 29.8 10.7 16.0 20.0 31.5 UNIT: inch ILL00274-00... -
Page 8: Technical Specifications
Operation Section 2.2 Technical Specifications ITEM SPECIFICATIONS Electronic Features Control Wall Mounted Controller (Included) Set Point Max. 95 °F (35 °C) Temperature Range Min. 55 °F (13 °C) Electrical Characteristics Voltage Requirement Single-Phase, 208/230 V, 60 Hz Operating Voltage Max. 253 V Range Min. - Page 9 Operation Section ITEM SPECIFICATIONS Refrigerant Refrigerant Control Electronic Expansion Valve Type R-410A Amount 2.31 lb (1.05 kg) Water Connection Water Inlet and Outlet (Unit side) 3/4 in (19 mm) NPT Female Signal Connection Fire Alarm Input (Signal Type) • No-voltage contact input •...
-
Page 10: Characteristics
Operation Section 2.3 Characteristics • Value range for each EWT shown in the graphs is based on the compressor speed. • EWT shown in the graphs is an abbreviation of "Entering Water Temperature". (1) How to read the characteristics < Example > Condition: Cooling Capacity: Evaporator Inlet Air Dry Bulb: 77 °F (25 °C) - Page 11 Operation Section (2) Cooling capacity curve EWT: 45 °F (7 °C) EWT: 85 °F (29 °C) EWT: 115 °F (46 °C) 95 (35) 86 (30) 77 (25) 68 (20) 59 (15) 50 (10) (10) (15) (20) (25) Evaporator Inlet Air Wet Bulb Temp. °F (°C) ILL00358-02 <...
- Page 12 Operation Section (3) Power consumption curve EWT: 115 °F (46 °C) EWT: 85 °F (29 °C) EWT: 45 °F (7 °C) 95 (35) 86 (30) 77 (25) 68 (20) 59 (15) 50 (10) (10) (15) (20) (25) (30) (35) Evaporator Inlet Air Wet Bulb Temp. °F (°C) ILL00359-01 <...
- Page 13 Operation Section (4) Current consumption curve EWT: 115 °F (46 °C) EWT: 85 °F (29 °C) EWT: 45 °F (7 °C) 95 (35) 86 (30) 77 (25) 68 (20) 59 (15) 50 (10) (10) (15) (20) (25) (30) (35) Evaporator Inlet Air Wet Bulb Temp. °F (°C) ILL00360-01 <...
- Page 14 Operation Section (5) Cool air temperature difference curve 25.2 (14) 21.6 (12) EWT: 45 °F (7 °C) 18.0 (10) EWT: 85 °F (29 °C) 14.4 (8) 10.8 (6) EWT: 115 °F (46 °C) 7.2 (4) 3.6 (2) 95 (35) 86 (30) 77 (25) 68 (20) 59 (15)
-
Page 15: Construction
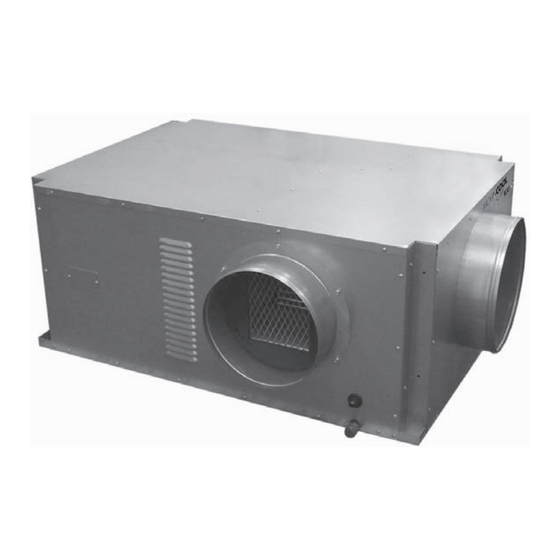
Operation Section 3. CONSTRUCTION 3.1 Exterior Components Cool Air Exhaust (12.0 in.Dia.Flange) Connection For Optional Condensate Pump Fixing Position For Optional Evaporator (Room) Condensate Pump Air Intake (14.0 in.Dia.Flange) Drain Pipe For Pump Mounting Holes Condensate Pan Drain For Gravitational Drain/Maintenance AC Fan Motor Service Panel Stop Switch... -
Page 16: Internal Structure
Operation Section 3.2 Internal Structure Accumulator Electronic Compressor Expansion Valve Overload Relay Water Regulating Valve Evaporator AC Fan Motor High-Pressure Switch Control Box Evaporator Fan Evaporator Fan Motor Compressor Condenser ILL00276-00... -
Page 17: Basic Construction
Operation Section 3.3 Basic Construction • This unit is compact in construction because of Water Regulating Valve Evaporator Fan Motor the condenser and evaporator being enclosed in one unit. The interior of the unit is divided into two sections. One section contains the evaporator which cools room interior air. -
Page 18: Refrigeration And Water System Construction
Operation Section 4. REFRIGERATION AND WATER SYSTEM 4.1 Refrigeration and Water System Construction The component parts of the refrigeration and water system include the following: • Compressor, Evaporator, Condenser, Accumulator, Electronic expansion valve, High-pressure switch, Water regulating valve These parts are all connected by copper piping. All the connections are brazed except the flare connections of the water regulating valve. - Page 19 Operation Section Flow of Refrigerant Flow of Water EWTS (Entering Water Thermistor) OLC (Compressor Overload Relay) CTS3 (Evaporator Pipe Outlet Thermistor) Water Accumulator Inlet Condenser Evaporator Compressor CTS1 Water (Condenser Thermistor) (Evaporator Outlet Fan Motor) RTS2 (Evaporator Inlet Air Thermistor) HPRS (High-Pressure Switch) (Electronic Expansion Valve)
-
Page 20: Compressor
Operation Section 4.2 Compressor • This unit is equipped with a variable speed compressor, which is driven by state of the art inverter technology. • A variable speed compressor automatically adjusts its speed as the heat load in the room changes. - Page 21 Operation Section (3) Operation 1) Start of compression Discharge 1) The cylinder is filled with low pressure gas. Valve 2) Since pressure in the discharge chamber is higher than in the cylinder, the discharge valve is kept closed. Piston Cylinder I003185 2) Suction and compression Discharge...
-
Page 22: Condenser
Operation Section (4) Compressor lubrication • The lubrication system is comprised of a hollow shaft, an oil scraper mounted at the bottom end of a shaft journal (shaft bearing), Rotor and the lubrication groove for the shaft journal. The lubrication groove is wider than the oil Hollow Shaft orifice. -
Page 23: Electronic Expansion Valve
Operation Section 4.4 Electronic Expansion Valve • The electronic expansion valve causes rapid Valve Spring Spring refrigerant expansion by injecting "high- Magnet Valve Holder temperature, high-pressure liquid refrigerant" Stopper Delivery Screw from the condenser through a small orifice. The Valve resultant "low-temperature, low-pressure mist refrigerant"... -
Page 24: High-Pressure Switch
Operation Section 4.7 High-Pressure Switch • The high-pressure switch prevents Pressure of Refrigerant condenser compressor from being Snap Disk damaged by excessive high pressure in the Movable Point high-pressure line of the refrigeration cycle. Stationary Point The switch is normally closed. The snap disk Terminal responds to the variations in pressure and, if Case... -
Page 25: Electrical System
Operation Section 5. ELECTRICAL SYSTEM 5.1 Circuit Diagram CONTROL CIRCUIT RTS2 CTS3 CTS2 CTS1 EWTS RTS1 HPRS FLTS Fire Output Millivolt Alarm Signal Thermostat Input C4 G4 CN17 CN20 CN19 CN10 CN11 CN14 CN13 CN12 DIP SWITCH CN18 Power Supply Circuit Module AC 208/230 V... -
Page 26: Control Box
Operation Section 5.2 Control Box RB: Relay Board IND: Inductor Coil TB1: Terminal Block 1 NF: Noise Filter TB2: Terminal Block 2 ILL00284-00... -
Page 27: Relay Board
Operation Section 5.3 Relay Board • The relay board controls components such as the compressor and fan motor based on both signals received from the WMC or MWT, as well as signals from various sensors. The relay board is equipped with a compressor control device called the “STI module”. The relay board also contains fuses and a DIP switch. - Page 28 Operation Section (2) DIP switch configuration and setting • The controller of the unit is equipped with DIP switches that default in the OFF position. The DIP switch can be set to configure the following functions. DSW1 DSW2 DSW3 DSW4 I003192 Switch Switch...
-
Page 29: Compressor Motor
Operation Section 5.4 Compressor Motor • This unit uses an inverter-controlled DC compressor. The compressor motor is operated by three-phase voltage outputted from the STI module on the relay board. Specifications: - Rated Voltage: DC 220 V - Rated Output: 1380 W 5.5 Compressor Overload Relay •... -
Page 30: Temperature Thermistor
Operation Section 5.7 Temperature Thermistor • The temperature thermistor detects temperature as a resistance value. I001695 Specification Symbol Denomination Characteristic Detect “SHORT” Detect “OPEN” RTS1 WMC room thermistor 8 k ohmat 77 °F (25 °C) 181 °F (83 °C) or higher -29 °F (-34 °C) or less Evaporator inlet air RTS2... -
Page 31: Connection And Setting
Operation Section 6. CONNECTION AND SETTING WARNING • Disconnect power supply from the unit before performing any service. Beware that some residual voltages may remain in the unit immediately after the power is disconnected. 6.1 Power Supply Requirements • This unit requires a single-phase 208/230 V, 60 Hz power supply to operate. •... -
Page 32: Wall Mounted Controller (Wmc) Connection
Operation Section 6.2 Wall Mounted Controller (WMC) Connection • This unit is equipped with terminals for connection to the supplied WMC. Connection Table Unit Terminal Wall Mounted Unit Controller Terminal No. Wire No. (Color) P (Red) C4 (White) G4 (Black) Shield Conductor Ground Screw (Green) - Page 33 Operation Section For WMC supplied with the CMW30 serial number from 0113XXXXCW3 to present • If the reading of the room temperature value is not accurate, adjustment can be done by setting the DIP switch located inside the WMC using the table shown below as reference.
-
Page 34: Field-Supplied Millivolt Wall Thermostat (Mwt) Connection
Operation Section 6.3 Field-Supplied Millivolt Wall Thermostat (MWT) Connection • This unit is equipped with terminals for connection to the MWT. The MWT can be installed for convenient access in any room. - Use with a single or multi-stage system wall thermostat. Thermostat type: Millivolt system - Most wall thermostats provide these basic functions: Fan Mode: On/Auto (Selects the desired fan mode.) -
Page 35: Warning Signal Connection (Output Signal Terminal L+ And L-)
Operation Section 6.4 Warning Signal Connection (Output Signal Terminal L+ and L-) • The unit is equipped with a warning signal output relay type (Form-C, normal open dry contact) that can be used to monitor the failure condition. • The relay contactor is closed when the self-diagnostic codes are displayed on the WMC and indicated by LED on the relay board. -
Page 36: Fire Alarm Control Panel Connection (Input Signal Terminal E+ And E-)
Operation Section 6.5 Fire Alarm Control Panel Connection (Input Signal Terminal E+ and E-) • The unit is equipped with a normal open input signal that can be connected directly from the fire alarm control panel. When receiving the signal from the fire alarm control panel, the unit turns off and does not turn back on until it has been reset. -
Page 37: Operation
Operation Section 7. OPERATION 7.1 Wall Mounted Controller (WMC) • The WMC for this unit should be mounted within the room close to the return air grill to provide convenient system control. LCD Display Control Panel 4.8 in (120 mm) 4.8 in (120 mm) 0.6 in (15 mm) ILL00530-00... - Page 38 Operation Section LCD Display I003164 COOL or FAN ONLY Illuminates to indicate COOL on or FAN ONLY on. RUN or AUTO Illuminates to indicate fan mode set to RUN or AUTO. HI or LO Illuminates to indicate fan speed set to High or Low. Room temperature Illuminates temperature in either Fahrenheit (°F) or Celsius (°C).
-
Page 39: Operational Status Display Control (Only When Connected With Wmc)
Operation Section 7.2 Operational Status Display Control (Only When Connected With WMC) • The operational status of each functional part can be displayed while the unit is running. (1) Display method • Press and hold the “”, “”, and “FAN MODE” buttons simultaneously for 3 seconds. •... -
Page 40: Self-Diagnostic Code Display Operation And Control
Operation Section 7.3 Self-Diagnostic Code Display Operation and Control (1) When connected with WMC • Self-diagnostic codes and “CHECK” are displayed on the LCD display of the WMC. Switching the self-diagnostic code display mode • The self-diagnostic code display can be switched between user mode and service mode. -
Page 41: Self-Diagnostic Code Records Display Operation (Only When Connected With Wmc)
Operation Section 7.4 Self-Diagnostic Code Records Display Operation (Only When Connected With WMC) • The unit power on time, compressor operation time, and self-diagnostic codes can be displayed on the WMC when it is connected to the unit. The unit power on time and compressor operating time can be stored up to 65535 hours (automatically cleared to 0 hour and start counting). - Page 42 Operation Section (2) Exiting the self-diagnostic code records display • To exit the self-diagnostic code records display, press the "RESET" button, or do not operate the system for 1 minute.
-
Page 43: Test Mode
Operation Section 7.5 TEST Mode • Test operation can be performed using the test mode. (1) Test operation • Set the unit to standby mode, make sure the STOP switch on the unit is in the OPERATE position, and move the DIP switch 3-1 to the ON position. The unit will automatically turn on and operate at the following conditions. -
Page 44: Compressor Operation
Operation Section 7.6 Compressor Operation (1) Startup speed control • The compressor operates at 40 rps for 120 Start of seconds after cooling operation begins. Once Compressor Operation the refrigeration cycle stabilizes, the inverter 120 sec controls compressor speed. Transition to Normal Control Time I003169... -
Page 45: Evaporator Fan Motor Operation
Operation Section 7.8 Evaporator Fan Motor Operation • The evaporator fan motor is controlled by signals from the WMC or MWT. (1) When the WMC is connected • ON/OFF control and fan speed are determined by the WMC settings. Fan motor settings - AUTO: The fan motor turns ON when the compressor is ON, and OFF when the compressor is OFF. -
Page 46: Anti-Frost Control
Operation Section 7.10 Anti-Frost Control • Anti-frost controls activate in accordance with the evaporator pipe inlet thermistor (CTS2) temperature in order to turn the compressor on and off, and prevent a decrease in cooling performance resulting from a buildup of frost on the evaporator. •... -
Page 47: Troubleshooting
Repair Section 8. TROUBLESHOOTING WARNING • Disconnect power supply from the unit before performing any service. Beware that some residual voltages may remain in the unit immediately after the power is disconnected. 8.1 Troubleshooting • Before troubleshooting the system, the following inspection should be performed. (1) Inspection of power source voltage •... -
Page 48: Self-Diagnostic Codes
Repair Section 8.2 Self-Diagnostic Codes • Self-diagnostic codes are displayed on the WMC and indicate by LED on the relay board under the following conditions. Refer to the troubleshooting chart on page 53 to 57 for the remedies. • LED on the relay board indicates self-diagnostic codes for the MWT under the following conditions. - Page 49 Repair Section Self-Diagnostic Relay Board Warning Code LED (Red turns on) Alarm Possible Cause Signal Detection Contents Pattern User Service Output Mode Mode When a fan motor speed of Evaporator fan motor 50 rpm or less is detected locked four times within 10 seconds after the fan motor is started.
- Page 50 Repair Section Relay Board Warning Self-Diagnostic Alarm LED (Red turns on) Possible Cause Signal Detection Contents Pattern Code Output When an evaporator refrigerant inlet thermistor temperature at or below 26.5 °F (-3 °C) is detected during Freezing abnormality compressor operation.
- Page 51 Repair Section Alarm clear method • Self-diagnostic codes are not displayed for the MWT. To identify the cause, check the LED on the relay board and refer to the charts on page 48 to 50. Self-Diagnostic Alarm Clear Method Code Possible Cause User Service...
- Page 52 Repair Section Self-Diagnostic Alarm Clear Method Code Possible Cause User Service Wall Mounted Controller (WMC) Millivolt Wall Thermostat (MWT) Mode Mode STI module input over current Power device temperature abnormality Press RESET button, turn off DC voltage abnormality the circuit breaker, then turn on Reset the power from the circuit Power device damage the circuit breaker and press...
-
Page 53: Troubleshooting Chart
Repair Section 8.3 Troubleshooting Chart • To accurately troubleshoot the problem, it is important to carefully confirm the nature of the problem. Condition Check Area Possible Cause Remedy Unit does not operate. 1. Voltage Power failure. Repair power supply. Turn the circuit breaker on. 2. - Page 54 Repair Section Self-Diagnostic Condition Codes Buzzer (WMC) Possible Cause Remedy Pattern Unit does User Service not operate. Mode Mode Drain hose is clogged Remove any blockage or excessive (for optional condensate pump). kinks preventing air flow. RESET the controller Drain hose trap position is too Improve hose installation.
- Page 55 Repair Section Self-Diagnostic Condition Codes Buzzer (WMC) Possible Cause Remedy Pattern Unit does User Service not operate. Mode Mode Defective RTS1 thermistor Replace the WMC. (short or open). Loose RTS2 thermistor Reconnect the RTS2 thermistor and connection. check the connection. RESET the controller Defective RTS2 thermistor Replace the RTS2 thermistor.
- Page 56 Repair Section Self-Diagnostic Condition Codes Buzzer (WMC) Possible Cause Remedy Pattern Unit does User Service not operate. Mode Mode Relay board communication Check all the wire connections on the error occurs for 40 seconds. relay board. RESET the controller If the error still occurs, replace the relay board.
- Page 57 Repair Section Self-Diagnostic Condition Codes Buzzer (WMC) Possible Cause Remedy Pattern Unit does User Service not operate. Mode Mode Excessive current from the RESET the controller twice or three power source to the STI times. If the error still occurs, replace module.
- Page 58 Repair Section Condition Check Area Possible Cause Remedy Insufficient Cooling Air is not Compressor start delay (120 Compressor starts after 120 seconds cool. seconds) is activated. automatically. Freeze protection is Compressor starts automatically when displays activated. evaporator outlet pipe temperature (CTS3) normally.
-
Page 59: Initialize Fan Motor
Repair Section 8.4 Initialize Fan Motor • Initialize the motor to correct the motor speed when any of the following components are replaced: evaporator fan motor, relay board. (1) Operation method 1) With the power supply OFF, turn DIP switch 2-1 ON. 2) Turn the power supply ON. - Page 60 Repair Section Initialize Fan Motor TEST Mode DSW1 DSW2 DSW3 DSW4 I003178...
-
Page 61: Basic Inspection
Repair Section 8.5 Basic Inspection • Perform the following inspection before disassembly. (1) Inspection of plate fins • To inspect the plate fins of the evaporator, the air filter must be removed. After removal of the air filters, inspect the plate fins for any dirt, dust, lint, or debris that may have caused insufficient cooling performance of the unit. -
Page 62: Inspection Of Compressor
Repair Section 8.6 Inspection of Compressor (1) Compressor motor • Measure resistance across the terminals of the compressor motor. (All terminals must be disconnected from the unit.) • Between terminals {at 68 °F (20 °C)} - U-V Approx. 0.64 ohm ... -
Page 63: Inspection Of Electronic Expansion Valve Control Coil
Repair Section 8.7 Inspection of Electronic Expansion Valve Control Coil • Measure resistance across the connector pins of the electronic expansion valve control coil. • Between connector pins {at 68 °F (20 °C)} - Blue-Red Approx. 46 ohm - Amber-Red Approx. 46 ohm - Yellow-Red Approx. -
Page 64: Inspection Of Refrigeration System
Repair Section 8.10 Inspection of Refrigeration System • In most cases, the cause for insufficient cooling is a clog in the system, a leakage, or an incorrect amount of refrigerant. In such cases, inspect the system according to the following procedure. (1) Clogged refrigeration system •... -
Page 65: Inspection Of Water System
Then Shut-off Valve disconnect the water pipes. Drain Port 2) Connect tap water to the water inlet of the unit. CMW30 Connect water outlet of the unit to drain. Unit Drain Plug ILL00437-00... - Page 66 Repair Section 3) Take out the twenty-one (21) screws, and then Top Panel remove the top panel. Screws (6) Screws (5) Screws (4) Top Panel Screws (6) ILL00242-00 4) Open the faucet handle to supply water. 5) Insert screwdrivers under both sides of the valve spring guide of the water regulating valve and lift upwards to flush.
-
Page 67: Parts Construction
Repair Section 9. DISASSEMBLY WARNING • Disconnect power supply from the unit before performing any service. Beware that some residual voltage may remain in the unit immediately after the power is disconnected. 9.1 Parts Construction Evaporator Inlet Air Right Panel Thermistor (RTS2) Top Panel Evaporator Pipe Inlet... -
Page 68: Disassembly
Repair Section 9.2 Disassembly 1) Loosen the bottom screw. Service Panel 2) Take out the nine (9) screws, and then remove the service panel. Screws (9) Bottom Screw (1) ILL00241-00 3) Disconnect the two (2) power supply lines from the terminal, and disconnect the ground line. Terminal CAUTION •... - Page 69 Repair Section 5) Take out the two (2) screws, and then remove the panel. 6) Disconnect the connector. Connector Screws (2) Panel ILL00243-00 7) Loosen the bottom screw. Front Panel 8) Take out the fifteen (15) screws, and then remove Screws (3) the front panel.
- Page 70 Repair Section 11) Take out the four (4) screws, and then remove the AC fan motor. AC Fan Motor Screws (4) ILL00348-00 12) Disconnect the two (2) connectors from the AC fan motor. Connectors (2) ILL00349-00 13) Take out the four (4) screws. 14) Loosen the two (2) bottom screws.
-
Page 71: Removal Of Evaporator Fan Assembly
Repair Section 9.3 Removal of Evaporator Fan Assembly Frame Ring Fan Motor Set Screw Frame I003127 < NOTE > Initialization is required after replacing the evaporator fan motor. (See page 59) 1) Take out the one (1) screw, and the four (4) nuts. Screw (1) Nuts (4) Evaporator Fan... - Page 72 Repair Section 3) Take out the six (6) screws, and then remove the Set Screw ring. Loosen the set screw with an Allen wrench Ring Set Screw and remove the fan. Screws (6) I003130 4) When assembling the fan, ensure that the screws 0.12 in (3 mm) 0.12 in (3 mm) align with the motor axis positioning holes.
-
Page 73: Removal Of Electrical Components
Repair Section 9.4 Removal of Electrical Components Relay Board and Bracket Assembly Ground Bolt Terminal Block 1 Stop Switch AC Fan Motor Noise Filter Ground Bolt Terminal Block 2 Inductor Coil Stay ILL00248-00... - Page 74 Repair Section (1) Relay board to Wall Mounted to Compressor to Millivolt Controller Overlord Relay Thermostat to Evaporator Pipe Inlet Thermistor and to High-Pressure to Float Evaporator Outlet Switch Switch to Electronic to Stop to Evaporator Thermistor Expansion Valve Switch Inlet Air Thermistor DIP Switch...
- Page 75 Repair Section Replacement of Relay Board 1) Attach the relay board with the six (6) screws. Always tighten the ground line for the relay board together with the bottom right screw. Make sure that the DIP switches on the new relay board are all set to the off position.
-
Page 76: Refrigeration And Water System Repair
Repair Section 10. REFRIGERATION AND WATER SYSTEM REPAIR 10.1 Repair of Refrigeration and Water System • In case there is a leak, obstruction, or problem in the refrigeration and water system of this unit, replace or repair the part in question. After replacing any component, all connections must be brazed except the flare connections of the water regulating valve. - Page 77 Repair Section (4) Use of dry nitrogen gas • During brazing, the inside of the pipe undergoes an oxidative reaction due to the brazing flame. Introduce dry nitrogen gas (0.27 gal/min (1 L/min); adjust with the flow regulator) through the pinch-off tube of the refrigerant.
-
Page 78: Removal Of Refrigeration And Water System Components
Repair Section 10.2 Removal of Refrigeration and Water System Components WARNING • Before replacing any refrigeration and water system component, recover the refrigerant using standard recovery procedures and equipment, and drain the water from the unit. • When recovering the refrigerant, use the pinch-off tubes at the low pressure side (tube 1) and high pressure side (tube 2) as shown in the figure below. - Page 79 Repair Section 1) Disconnect four brazing points (A ~ D) as shown. When brazing, cover the area E with a wet cloth to prevent damage. ILL00352-00 2) Remove two (2) nuts from the frame. Then remove the water cooled condenser. Nuts (2) ILL00353-00 (2) Removal of water regulating valve...
-
Page 80: Charging The System With R-410A Refrigerant
Repair Section 10.3 Charging the System with R-410A Refrigerant • Always ensure that the refrigeration system has been properly evacuated before charging with the specified amount of R-410A. • Equipment is for R-410A only. • Liquid charge (no gas charge). •... - Page 81 Repair Section (1) Connection of gauge manifold 1) Properly remove the crushed end of the pinch-off tubes at the high-pressure side and the low Charging Hose Side pressure side of the refrigerant cycle with a pipe Refrigerant cutter. Cycle Side 2) Fit the process tube fitting to the pinch-off tube on both sides.
- Page 82 Repair Section (3) Checking vacuum 1) Leave the high-pressure valve and the low- Valve Setting Leave valves closed for 5 pressure valve of the gauge manifold closed for 5 minutes or more. Pointer of Closed Closed pressure gauge returning to minutes or more, and confirm that the gauge zero indicates there is a leak.
- Page 83 Repair Section (4) Checking for gas leaks 1) Remove the charging hose (green) from the Valve Setting vacuum pump, and connect the hose to the Closed Closed Air Purging refrigerant cylinder (R-410A). Open The Valve 2) Loosen the nut on the gauge manifold side of the of Refrigerant Cylinder charging hose (green).
- Page 84 Repair Section (5) Evacuation (repeat) 1) Close the valve of the refrigerant cylinder. Then Valve Setting remove the charging hose (green) from the Gauge Closed Open Closed Closed 30 inHg (100 k Pa) or larger refrigerant cylinder, and connect it to the Low-Pressure refrigerant recovery machine.
-
Page 85: Refrigerant Charging Work
Repair Section 10.4 Refrigerant Charging Work (1) Refrigerant charging 1) Remove the charging hose (green) from the Valve Setting vacuum pump, and connect it to the refrigerant Closed Closed Air Purging cylinder (R-410A). Open The Valve 2) Loosen the nut on the gauge manifold side of the of Refrigerant Cylinder charging hose (green). - Page 86 Repair Section (2) Removal of gauge manifold 1) Crimp the pinch-off tube with a pinch-off tool. Pinch-Off Tool 2) Remove the gauge manifold and the process to Gauge Manifold Side tube fitting. Crush the end of the pinch-off tube. Pinch-Off Tube 3) Braze the end of the pinch-off tube.
-
Page 87: Reassembly
Repair Section 11. REASSEMBLY 11.1 Reassembly of Unit • Reassemble the unit in the reverse order of removal. Described below are the parts that require special care in reassembling the unit. Perform all wiring or rewiring as referenced in the wiring diagram. - Page 88 P/N: SV0076-01 Second Issue: January 2013...
Need help?
Do you have a question about the CMW30 and is the answer not in the manual?
Questions and answers