Table of Contents
Advertisement
Available languages
Available languages
Quick Links
π
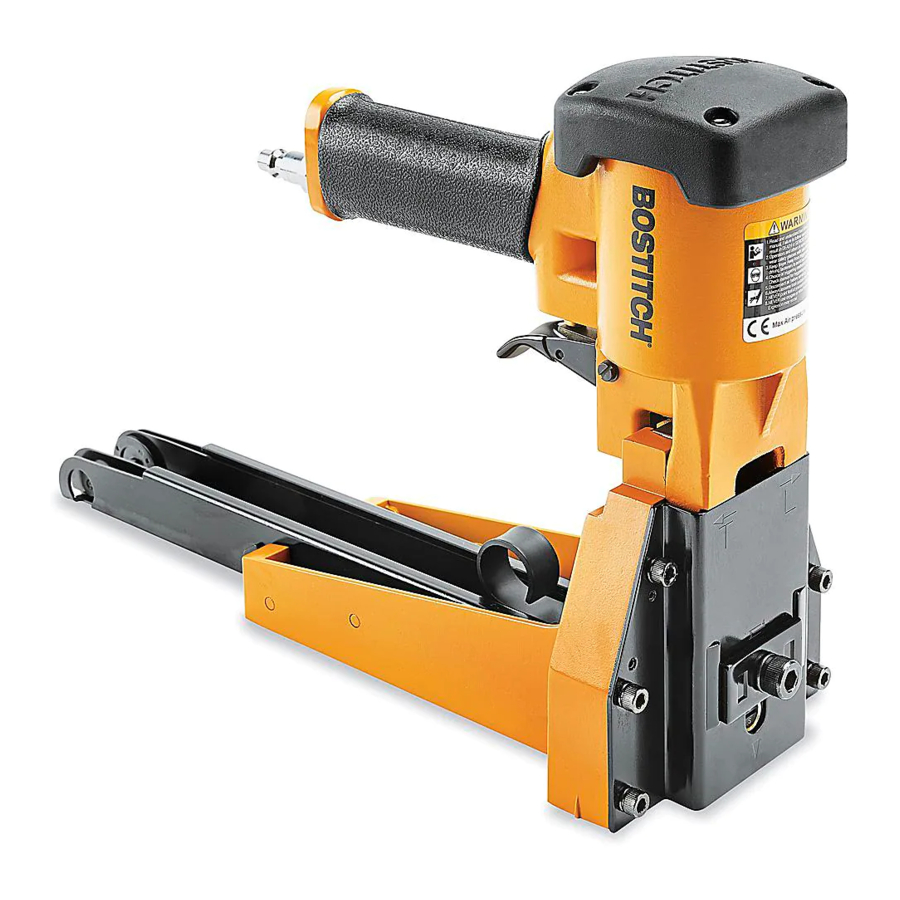
H-3530
BOSTITCH
ROLL FEED
®
PNEUMATIC STAPLER
LOADING THE MAGAZINE
1.
Disconnect from air supply.
WARNING! When loading the stapler, never
place a hand or any part of the body in the
fastener discharge area of the stapler. Never
point the stapler at anyone. Do not pull the
trigger or depress the trip as accidental
actuation may occur, possibly causing injury.
2. Open the magazine – Press cover slightly to unlatch
from magazine and swing cover open (See Figure 1).
3. Check Staple Leg Length – Adjustment is provided
in the H-3530 for different staple leg lengths. Spacers
must be changed to use 1/2" (13mm) staples.
a. To adjust machine for leg length, loosen set screw
and turn pivot pin 180º with a screwdriver to the
desired adjustment as noted. Tighten set screw
(See Figure 2).
Screw
Driver
Pivot Pin
Front Bracket
PAGE 1 OF 15
1-800-295-5510
uline.com
OPERATION
Figure 1
Magazine
Figure 2
Set
Screw
Pour le français, consulter les pages 11-15.
b. To change shallow clinchers (see specifications
chart for part numbers), remove screws and front
bracket to provide access to clinchers. Change
one at a time to prevent reversing parts. Also part
#45 (See Figure 3) will need to be changed to
specified spacer in the table.
c. To adjust coil guides, loosen 4 screws (See Figure 4).
Coil Side Guides
Magazine Boss
1. For 1/2" (13mm) staples: push guides forward
and in as far as they go; tighten screws.
2. For 5/8" (16mm) staples: push guides to rear
with screws in center of slot; tighten screws.
3. For 3/4" (19mm) staples: push guides forward
and outwards as far as they go; tighten screws.
Para Español, vea páginas 6-10.
Figure 3
Figure 4
0914 IH-3530
Advertisement
Table of Contents

Related Manuals for U-Line BOSTITCH H-3530


Summary of Contents for U-Line BOSTITCH H-3530
- Page 1 Para Español, vea páginas 6-10. Pour le français, consulter les pages 11-15. π H-3530 1-800-295-5510 uline.com BOSTITCH ROLL FEED ® PNEUMATIC STAPLER OPERATION LOADING THE MAGAZINE b. To change shallow clinchers (see specifications chart for part numbers), remove screws and front Disconnect from air supply.
- Page 2 OPERATION CONTINUED LOADING THE MAGAZINE CONTINUED USING THE STAPLER 4. Load the coil of staples – Place coil of staples into Stapling – Grasp handle with one hand. Position on magazine. Feed front end of coil into the side and box in line with the desired staple location.
-
Page 3: Safety Warnings
SAFETY WARNINGS OPERATION ANSI Z87.1 and provide both frontal and side protection. WARNING! Always handle the stapler with care: NOTE: Non-side shielded spectacles and face 1. Never engage in horseplay. 2. Never pull shields do not provide adequate protection. the trigger unless nose is directed toward the work. -
Page 4: Maintenance
MAINTENANCE REPLACEMENT PARTS AIR SUPPLY - PRESSURE AND VOLUME • Bostitch replacement parts are recommended. Do • Air volume is as important as air pressure. The air not use modified parts or parts which will not give volume supplied to the stapler may be inadequate equivalent performance to the original equipment. -
Page 5: Troubleshooting
TROUBLESHOOTING OPERATING ISSUE CAUSES RECOMMENDATIONS Trigger valve housing leaks air O-Ring cut or cracked Replace O-Ring Trigger valve stem leaks air O-Ring/seals cut or cracked Replace trigger valve assembly Frame/piston rod leaks air O-Ring Replace O-Ring Frame/cap leaks air Damaged O-Ring Replace O-Ring Loose cap screws Tighten and recheck... - Page 6 π H-3530 800-295-5510 uline.mx BOSTITCH ® ENGRAPADORA NEUMÁTICA DE ROLLO FUNCIONAMIENTO CARGUE EL CARTUCHO b. Para cambiar los remachadores superficiales (consulte el cuadro de especificaciones para Desconecte del suministro de aire. ver los números de partes) retire los pernos y el soporte frontal para de acceder a los ¡ADVERTENCIA! Al cargar la engrapadora, remachadores.
- Page 7 CONTINUACIÓN DE FUNCIONAMIENTO CONTINUACIÓN DE CARGUE EL CARTUCHO USE LA ENGRAPADORA Engrapado - Tome el asa con una mano. Colóquela 4. Carga del rollo de grapas - Coloque el rollo de grapas en el cartucho. Pase el extremo delantero en la caja alineando con la ubicación deseada de la del rollo al interior de las guías lateral y superior.
-
Page 8: Advertencias De Seguridad
ADVERTENCIAS DE SEGURIDAD OPERACIÓN Nacionales (American National Standards Institute), ANSI Z87.1 y proveer protección frontal y lateral. ¡ADVERTENCIA! Siempre manipule la engrapadora con cuidado: 1. Nunca juegue NOTA: Los lentes o caretas sin protección lateral con la engrapadora. 2. Nunca hale el gatillo no proporcionan una protección adecuada. -
Page 9: Mantenimiento
MANTENIMIENTO PARTES DE REPUESTO SUMINISTRO DE AIRE - PRESIÓN Y VOLUMEN • Se recomienda usar partes de repuesto Bostitch. • El volumen de aire es tan importante como la presión. El volumen de aire suministrado a la engrapadora No use partes modificadas ni componentes que puede ser inadecuado debido a conectores y no tengan un rendimiento equivalente al equipo mangueras de tamaño inferior o por los efectos... -
Page 10: Solución De Problemas
SOLUCIÓN DE PROBLEMAS PROBLEMA DE OPERACIÓN CAUSAS RECOMENDACIONES La carcasa de la válvula del Anillo-O roto o agrietado Remplace el anillo-O gatillo fuga aire El vástago de la válvula del gatillo Anillo-O/sellos rotos o agrietados Remplace el ensamblado de la válvula de disparo fuga aire El armazón/vástago del pistón Anillo-O... - Page 11 π H-3530 1-800-295-5510 uline.ca BOSTITCH – AGRAFEUSE PNEUMATIQUE AVEC ROULEAU D' A LIMENTATION UTILISATION CHARGEMENT DU MAGASIN b. Pour changer les rivets de faible profondeur (voir le tableau des spécifications pour les numéros Déconnectez l'alimentation d'air. de pièce), retirez les vis et le support avant pour accéder aux rivets.
- Page 12 OPERATION CONTINUED UTILISATION DE L'AGRAFEUSE CHARGEMENT DU MAGASIN, SUITE 4. Chargez le rouleau d'agrafes : Déposez un rouleau Agrafage : Saisissez la poignée avec une main. Positionnez d'agrafes dans le magasin. Enfilez l'extrémité avant du la boîte en ligne avec l'emplacement d'agrafe voulu. Il y'a rouleau dans les guides latéraux et supérieur.
-
Page 13: Avertissements De Sécurité
AVERTISSEMENTS DE SÉCURITÉ UTILISATION REMARQUE : Les lunettes et les masques protecteurs sans écrans latéraux n'offrent pas à AVERTISSEMENT! Manipulez toujours l'agrafeuse eux-seuls une protection adéquate. ARRÊT avec soin : 1. Ne vous chamaillez jamais. 2. ALIMENTATION D'AIR ET RACCORDS N'appuyez jamais sur la détente si le nez n'est pas orienté... -
Page 14: Entretien
ENTRETIEN PIÈCES DE RECHANGE PRESSION ET VOLUME D'ALIMENTATION D'AIR • Il est recommandé d'utiliser les pièces de rechange • Le volume d'air est aussi important que la pression BOSTITCH. N'employez pas des pièces modifiées d'air. Le volume d'air fourni à l'agrafeuse peut être ou des pièces qui n'offriront pas une performance inadéquat en raison de raccords et de conduites équivalente à... -
Page 15: Dépannage
DÉPANNAGE PROBLÈME DE FONCTIONNEMENT CAUSES RECOMMANDATIONS Fuite d'air dans le boîtier de la soupape de Joint torique coupé ou fissuré Remplacez le joint torique détente Joints toriques/joints d'étanchéité coupés ou Remplacez la soupape de la détente Fuite d'air de la tige de soupape de la fissurés détente Fuite d'air du cadre/tige de piston...
Need help?
Do you have a question about the BOSTITCH H-3530 and is the answer not in the manual?
Questions and answers