Table of Contents
Advertisement
Available languages
Available languages
Quick Links
Advertisement
Table of Contents

Related Manuals for Crivit 271503


Summary of Contents for Crivit 271503
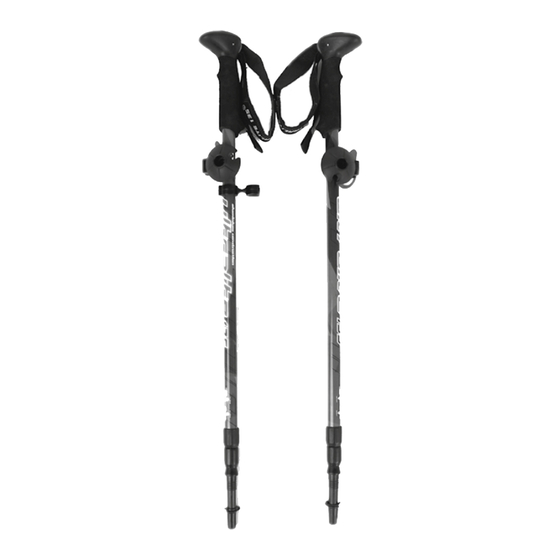
- Page 1 BASTONES DE SENDERISMO DE ALUMINIO BASTONI DA TREKKING BASTONES DE SENDERISMO DE ALUMINIO Instrucciones de uso BASTONI DA TREKKING Istruzioni d‘uso ALUMINIUM HIKING POLES Instructions for use ALUMINIUM-TREKKINGSTÖCKE Gebrauchsanweisung IAN 271503...
-
Page 2: Lista De Piezas
¡Enhorabuena! Con la compra de este artículo ha adquirido un producto de excelente calidad. Antes de utilizarlo por primera vez, familiarícese con él leyendo atentamente las siguientes instrucciones de uso. Utilice el pro- ducto según lo indicado aquí y solo para los ámbitos de uso descritos. Conserve estas instrucciones de uso para futuras consultas y, en el caso de que en algún momento entregara el producto a terceros, no se olvide de adjuntar también las presentes instrucciones. - Page 3 Ajuste de la longitud del bastón Sus bastones de trekking son ajustables a una altura de 66 - 135 cm y deben regularse según su tamaño corporal y el modo de aplicación. Cerrar/abrir (fig. B) El sentido de rotación ya está indicado en la parte superior del bastón de trekking.
- Page 4 • Andar sobre suelo inclinado (fig. F) Para ello, hay que acortar el bastón superior y alargar el inferior para que ambos puedan ofrecer apoyo. • Subidas/bajadas (fig. G/H) En las subidas, hay que acortar los bastones para que ofrezcan un apoyo agradable.
- Page 5 Información útil para el uso • Use guantes cuando haga frío. • Para excursiones largas, debe asegurarse de llevar consigo suficiente bebida (eventualmente cinturón porta bebidas o mochila porta bebi- das). • Lleve ropa adecuada al clima. Soporte de combinación para taco de asfalto &...
-
Page 6: Limpieza Y Cuidados
Esto es válido también para las piezas reemplazadas o reparadas. Las reparaciones realizadas una vez transcurrido el periodo de garantía se deberán pagar. IAN: 271503 Servicio España Tel.: 902 59 99 22 (0,08 EUR/Min. -
Page 7: Lista Dei Componenti
Congratulazioni! Con il vostro acquisto avete scelto un prodotto altamente qua- litativo. Familiarizzate con il prodotto prima di prenderlo in funzione. Leggete attentamente le seguenti istruzioni d´uso. Utilizzate il prodotto soltanto per lo scopo previsto e i campi d´impiego indicati. Conservate bene queste istruzioni. - Page 8 Regolazione lunghezza dei bastoncini I bastoncini da trekking sono regolabili in altezza da 66 a 135 cm e dovrebbero essere regolati in base alla grandezza corporea dell’utente. Chiudere/Aprire (fig. B) Il senso di rotazione per l‘apertura e la chiusura è indicato sulla parte superiore del bastoncino da trekking.
- Page 9 • Superfici oblique (fig. F) In questo caso bisogna accorciare la parte superiore del bastoncino e allungare quella inferiore di modo che entrambe possano sostenere l’utente in modo adeguato. • Salita/Discesa (fig. G/H) In caso di salita i bastoncini devono essere accorciati per garantire un sostegno piacevole.
-
Page 10: Informazioni Utili
Informazioni utili • Indossare guanti in caso di tempo freddo. • Per viaggi molto lunghi, è necessario assicurarsi di aver abbastanza da bere (eventualmente porta borraccia o zainetto). • Indossare l’abbigliamento adeguato in base al tempo. Supporto combinato per pad per asfalto &... -
Page 11: Pulizia E Cura
Lo stesso vale anche per le parti sostituite o riparate. Le riparazioni dopo la scadenza della garanzia verranno effettuate a pagamento. IAN: 271503 Assistenza Italia Tel.: 0236003201 E-Mail: deltasport@lidl.it Assistenza Malta Tel.:... -
Page 12: Parts List
Congratulations on purchasing this high-quality product. Be sure to familiarise yourself with the assembly instructions prior to use. Please take the time to carefully read through the following assembly instructions and safety notes. Only use the product as described and for the intended use. - Page 13 Adjusting the pole length Your trekking poles are height adjustable from 66 - 135cm and should be adjusted to your height and the type of use. Locking/opening (Fig. B) The direction for opening and locking is already indicated at the top of the trekking pole.
- Page 14 • Walking traverses (Fig. F) Here the upper pole must be shortened and the low pole extended so both pieces can provide support. • Climbing (Fig. G/H) Ascending the poles must be shortened to present a comfortable support. Descending the poles must be extended so you are in a comfortable upright position whilst supported.
- Page 15 Helpful hints for use • Wear gloves in cold weather. • Be sure to take sufficient liquids on extended outings (if necessary use a hydration belt or hydration pack). • Dress appropriate for the weather. Combo bracket for asphalt pad & basket Use the combo bracket to store the asphalt pad and the trekking pole basket.
-
Page 16: Care And Cleaning
Any repairs under the warranty, statutory guarantees or through goodwill do not extend the warranty period. This also applies to replaced and repaired parts. Repairs after the warranty are subject to a charge. IAN: 271503 Service Great Britain Tel.: 0871 5000 720 (£... -
Page 17: Technische Daten
Herzlichen Glückwunsch! Mit Ihrem Kauf haben Sie sich für ein hochwertiges Produkt ent- schieden. Machen Sie sich vor der ersten Verwendung mit dem Produkt vertraut. Lesen Sie hierzu aufmerksam die nachfolgende Gebrauchs- anweisung. Benutzen Sie das Produkt nur wie beschrieben und für die angegebenen Einsatzbereiche. - Page 18 Einstellen der Stocklänge Ihre Trekkingstöcke sind höhenverstellbar von 66 - 135 cm und sollten nach Ihrer Körpergröße und Art der Anwendung eingestellt werden. Schließen/Öffnen (Abb. B) Die Drehrichtung zum Öffnen und Schließen ist bereits auf dem oberen Teil des Trekkingstocks angegeben. Halten Sie das obere Stocksegment Öffnen mit einer Hand fest, die unteren...
- Page 19 • Laufen auf Querungen (Abb. F) Hierbei muss der obere Stock verkürzt und der untere Stock verlängert werden, sodass beide eine Unterstützung bieten können. • Auf-/Abstieg (Abb. G/H) Bergauf müssen die Stöcke so verkürzt werden, dass sie eine angenehme Stütze darstellen. Bergab sollten die Stöcke so weit verlängert werden, dass Sie beim Aufstützen eine bequeme, aufrechte Körperhaltung haben.
- Page 20 Nützliche Hinweise zur Benutzung • Tragen Sie bei kaltem Wetter Handschuhe. • Bei längeren Touren sollten Sie sicherstellen, ausreichend Getränke (evtl. Trinkgürtel oder Trinkrucksack) dabei zu haben. • Tragen Sie dem Wetter entsprechende Kleidung. Kombinationshalterung für Asphaltpad & Teller An der Kombinationshalterung können Sie den Asphaltpad und den Trekkingstock-Teller aufbewahren.
-
Page 21: Reinigung Und Pflege
Die Garantiezeit wird durch etwaige Reparaturen aufgrund der Garantie, gesetzlicher Gewährleistung oder Kulanz nicht verlängert. Dies gilt auch für ersetzte und reparierte Teile. Nach Ablauf der Garantie anfallende Reparaturen sind kostenpflichtig. IAN: 271503 Service Deutschland Tel.: 0800-5435111 E-Mail: deltasport@lidl.de Service Österreich... - Page 28 DELTA-SPORT HANDELSKONTOR GMBH Wragekamp 6 D-22397 Hamburg Version: 01/2016 Delta-Sport-Nr.: TR-2329 IAN 271503...
Need help?
Do you have a question about the 271503 and is the answer not in the manual?
Questions and answers