Table of Contents
Advertisement
Quick Links
Advertisement
Table of Contents

Related Manuals for Zaxcom URX50


Summary of Contents for Zaxcom URX50
- Page 1 User Manual Published December 2020 Firmware Version URX-2.21 URX50...
-
Page 3: Table Of Contents
HOME SCREEN ..........................8 MAIN MENU ............................9 ............................ 9 AVIGATING THE ..............................9 REQUENCY ELECT ................................9 CREEN SUB MENUS ............................. 10 ............................... 10 ENU GROUPS ......................10 CCESSING AND NAVIGATING THE MENU GROUPS ........................10 NTERING AND NAVIGATING A SUB MENU ........................... - Page 4 OPERATING FREQUENCIES ....................... 20 UHF A ................................20 UDIO FIRMWARE ............................21 SPECIFICATIONS ..........................22 PRODUCT SUPPORT ......................... 24 ZAXCOM WARRANTY POLICY AND LIMITATIONS ................25...
- Page 5 Press and hold for 2 seconds to power up the URX50. • Press and hold for 4 seconds to power down the URX50 - then pess the MENU key • Press three times quickly to enter or exit the menu groups.
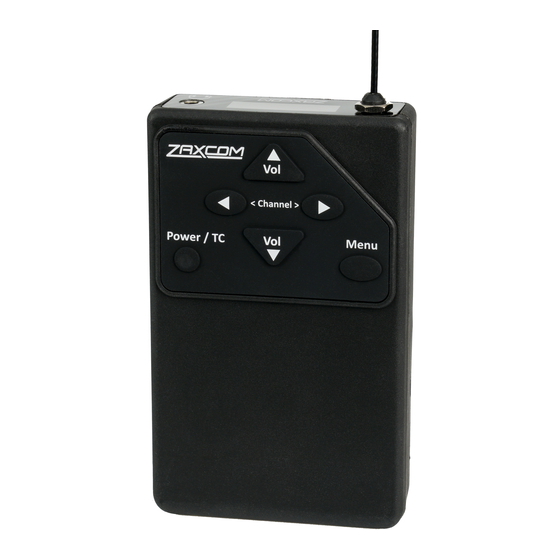
- Page 6 Zaxcom URX50 1. Antenna 2. OLED Display 3. 3.5mm Headphone Jack Please note that this jack acts as the second antenna for diversity reception..
- Page 7 Rear Rear 1. Battery Compartment - The URX50 uses 3 AA batteries and will work with alkaline, NiMH or lithium AA batteries. The bottom of the URX50 has charging contacts so when using NiMH batteries, the batteries can be charged by using Zaxcom’s drop in charger.
-
Page 8: Home Screen
This is the name of the transmitter being received by the URX50. Received Transmitter Record Status This displays the status of the internal recorder of the transmitter being received by the URX50. Stop (STP) Play (PLY) or Record (REC) will be displayed. -
Page 9: Main Menu
STEREO ‘TX NAME’ When the lock screen is landed on a 5 second countdown clock will start. After 5 seconds elapse the URX50 will lock and the menus cannot be accessed, this is to prevent the URX settings from accidentally be changed. -
Page 10: Sub Menus
Channel Preset - Sets the number of preset channels and sets the frequency of each preset channel. • Scan - This is where the URX50 can scan the set RF spectrum. • Audio - This is where the audio functions of the URX50 are set. -
Page 11: Channel Preset Menu
CHANNEL PRESET MENU Number of Presets NUMBER OF PRESETS: 31 From this menu the number of presets that the URX50 will display can be selected. The URX50 can have up to 31 presets. Preset Adjust PRESET 1: 524.3 TX NAME (ON) From this menu each preset frequency can be adjusted by pressing the CH UP and CH DOWN keys. -
Page 12: Scan Menu
After the scan is completed a graphic display of the RF that is present, in the specified range, will be shown. The URX50 will also suggest a clear frequency. That frequency can be accepted by pressing the CH UP key. Or press the CH DOWN key to skip the first chosen frequency and have the URX50 suggest another frequency. -
Page 13: Setting The Scan Range
Setting the Scan Range SCAN LIMIT: ALL 200 512 - 698 The scan range menu sets the frequency range that the URX50 will scan. Pressing the CH UP and CH DOWN keys will cycle through the scanning options. Available Scan Ranges All 200 - All frequencies from 512.0MHz through 698.0MHz will be scanned. -
Page 14: Audio Menu
Zaxcom URX50 Headphone Routing Menu AUDIO MENU Headphone Router HP ROUTER BOTH When receiving a stereo signal, the headphone routing will which signal (Left, Right or Both) will be routed to the headphones. Speaker Enable SPEAKER: ON - Turns on the speaker. -
Page 15: Lanyard Keys
IS LESS THAN 2 This menu sets if transmitters with certain ZaxNet unit codes will not be able to be monitored by the URX50. For example, if this menu is set to 30 any transmitter with a ZaxNet unit code below 30 will not be able to be monitored by the URX50. -
Page 16: Setup Menu
“modulates”, or sends, its signal to the URX50. This setting needs to match the modulation mode that the corresponding transmitter is set to - if the two setting do not match the URX50 will not be able to receive and decode the signal from the transmitter. -
Page 17: Software Update
This is where the URX software is updated from. When in this menu pressing the CH UP key will initiate the update process and the URX50 will wait and search for software that will be transmitted from a Zaxcom transmitter (please refer to the software update section of this manual for more information on how to update the URX). -
Page 18: Hide Frequency Menu
Test Tone TONE : The URX50 can be set to output a test tone from this menu. This is useful to set levels and check routing. Pressing the INC and DEC key will cycle through the different tone settings. OFF - No tone is being outputted. -
Page 19: Name Set
Name Set NAME: 1234 The name menu allows the URX50 to be named which aids in identifying the URX. The maximum name length is 8 characters. Any letter or number can be used and if desired a space can be used. -
Page 20: Operating Frequencies
Zaxcom URX50 Operating Frequencies Operating Frequencies UHF Audio URX50 - L Tuning Range: 500 - 638 MHz URX50 - H Tuning Range: 542 - 698 MHz... -
Page 21: Firmware
URX50 will automatically restart the update process with the start of the next cycle. 7. When the URX50 is done updating the software “SUCCESS . . . PRESS TC TO REBOOT” will be displayed. Please note that it is important that the URX50 is not powered down before this is displayed. -
Page 22: Specifications
Receiver RF Channels: 1 Frequency selection: 20 discrete channels Diversity method: antenna switching RF Modulation: proprietary digital method URX50-L Tuning Range: 500 - 638 MHz URX50-H Tuning Range: 542 - 698 MHz RF Frequency Step: 100 KHz RF Signal Bandwidth: 200 KHz... - Page 23 Zaxcom URX50 Specifications...
-
Page 24: Product Support
Download the latest Firmware from: http://zaxcom.com/support/updates/ Download the latest User Manuals from: http://zaxcom.com/support/updates/ Submit Technical Questions at: http://www.zaxcom.com/submit-a-technical-question Submit information for Repair Services at: http://www.zaxcom.com/support/repairs Join the Zaxcom User Forum at: http://www.zaxcom.com/forum/forum.php Join the Zaxcom Face Book User Group at: https://www.facebook.com/groups/682199065139938/... -
Page 25: Zaxcom Warranty Policy And Limitations
Distributers may sell Product to resellers who then sell Product to end users. Please see below for warranty information or obtaining service. No warranty service is provided unless the Product is returned to Zaxcom Inc. or a Zaxcom dealer in the region where the Product was first shipped by Zaxcom. - Page 27 • Connect the equipment into an outlet on a circuit different from that which the receiver is connected • Consult the dealer or an experienced radio/TV technician for help. Changes or modifications to this equipment not expressly approved by Zaxcom, Inc. could void the user’s authority to operate it.
Need help?
Do you have a question about the URX50 and is the answer not in the manual?
Questions and answers