Table of Contents
Advertisement
Available languages
Available languages
INSTR_810-3810-S.qxd
11/16/07
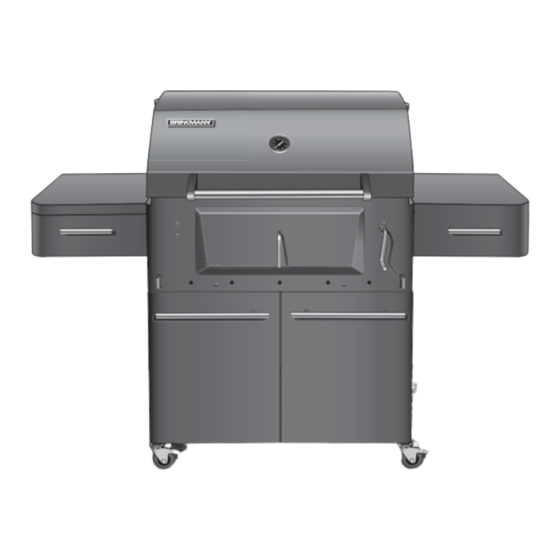
Professional Single Zone
Charcoal Grill
OWNER'S MANUAL / MANUAL DEL PROPIETARIO
HAZARDOUS EXPLOSION MAY RESULT IF THESE WARNINGS AND INSTRUCTIONS ARE IGNORED. READ AND
FOLLOW ALL WARNINGS AND INSTRUCTIONS IN THIS MANUAL TO AVOID PERSONAL INJURY, INCLUDING
SE PUEDE PRODUCIR UNA EXPLOSIÓN PELIGROSA SI SE HACE CASO OMISO A ESTAS ADVERTENCIAS E
INSTRUCCIONES. LEA Y SIGA TODAS LAS ADVERTENCIAS E INSTRUCCIONES EN ESTE MANUAL PARA
EVITAR LESIONES PERSONALES, INCLUSO LA MUERTE, O LOS DAÑOS MATERIALES.
9:58 AM
Page 1
ASSEMBLY AND OPERATING INSTRUCTIONS
INSTRUCCIONES DE ARMADO Y OPERACIÓN
SAVE THIS MANUAL FOR FUTURE REFERENCE
GUARDE ESTE MANUAL PARA REFERENCIA FUTURA
WARNING/ADVERTENCIA
DEATH OR PROPERTY DAMAGE.
NOTICE TO INSTALLER:
LEAVE THESE INSTRUCTIONS WITH THE
GRILL OWNER FOR FUTURE REFERENCE.
AVISO PARA EL
INSTALADOR:
ENTREGUE ESTAS INSTRUCCIONES AL
PROPIETARIO DE LA PARRILLA PARA
REFERENCIA FUTURA.
Advertisement
Table of Contents

Subscribe to Our Youtube Channel
Related Manuals for Brinkmann 810-3810-S


Summary of Contents for Brinkmann 810-3810-S
-
Page 1: Charcoal Grill
INSTR_810-3810-S.qxd 11/16/07 9:58 AM Professional Single Zone Charcoal Grill OWNER’S MANUAL / MANUAL DEL PROPIETARIO ASSEMBLY AND OPERATING INSTRUCTIONS INSTRUCCIONES DE ARMADO Y OPERACIÓN SAVE THIS MANUAL FOR FUTURE REFERENCE GUARDE ESTE MANUAL PARA REFERENCIA FUTURA HAZARDOUS EXPLOSION MAY RESULT IF THESE WARNINGS AND INSTRUCTIONS ARE IGNORED. READ AND FOLLOW ALL WARNINGS AND INSTRUCTIONS IN THIS MANUAL TO AVOID PERSONAL INJURY, INCLUDING SE PUEDE PRODUCIR UNA EXPLOSIÓN PELIGROSA SI SE HACE CASO OMISO A ESTAS ADVERTENCIAS E... -
Page 2: Important Safety Warnings
INSTR_810-3810-S.qxd 11/16/07 9:58 AM IMPORTANT SAFETY WARNINGS WE WANT YOU TO ASSEMBLE AND USE YOUR GRILL AS SAFELY AS POSSIBLE. IS TO ATTRACT YOUR ATTENTION TO POSSIBLE HAZARDS AS YOU ASSEMBLE AND USE YOUR GRILL. WHEN YOU SEE THE SAFETY ALERT SYMBOL, PAY CLOSE ATTENTION TO THE INFORMATION WHICH FOLLOWS! READ ALL SAFETY WARNINGS AND INSTRUCTIONS CAREFULLY •... - Page 3 We advise that a fire extinguisher be on hand. Refer to your local authority to determine proper size and type of fire extinguisher. • Accessory attachments not manufactured by The Brinkmann Corporation for this particular product are not recommended and may lead to personal injury or property damage.
-
Page 4: Assembly Instructions
1 Right side table 1 Left side drawer 1 Door frame bracket 1 Rear panel 4 Legs 1 Left side panel 1 Right side panel 1 Bottom panel 2 Doors 4 Locking casters Page 4 www.brinkmann.net www.grillpartsonline.com (Proof of purchase will be required.) -
Page 5: Parts Bag Contents
INSTR_810-3810-S.qxd 11/16/07 9:58 AM Parts Bag Contents 1 10 X 8mm hexagonal nut 1 Door locking plate 1 Door handle 4 M6 X 50 mm Bolts 23 M5 X 10 mm Bolts 1 M10 Locking Washer 1 M10 Washer 8 M5 Self-Locking Nuts Page 5 4 M6 Nuts 8 M5 Spring Washers... - Page 6 INSTR_810-3810-S.qxd 11/16/07 9:58 AM Choose a good, cleared assembly area and get a friend to help you put your grill together. Lay cardboard down to protect grill finish and assembly area. Turn the grill on its side to begin assembly. Step 1 Attach locking casters to bottom of each leg.
- Page 7 INSTR_810-3810-S.qxd 11/16/07 9:58 AM Page 7 Step 4 Attach rear panel to cart assembly by using four M6 x 15mm bolts. Step 5 Attach door frame bracket to front of cart assembly by using four M5 x 10mm bolts. Step 6 Install door handle through holes in door by using two M5 x 10mm bolts, M5 washers and M5 spring washers.
- Page 8 INSTR_810-3810-S.qxd 11/16/07 9:58 AM Step 7 Install left door by inserting the lower hinge pin into the lower left door hinge. Depress the upper left door hinge, then align with the upper left door bracket until hinge pin locks into place. Repeat for right door.
- Page 9 INSTR_810-3810-S.qxd 11/16/07 9:58 AM Washer Page 9 Lock Washer Door Handle Door Locking Plate Door Step 10 Attach the air shutter to the inside of grill body by aligning the air shutter and grill body holes, secure by using two M5 x 10mm bolts and M5 self-locking nuts.
- Page 10 INSTR_810-3810-S.qxd 11/16/07 9:58 AM Step 14 Attach the charcoal crank by screwing in the handle clockwise into the grill front crank hole. Step 15 Attach the ash pan collar to bottom of grill body using three M5 x 10mm bolts. Step 16 Slide the ash pan into the track of the ash pan collar as illustrated.
- Page 11 INSTR_810-3810-S.qxd 11/16/07 9:58 AM Page 11 Step 18 Attach handle to left drawer by using two M5 x 10mm bolts, M5 spring washers and M5 washers. Repeat for right side towel rack. Step 19 Attach side table to right side of grill assembly using four M6 x 15mm bolts, insert the bolts halfway.
-
Page 12: Preparation For Use & Lighting Instructions
Page 12 BEFORE OPERATING YOUR GRILL. Prior to your first use of the Brinkmann Professional Grill, follow the instructions below carefully to cure your grill. Curing your grill will minimize damage to the exterior finish as well as rid the grill of paint odor that can impart unnatural flavors to the first meal prepared on your Brinkmann Professional Grill. - Page 13 IMPORTANT: To protect your smoker from excessive rust, the unit must be cured periodically and covered at all times when not in use. A smoker cover can be ordered directly from Brinkmann by calling 800-468-5252. YOUR BRINKMANN PROFESSIONAL GRILL IS NOW CURED AND READY FOR USE. Page 13...
-
Page 14: Operating Instructions
INSTR_810-3810-S.qxd 11/16/07 9:58 AM OPERATING INSTRUCTIONS PLACE THE GRILL OUTDOORS ON A HARD, LEVEL, NON-COMBUSTIBLE SURFACE AWAY FROM ROOF OVERHANG OR ANY COMBUSTIBLE MATERIAL. NEVER USE ON WOODEN OR OTHER SURFACES THAT COULD BURN. PLACE THE GRILL AWAY FROM OPEN WINDOWS OR DOORS TO PREVENT SMOKE FROM ENTERING YOUR HOUSE. -
Page 15: Smoke Cooking Tips
INSTR_810-3810-S.qxd 11/16/07 9:58 AM Step 4 With coals burning well, carefully add wood chunks using long cooking tongs (see “Flavoring Wood” and “Adding Charcoal/Wood During Cooking” sections of this manual.) Step 5 Place cooking grills on grill support lips. Use charcoal grate adjuster crank to position charcoal grate to lowest level. - Page 16 INSTR_810-3810-S.qxd 11/16/07 9:58 AM Grilling/Searing Charcoal grate Middle Low/Middle High Charcoal Tray Level (Grilling) Charcoal grate High Charcoal Tray Level (Searing) Page 16 Step 1 Lightly coat all interior surfaces of the Professional Grill including cooking grill with vegetable oil or vegetable oil spray. Do not coat charcoal grate or charcoal ash tray.
-
Page 17: Flavoring Wood
INSTR_810-3810-S.qxd 11/16/07 9:58 AM Step 5 Place cooking grill on grill support lips. Use charcoal grate adjuster crank to position charcoal grate to desired cooking level. WARNING: Wear protective gloves or oven mitts when adjusting door handle, ash tray or cooking height. Step 6 Place food on cooking grill and close grill lid. -
Page 18: Regulating Heat
INSTR_810-3810-S.qxd 11/16/07 9:58 AM Regulating Heat Adding Charcoal/Wood During Cooking Page 18 To increase heat, more wood and/or charcoal may be needed. Follow instructions in “Adding Charcoal/Wood During Cooking” section of this manual. To maintain the temperature, more wood and/or charcoal may need to be added during the cooking cycle. -
Page 19: After-Use Safety
To protect your grill from excessive rust, the unit must be properly cured and covered at all times when not in use. A smoker cover may be ordered directly from Brinkmann by calling 800-468-5252. • Wash cooking grill and charcoal grate with hot, soapy water, rinse well and dry. - Page 20 INSTR_810-3810-S.qxd 11/16/07 9:58 AM ADVERTENCIAS DE SEGURIDAD IMPORTANTES DESEAMOS QUE USTED ENSAMBLE Y USE SU PARRILLA DE LA MANERA MÁS SEGURA POSIBLE. EL PROPÓSITO DE ESTE SÍMBOLO DE ALERTA DE SEGURIDAD ES LLAMAR SU ATENCIÓN A POSIBLES PELIGROS MIENTRAS ENSAMBLA Y USA SU PARRILLA. ¡CUANDO VEA EL SÍMBOLO DE ALERTA DE SEGURIDAD ATENCIÓN A LA INFORMACIÓN QUE APARECE DESPUÉS! LEA TODAS LAS ADVERTENCIAS DE SEGURIDAD E INSTRUCCIONES CUIDADOSAMENTE ANTES •...
- Page 21 • Le recomendamos que tenga a mano un extinguidor. Refiérase a sus autoridades locales para determinar el tamaño y tipo apropiados de extinguidor. • El uso de accesorios no fabricados por The Brinkmann Corporation para este producto en particular no se recomienda y podría resultar en lesiones personales o daños a la propiedad.
- Page 22 1 Soporte de la Puerta Lateral 1 Panel Trasero 4 Patas 1 Panel Izquierda 1 Panel Derecho 1 Anaquel inferior 2 Puertas 4 Ruedecillas de Acero Page 22 ANTES DE ARMAR Y USAR SU AHUMADOR. www.brinkmann.net www.grillpartsonline.com (Se requerirá prueba de compra.)
- Page 23 INSTR_810-3810-S.qxd 11/16/07 9:58 AM Contenido de la Bolsa de Piezas 1 Tuerca hexagonal de 10 x 8mm 1 Placa para asegurar la puerta 1 Manija de la puerta 4 M6 X 50 mm Pernos 23 M5 X 10 mm Pernos 1 M10 Arandelas de Resorte 1 M10 Arandelas 8 M5 Tuercas De Autoretención...
- Page 24 INSTR_810-3810-S.qxd 11/16/07 9:58 AM Escoja un área de ensamblaje adecuada y limpia, y consiga ayuda de un amigo para armar juntos su parrilla. Ponga cartón en el suelo para proteger el acabado de la parrilla y el área de ensamblaje. Voltee la parrilla hacia un lado para empezar el ensamblaje.
- Page 25 INSTR_810-3810-S.qxd 11/16/07 9:58 AM Page 25 Paso 4 Conecte el panel trasero al carro utilizando cuatro pernos M6 x15mm. Paso 5 Conecte el panel horizontal de la puerta a la parte frontal del carro utilizando cuatro pernos M6 x10mm. Paso 6 Instale las manijas de las puertas a través de los orificios utilizando dos pernos M5 x 10mm, Arandelas M5 y arandelas de...
- Page 26 INSTR_810-3810-S.qxd 11/16/07 9:58 AM Paso 7 Inserte el pasador de la puerta izquierda en el agujero de la pata delantera del carro; luego alinee la puerta con el soporte de la puerta izquierda. Oprima el pasador de resorte situado en el borde superior de la puerta y deslícela hacia el soporte de la puerta lateral izquierda hasta que el pasador se trabe en el agujero del soporte...
- Page 27 INSTR_810-3810-S.qxd 11/16/07 9:58 AM Arandelas Autoretención Arandelas Tuerca Asegurar la Page 27 Manija de la Puerta Placa para Puerta Puerta Paso 10 Conecte las rendijas de aire al cuerpo interno de la parrilla alineando las rendijas de aire con los orificios de la parrilla, asegure usando dos pernos M5x 10mm y tuercas de ajuste automático M5.
- Page 28 INSTR_810-3810-S.qxd 11/16/07 9:58 AM Paso 14 Conecte la manija de elevación del carbón entornillando la misma en el sentido del reloj a través del agujero frontal. Paso 15 Conecte el colector de cenizas a la parte inferior de la parrilla utilizando tres pernos M5 x10mm.
- Page 29 INSTR_810-3810-S.qxd 11/16/07 9:58 AM Page 29 Paso 18 Conecte la manija a la gaveta izquierda utilizando dos pernos M5 x 10mm, arandelas M5 y arandelas de estrella M5. Repita proceso para la gaveta derecha. Paso 19 Conecte la mesa lateral a la derecha de la parrilla utilizando cuatro pernos M6 x 15mm, introduzca los pernos a la mitad.
- Page 30 LEA TODAS LAS ADVERTENCIAS DE SEGURIDAD E INSTRUCCIONES CUIDADOSAMENTE ANTES DE UTILIZAR SU PARRILLA. Curado de su Parrilla Page 30 Antes del primer uso de su Parrilla Profesional Brinkmann, siga cuidadosamente las instrucciones que aparecen abajo para el curado de su parrilla. Curar su parrilla minimizará el daño al acabado exterior así como eliminará...
- Page 31 IMPORTANTE: Para proteger su ahumador de la oxidación excesiva, la unidad debe ser curada periódicamente y cubierta todo el tiempo mientras no se use. Una cubierta para ahumador puede ser encargada directamente de Brinkmann llamando al 800-468-5252. SU PARRILLA PROFESIONAL BRINKMANN HA QUEDADO CURADA Y ESTÁ...
-
Page 32: Instrucciones De Uso
INSTR_810-3810-S.qxd 11/16/07 9:58 AM INSTRUCCIONES DE USO COLOQUE LA PARRILLA EN EXTERIORES, EN UNA SUPERFICIE DURA, NIVELADA Y NO INFLAMABLE ALEJADA DE CUALQUIER ALERO DE TECHO O CUALQUIER OTRO MATERIAL INFLAMABLE. NUNCA USE EN SUPERFICIES DE MADERA U OTRAS QUE PUDIERAN QUEMARSE. COLOQUE LA PARRILLA LEJOS DE VENTANAS ABIERTAS O PUERTAS PARA PREVENIR QUE EL HUMO ENTRE A SU CASA. -
Page 33: Consejos De Cocina
INSTR_810-3810-S.qxd 11/16/07 9:58 AM Paso 4 Con el carbón ardiendo bien, agregue cuidadosamente trozos de madera usando tenazas largas para cocinar (vea las secciones "Madera saborizante" y "Para agregar carbón/madera mientras cocina" de este manual). Paso 5 Coloque las rejillas para cocinar en los bordes de apoyo. Use la manivela para ajustar la rejilla para carbón al nivel más bajo. - Page 34 INSTR_810-3810-S.qxd 11/16/07 9:58 AM Asar/Abrasar Rejilla para Carbón Nivel Medio Bajo/Medio Alto de la Bandeja para Carbón (Asar) Rejilla para Carbón Nivel Alto de la Bandeja para Carbón (Abrasar) Page 34 Paso 1 Cubra con una ligera capa de aceite vegetal o aerosol vegetal para cocinar todas las superficies interiores de la Parrilla Profesional incluyendo la rejilla para cocinar.
- Page 35 INSTR_810-3810-S.qxd 11/16/07 9:58 AM Paso 5 Ponga la rejilla para cocinar en los bordes de apoyo. Use la manivela de ajuste para colocar la rejilla para carbón en el nivel deseado para cocinar. ADVERTENCIA: Use guantes de horno protectores para ajustar el agarradero de puerta, bandeja de ceniza o para ajustar altura de cocción.
-
Page 36: Regulación De La Temperatura
INSTR_810-3810-S.qxd 11/16/07 9:58 AM Regulación de la Temperatura Para Agregar Carbón/Madera Mientras Cocina Page 36 Para incrementar el calor, más madera y/o carbón podrían necesitarse. Siga las instrucciones en la sección de "Para agregar carbón/madera mientras cocina" de este manual. Para mantener la temperatura, podría ser necesario agregar más madera y/o carbón durante el ciclo de cocción. - Page 37 Para proteger su parrilla del óxido excesivo, la unidad debe estar adecuadamente curada y cubierta todo el tiempo cuando no esté en uso. Una cubierta para ahumador puede ser encargada directamente de Brinkmann llamando al 800-468-5252. • Lave las rejillas para cocinar y rejilla para carbón con agua jabonosa caliente, enjuáguelas bien y séquelas.
- Page 38 Professional Grill Smoker Cover Our heavy-duty, durable vinyl cover with felt backing provides years of protection for Brinkmann Professional Grill. This top-of-the-line cover comes with closure strips at both ends to prevent cover from slipping or blowing off. Black. Model 812-3214-0 steam and heat to flow into the food.
- Page 39 Nuestra duradera cubierta de vinilo para trabajo pesado, con felpa por dentro, provee años de protección para la Parrilla Profesional Brinkmann. Esta cubierta de primera viene con tiras para cerrarla en ambos lados para prevenir que la cubierta se resbale o se vuele. Negra.
-
Page 40: One Year Limited Warranty
GARANTÍA LIMITADA DE UN AÑO Por un año a partir de la fecha de compra, The Brinkmann Corporation garantiza la parilla Profesional contra defectos debidos a la mano de obra o materiales, al comprador original. Las obligaciones de The Brinkmann Corporation bajo esta garantía están limitadas a los siguientes lineamientos: •...
Need help?
Do you have a question about the 810-3810-S and is the answer not in the manual?
Questions and answers