Advertisement
Available languages
Available languages
Quick Links
Advertisement

Related Manuals for Brinkmann 810-3826-S


Summary of Contents for Brinkmann 810-3826-S
- Page 1 PlainSite ® Legal Document USPTO Patent Trial and Appeal Board Case No. IPR2018-00902 CHAR-BROIL, LLC v. A&J Manufacturing, LLC Document 1009 View Document View Docket Cover art © 2015 Think Computer Corporation. All rights reserved. Learn more at http://www.plainsite.org.
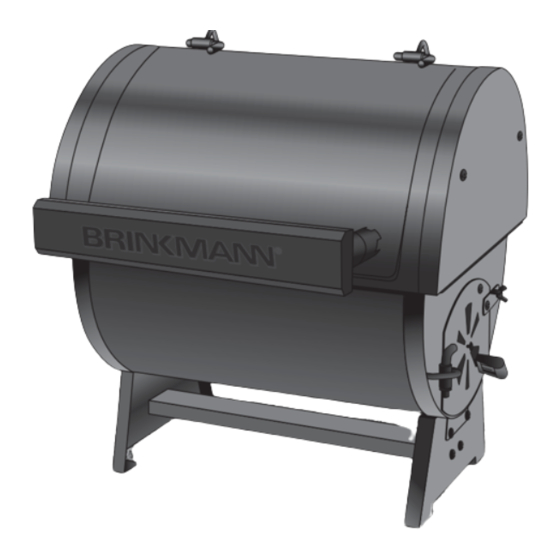
- Page 2 ORTABLE HARCOAL RILL & C UNCTION RILL HARCOAL MOKER IREBOX ARRILLA ORTÁTIL AL ARBÓN UNCIÓN ARRILLA DE AS Y HUMADOR DE ARBÓN DE EÑA QUIPO DE LA AJA DE UEGO OWNER’S MANUAL / MANUAL DEL PROPIETARIO ASSEMBLY AND OPERATING INSTRUCTIONS INSTRUCCIONES DE ARMADO Y OPERACIÓN SAVE THIS MANUAL FOR FUTURE REFERENCE GUARDE ESTE MANUAL PARA REFERENCIA FUTURA...
-
Page 3: Table Of Contents
CAUTION: Indicates a potentially hazardous situation which, if not avoided, may result in minor or moderate injury. FOR COVERS, ACCESSORIES AND OTHER PRODUCTS, PLEASE VISIT US ONLINE AT: www.brinkmann.net Char-Broil Exhibit 1009 Char-Broil v. A&J... -
Page 4: General Warnings
GENERAL WARNINGS WARNING • Only use this grill on a hard, level, non-combustible, stable surface (concrete, ground, etc.) capable of supporting the weight of the grill. Never use on wooden or other surfaces that could burn. • Proper clearance of 10 feet (3.1 m) between the grill and combustible material (bushes, trees, wooden decks, fences, buildings, etc.) or construction should be maintained at all times when grill is in use. - Page 5 • We advise that a fire extinguisher be on hand. Refer to your local authority to determine proper size and type of fire extinguisher. • Accessory attachments not manufactured by The Brinkmann Corporation for this particular product are not recommended and may lead to personal injury or property damage.
-
Page 6: Portable Grill Operating Instructions
CURING YOUR GRILL: Prior to your first use of the Brinkmann Portable Charcoal Grill, follow the instructions below carefully to cure your grill. Curing your grill will rid the grill of paint odor that can impart unnatural flavors to the first meal prepared on your Brinkmann Charcoal Grill. - Page 7 To protect your grill from excessive rust, the unit must be properly covered at all times when not in use. YOUR BRINKMANN PORTABLE CHARCOAL GRILL IS NOW CURED AND READY FOR USE. SMOKING Follow the instructions above to build a fire in the grill.
- Page 8 GRILLING/SEARING Follow the instructions above to build a fire in the grill. Place cooking grills on grill support lips in cooking chamber. Wear protective oven mitts/gloves when adjusting cooking grills or touching hot grill surfaces to WARNING: protect your hands from burns. Place food on cooking grills and close grill lid.
-
Page 9: Portable Grill Assembly Instructions
READ ALL SAFETY WARNINGS & ASSEMBLY INSTRUCTIONS CAREFULLY BEFORE ASSEMBLING OR OPERATING YOUR GRILL. WE RECOMMEND TWO PEOPLE WORK TOGETHER WHEN ASSEMBLING THIS UNIT. The following tools are required to assemble this Brinkmann Portable Charcoal Grill: • Phillips Head Screwdriver • Adjustable Wrench... - Page 10 ASSEMBLY STEPS Choose a good, cleared assembly area Left Leg and get a friend to help you put your grill together. Lay cardboard down to protect grill finish and assembly area. Step 1 Remove two pre-attached bolts on one end of the leg beam.
- Page 11 Step 3 Place cooking chamber on top of legs. Cooking Chamber Cooking Chamber Step 4 Attach left leg to cooking chamber using pre-attached bolts and nuts that were removed from firebox support bracket in Step 2. Left Leg Step 5 Wing Nut Loosen the wing nut of side door and then Side Door...
- Page 12 Step 6 Right Leg Bracket Attach the right leg to the right leg bracket using pre-attached bolts that were removed from right legs in Step 2. Close and lock side door. Right Leg Step 7 Remove six pre-attached bolts from the air shutter panel.
- Page 13 Firebox Lid Handle Step 9 Open firebox lid. Attach the firebox lid handle using two pre-attached cross heat shields and wing nuts. Cross Heat Shields Wing Nuts Step 10 Place the charcoal grate by inserting end into the hole of the left side panel of the Hole firebox.
-
Page 14: Firebox Operating Instructions
CURING YOUR GRILL: Prior to your first use of the Brinkmann Dual Function Grill with firebox, follow the instructions below carefully to cure your grill. Curing your grill will rid the grill of paint odor that can impart unnatural flavors to the first meal prepared on your Brinkmann Dual Function Grill. - Page 15 To protect your grill from excessive rust, the unit must be properly covered at all times when not in use. YOUR BRINKMANN DUAL FUNCTION GRILL WITH FIREBOX IS NOW CURED AND READY FOR USE. SMOKING Follow the instructions above to build a fire in the firebox.
- Page 16 A lot of wood is not required to obtain a good smoke flavor. A recommended amount for the Brinkmann Dual Function Grill is 5 to 6 wood chunks or sticks.
-
Page 17: After Use Safety
AFTER-USE SAFETY WARNING • Always allow grill and all components to cool completely before handling. • Never leave coals and ashes in smoker unattended. Make sure coals and ashes are completely extinguished before removing. • Before grill can be left unattended, remaining coals and ashes must be removed from grill. Use caution to protect yourself and property. -
Page 18: Firebox Assembly Instructions
READ ALL SAFETY WARNINGS & ASSEMBLY INSTRUCTIONS CAREFULLY BEFORE ASSEMBLING OR OPERATING YOUR FIREBOX. WE RECOMMEND TWO PEOPLE WORK TOGETHER WHEN ASSEMBLING THIS UNIT. The following provided tool is required to assemble this Brinkmann Firebox: • Phillips Head Screwdriver • Adjustable Wrench... - Page 19 ASSEMBLY STEPS Choose a good, cleared assembly area and get a friend to help you put your grill together. Lay cardboard down to protect grill Cooking Grates finish and assembly area. Turn the grill on its side to begin assembly. Step 1 Remove the cooking grates and charcoal grate from the grill body.
- Page 20 Step 4 Remove two pre-attached bolts from the firebox support bracket as shown and set aside for later use. Firebox Support Bracket Firebox Support Bracket Step 5 Remove two pre-attached bolts from right side cart legs crossbar. Attach the firebox support bracket to right side cart legs crossbar with two pre-attached bolts.
- Page 21 Step 7 Attach the firebox to the firebox support bracket with two bolts removed in Step 4. bolts Inside of Firebox Firebox Firebox Support Bracket Firebox Lid Handle Step 8 Open firebox lid. Attach the firebox lid Cross Heat Shields handle using two pre-attached cross heat shields and wing nuts.
- Page 22 Step 10 Attached the air shutter using one M5 X 10 mm bolt and M5 lock nut and Air Shutter Stem attach the air shutter handle to the air shutter stem. Air Shutter Handle Step 11 Hole Place the charcoal grate by inserting end Charcoal Grate into the hole of the left side panel of the firebox.
- Page 23 PRECAUCIÓN: Indica una situación posiblemente peligrosa la cual, si no se evita, puede producir lesiones menores o moderadas. PARA CUBIERTAS, ACCESORIOS Y OTROS PRODUCTOS, FAVOR DE VISITARNOS POR LA RED MUNDIAL EN: www.brinkmann.net Char-Broil Exhibit 1009 Char-Broil v. A&J IPR2018-00902...
- Page 24 ADVERTENCIAS GENERALES ADVERTENCIA • Utilice esta parrilla únicamente sobre una superficie estable dura, nivelada, no combustible (concreto, piso, etc.) capaz de aguantar el peso del ahumador. Nunca lo utilice sobre superficies de madera o de otro tipo que podrían quemarse. •...
- Page 25 • No se recomiendan aditamentos para accesorios de este producto en particular no fabricados por The Brinkmann Corporation ya que pueden causar lesiones personales o daños a la propiedad. • Cuando no utilice su parrilla, almacénela en un lugar seco y lejos del alcance de los niño.
- Page 26 CURADO DE LA PARRILLA Antes de utilizar por primera vez su parrilla Portátil de Carbón de Leña de Brinkmann, siga detenidamente las instrucciones dadas a continuación para precalentar su parrilla, ya que esto eliminará el olor a pintura de la parrilla que puede impartirle un sabor no natural a su primera comida preparada en su parrilla Portátil de...
- Page 27 ADVERTENCIA: Se debe permitir que el fluido de encendido se consuma por completo antes de cerrar la tapa de la parrilla (aproximadamente 20 minutos). De lo contrario, se pueden atrapar vapores del fluido en la parrilla y causar un incendio repentino o explosión al abrir la tapa. Nota: Para prolongar la vida útil de la parrilla, asegúrese de que las brasas calientes y la leña no toquen las paredes de la parril...
- Page 28 Coloque la comida sobre las parrillas para cocinar y cierre la cubierta de la parrilla. Siempre utilice un termómetro de carne para cerciorarse de que la comida esté bien cocida antes de sacarla de la parrilla. Deje que su parrilla se enfríe y luego siga las instrucciones dadas en las secciones “Seguridad después del uso”...
- Page 29 INSTRUCCIONES DE ENSAMBLADO ANTES DE ENSAMBLAR Y UTILIZAR SU PARRILLA. RECOMENDAMOS QUE DOS PERSONAS ENSAMBLEN ESTA UNIDAD CONJUNTAMENTE. Se necesita la siguiente herramienta para ensamblar esta Parrilla Portátil al Carbón de Brinkmann: • Destornillador con cabeza Phillips • Llave Ajustable LISTA DE PIEZAS:...
- Page 30 PASOS DE ARMADO Elija un área de montaje buena, despejada y consiga un amigo para que lo ayude a armar la Pata Izquierda parrilla. Coloque cartones debajo para proteger el acabado de la parrilla y el área de montaje. Paso 1 Retire los dos pernos pre-instalados en un extremo de la viga de la pata.
- Page 31 Paso 3 Coloque la cámara de cocción en la parte superior de las patas. Compartimiento para Cocinar Compartimiento para Cocinar Paso 4 Fije la pata izquierda a la cámara de cocción con los pernos pre-instalados y tuercas que se quitaron del soporte de montaje de la caja del fogón en el Paso 2.
- Page 32 Paso 6 Soporte de la Pata Derecha Fije la pata derecha al soporte de la pata derecha con los pernos pre-instalados que fueron retirados de las patas derechas en el Paso 2. Cierre y asegure la puerta lateral. Pata Derecha Paso 7 Retire los seis pernos pre-instalados del panel obturador de aire.
- Page 33 Manija de la Tapa de la Caja de Fuego Paso 9 Abra la tapa del fogón. Conecte la manija de la tapa del fogón usando dos escudos térmicos cruzados pre-colocados y las Escudos Térmicos Cruzados tuercas de mariposa Tuerca de Alas Paso 10 Agujero Coloque la rejilla de carbón insertando el...
- Page 34 ANTES DE UTILIZAR SU PARRILLA. CURADO DE LA PARRILLA Antes de utilizar por primera vez su parrilla Función Dual con Caja de Fuego de Brinkmann, siga detenidamente las instrucciones dadas a continuación para precalentar su parrilla, ya que esto eliminará el olor a pintura de la parrilla que puede impartirle un sabor no natural a su primera comida preparada en su parrilla Función Dual de Brinkmann.
- Page 35 ADVERTENCIA: Se debe permitir que el fluido de encendido se consuma por completo antes de cerrar la tapa de la parrilla (aproximadamente 20 minutos). De lo contrario, se pueden atrapar vapores del fluido en la parrilla y causar un incendio repentino o explosión al abrir la tapa. Nota: Para prolongar la vida útil de la parrilla, asegúrese de que las brasas calientes y la leña no toquen las paredes de la parril...
- Page 36 Coloque la comida sobre las parrillas para cocinar y cierre la cubierta de la parrilla. Siempre utilice un termómetro de carne para cerciorarse de que la comida esté bien cocida antes de sacarla de la parrilla. Deje que su parrilla se enfríe y luego siga las instrucciones dadas en las secciones “Seguridad después del uso”...
- Page 37 Se puede ordenar una cubierta para el ahumador Barrel directamente de Brinkmann llamando al 800-468-5252. • Lave las rejillas para cocinar y las rejillas para carbón con agua jabonosa caliente, enjuáguelas bien y séquelas.
- Page 38 INSTRUCCIONES DE ENSAMBLADO ANTES DE ENSAMBLAR Y UTILIZAR SU PARRILLA. RECOMENDAMOS QUE DOS PERSONAS ENSAMBLEN ESTA UNIDAD CONJUNTAMENTE. Se necesita la siguiente herramienta para ensamblar esta Caja de Fuego de Brinkmann: • Destornillador con cabeza Phillips • Llave Ajustable LISTA DE PARTES:...
- Page 39 PASOS DE ARMADO Elija un área de montaje buena, despejada y consiga un amigo para que lo ayude a armar la parrilla. Coloque cartones debajo para proteger Rejillas para el acabado de la parrilla y el área de montaje Cocinar Paso 1 Quite las rejillas para cocinar y la rejilla de carbón del cuerpo de la parrilla.
- Page 40 Paso 4 Quite dos pernos pre-atados del soporte de la caja de fuego como se muestra y póngalos a un lado para utilizar más tarde. Soporte de la Caja de Fuego Soporte de la Caja de Fuego Paso 5 Quite dos pernos pre-atados de la barra transversal de las patas del carro del lado derecho.
- Page 41 Paso 7 Ate la caja de fuego al soporte de la caja de fuego con dos pernos quitados en Paso 4. Pernos Adentro de la Caja de Fuego Caja de Fuego Soporte de la Caja de Fuego Manija de la Tapa de la Caja de Fuego Paso 8 Escudos Térmicos Cruzados...
- Page 42 Paso 10 Ate el obturador del aire usando un perno M5 X 10 mm y tuerca de fijación M5 y ate Vástago del Obturador de Aire la manija del obturador de aire al vástago del obturador de aire. Manija de Obturador de Aire Paso 11 Agujero...
- Page 43 GARANTÍA LIMITADA DE UN AÑO Por un año a partir de la fecha de compra, The Brinkmann Corporation garantiza Parrilla Portátil al Carbón o Función Dual Parrilla de Gas y Ahumador de Carbón de Leña Equipo de la Caja de Fuego de Brinkmann contra defectos debidos a la mano de obra o materiales, al comprador original.
Need help?
Do you have a question about the 810-3826-S and is the answer not in the manual?
Questions and answers