Table of Contents
Advertisement
Quick Links
Advertisement
Table of Contents

Related Manuals for Xylem YSI Pro1030


Summary of Contents for Xylem YSI Pro1030
- Page 1 Pro1030 U SER MA NUAL E nglish...
-
Page 2: Table Of Contents
C o N T E N T S Warranty ....................i Introduction ..................1 Getting Started ..................1 Initial Inspection ..............1 Battery Installation ..............1 Key Pad ..................2 Connecting the Sensor and Cable ........3 Run Screen ................5 Backlight .................6 Powering off ................6 Navigation ................6 First Power on ................7 System Setup Menu ................7 Audio ..................8... - Page 3 W A R R A N T Y Factory Default ..............14 Calibration ..................15 The YSI Professional 1030 instrument (Pro1030) is warranted for three (3) Temperature .................15 years from date of purchase by the end user against defects in materials and workmanship, exclusive of batteries and any damage caused by pH Calibration ..............15 defective batteries.
-
Page 4: Introduction
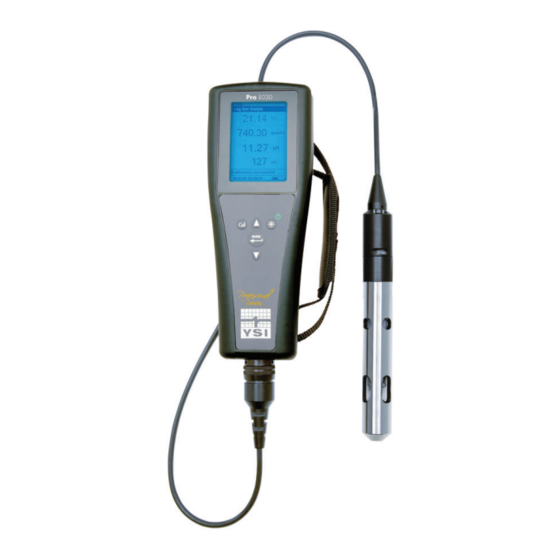
I N T R o D U C T I o N Thank you for purchasing the YSI Pro1030, an instrument from the YSI Professional Series product family. The Pro1030 measures conductivity, temperature and either pH or oRP in water. The Pro1030 features an... -
Page 5: Key Pad
4. Install the new batteries, ensuring correct polarity alignment Number Description (figure 1). calibrate 5. Place the battery cover on the back of the instrument and Press and hold for 3 seconds to calibrate. tighten the four screws. Do not over-tighten. opens Calibrate menu from the Run screen. -
Page 6: Run Screen
CoNNECTING PRoBE/CABLE ASSEMBLY INSTRUMENT When an ISE sensor is not installed in the cable, the bulkhead connector is not water-proof. Do not submerge the cable To connect the cable, align the keys on the cable connector to the slots without a sensor installed. Submerging the cable without a on the instrument connector. -
Page 7: Backlight
BacKlIght fIrst power on once the instrument is powered on, pressing the power/backlight key The instrument will step through an initial configuration when powered on for the first time. This will set the language. Use the up or down will turn on the display backlight. The backlight will remain on until arrow keys to highlight the appropriate language, then press enter to the key is pressed again or after two minutes of not pressing any key confirm (figure 6). -
Page 8: Audio
screen. Highlight the desired unit (Celsius or Fahrenheit) and press enter to enable. The enabled temperature unit will have an ‘X’ in the box next to it. only one unit may be enabled at a time. Highlight the ESC-Exit box and press enter to save any changes and to close the Temperature Units submenu. -
Page 9: Ph Buffer Set
There are seven options for displaying conductivity. only two units can When Auto Stable is enabled, an symbol will display next to the be enabled at the same time: reading on the Run screen and blink during stabilization. When the ISE and/or conductivity reading stabilizes based on the Auto Stable • CoND-mS/cm displays conductivity in milliSiemens per settings, the... -
Page 10: Specific Conductance Reference Temperature
Using the Pro1030’s default reference temperature and temperature for the water at your sampling site. Use the following procedure to coefficient (25 °C and 1.91%), the calculation is carried out as follows: determine the multiplier for a specific sample: Specific Conductance (25°C) = Conductivity of sample 1. -
Page 11: Cell Constant
Next, use the up or down arrow keys to adjust the shut off time from 0 Parameter Reset Defaults to 60 minutes. Press enter to save the new shutoff time. Next, highlight Conductivity Auto Stable off (0.0 % Change the ESC-Exit box and press enter to close the submenu. and 10 seconds) SPC Reference Temperature 25°C... -
Page 12: Orp Calibration
7. ‘Calibration Successful’ will display for a few seconds to indicate 3. Highlight pH and press enter. If pH is not listed as an option, a successful calibration and then the instrument will return to check the System Setup menu to ensure pH is enabled in the the Run screen. -
Page 13: Conductivity Calibration
(figure 8). Ensure the entire conductivity sensor is submerged in 5. Wait for the temperature reading to stabilize, then press enter the solution or the instrument will read approximately half the to complete the calibration or press Cal to cancel. expected value. -
Page 14: Taking Measurements
7. If the calibration is unsuccessful, an error message will display condUctIvIty on the screen. Press the Cal key to exit the calibration error The conductivity sensor will provide quick readings as long as the message and return to the Run screen. See the Troubleshooting entire sensor is submerged and no air bubbles are trapped in the section of this manual for possible solutions. -
Page 15: Viewing And Erasing Saved Data
VIEWING DATA once in Data mode, use the up and down arrow keys to view saved data sets in sequential order or press enter to access the bottom functions. After accessing the bottom functions, highlight the Data box and press enter to regain access to viewing data. The data set displayed is indicated by the data set number, 01 through 50. -
Page 16: Care, Maintenance And Storage
13, and 15 becomes 14. The instrument will return to Data mode after from entering the port. once the ISE sensor is removed, examine the erasing one data set. connector inside the port. If any moisture is present, use compressed air to completely dry the connector or let it air dry. -
Page 17: Sensor Storage
1. Soak the sensor for 10-15 minutes in clean water containing a If this procedure is unsuccessful, as indicated by improper sensor few drops of commercial dish washing liquid. performance, contact YSI Technical Support or the YSI authorized 2. GENTLY clean the glass bulb and platinum button by rubbing dealer where you purchased the instrument. - Page 18 Symptom Possible Solution Symptom Possible Solution Instrument will not 1. Verify correct sensor type selection Instrument will 1. Ensure the conductivity sensor is calibrate pH or oRP; in the System Setup menu. not calibrate the clean. Follow the cleaning procedures instrument displays 2.
-
Page 19: Specifications
S P E C I F I C A T I o N S These specifications represent typical performance and are subject to change without notice. For the latest product specification information, please visit YSI’s website at ysi.com or contact YSI Tech Support. Parameter Range Resolution...
Need help?
Do you have a question about the YSI Pro1030 and is the answer not in the manual?
Questions and answers