Table of Contents
Advertisement
Quick Links
Manual Supplement
Manual Title: 635/633 Users
Part Number: 1278087
Print Date:
Revision/Date: 1, 9/99
© 2001 Fluke Networks. All rights reserved. Printed in the U.S.A.
July 1999
We've added two new features and
made several changes in Version 2.0
of the 635 QuickBERT-T1 tester. This
supplement provides an overview of
the tester's new capabilities and
updates you on the changes and
corrections we've made in the latest
version.
This supplement contains information
necessary to ensure the accuracy and
completeness of the above manual. It
is organized as follows:
•
New features
•
Product Updates
•
Corrections
Supplement Issue: 2
Issue Date:
Page Count:
12/01
14
Advertisement
Table of Contents

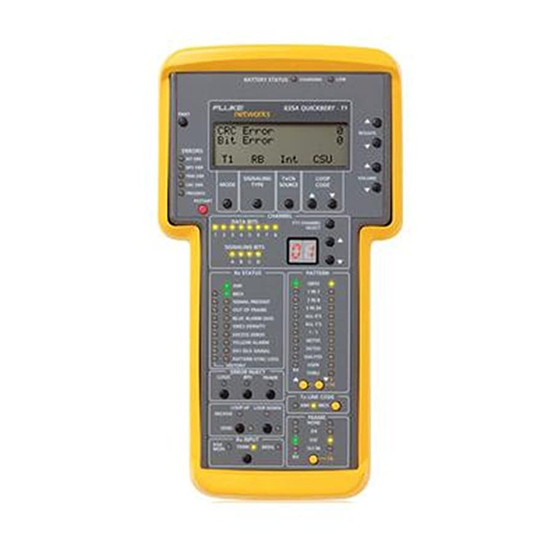
Summary of Contents for Fluke 635 QuickBERT-T1
- Page 1 This supplement contains information necessary to ensure the accuracy and completeness of the above manual. It is organized as follows: • New features • Product Updates • Corrections © 2001 Fluke Networks. All rights reserved. Printed in the U.S.A.
-
Page 2: New Features
635/633 Users Manual Supplement New Features Version 2.0 of the QuickBERT-T1 tester offers these two features: • Prints current test results and setup information • Downloads software updates This section shows you how to use these new features. Printing Current Test Results The tester can print test results and setup information automatically or on demand (when you press the PRINT key). - Page 3 Manual Supplement 635/633 Users 4. Press the SIGNALING TYPE (Setup) key. The Setup Print screen is displayed. The current setting for “Mode” is blinking: Setup Print: Mode: Norm Baud: 19.2 Done abn26f.eps This screen lists the two setup parameters for printing: “Mode”...
- Page 4 635/633 Users Manual Supplement 6. Press the MODE (Done) key to exit the setup menu. You can print at any time by pressing the PRINT key. However, if “Auto” is selected, the tester automatically prints a report when it detects an error or an alarm.
-
Page 5: Downloading Software Updates
Downloading Software Updates When a software update becomes available for the tester, you can download the latest version to a PC from the Fluke Networks web site (http://www.flukenetworks.com). The web site provides instructions for downloading and transferring the update software from a PC to the tester. - Page 6 635/633 Users Manual Supplement 3. Press the SIGNALING TYPE (Setup) key. The Setup Contrast menu is displayed: Setup Contrast Done abn28f.eps The blinking rectangle on the min/max indicator shows the current level of contrast. 4. Do one of the following: •...
- Page 7 Manual Supplement 635/633 Users On page 1-4, replace Figure 1-2 with the following figure: Bantam-to- Bantam Cables A/C Power Adapter RS-232 cable ToolPack Carrying Case Users Manual abn01f.eps Figure 1-2. Supplied Equipment On page 1-6, section 1-9, add the following sentence between the first and second sentences: Also available for purchase is a thermal printer.
- Page 8 635/633 Users Manual Supplement On page 2-11, make the following changes: Change: 2-16. TEST MODE Key 2-16. MODE Key Under section 2-16, replace the first sentence with the following: Pressing the MODE key allows you to select one of four modes: T1, F64 (fractional T1, 64k), F56 (fractional T1, 56k) and Setup.
- Page 9 Manual Supplement 635/633 Users On page 2-15, make the following changes: Section 2-25, add the following to the end of the paragraph: To arm the span, first select the ARM loop code. Then, press the SEND LOOP UP key to arm the span. To disarm the span, press the SEND LOOP DOWN key.
- Page 10 635/633 Users Manual Supplement Section 2-31, add the following to the end of the paragraph: To loop up the HLU (central office interface) from the central office, select the NLOC loop code and press the SEND LOOP UP key. To loop down the HLU, select the NLOC loop code and press the SEND LOOP DOWN key.
- Page 11 Manual Supplement 635/633 Users Section 2-37, add the following to the end of the paragraph: To loop up the second doubler (if provided) from the customer side, select the CDU2 loop code and press the SEND LOOP UP key. To loop down the second doubler, select the CDU2 loop code and press the SEND LOOP DOWN key.
- Page 12 635/633 Users Manual Supplement 3. To change the default user pattern, do the following: a) Press the RESULTS key to select “0” or “1” for the bit in the first position. Notes To clear all of the bits in the current length of the pattern and set them all to “1”, press and hold the RESULTS key for approximately...
-
Page 13: Setting The Date And Time
Manual Supplement 635/633 Users On page 2-23 replace the third sentence in section 2-58 with the following: The VOLUME keys, which are located to the right of the LCD, are used to adjust the audio volume. On page 2-28, replace the entire 2-80 section with: 2-80. - Page 14 635/633 Users Manual Supplement Print Date/Time Setup Done abn29f.eps 3. Press the RESULTS key to select “Date/Time”. “Date/Time” blinks to indicate that it is selected. 4. Press the SIGNALING TYPE (Setup) key to display the Setup Date/Time menu, as follows: Setup Date/Time: 01/21/02 08:35:52...
- Page 15 Manual Supplement 635/633 Users 6. Press the MODE (Done) key to exit the Setup Date/Time menu. Note If you supplied an incorrect value for a field, an error message is displayed. To supply the correct value, press the SIGNALING TYPE (Tab) key to move to the field that contains the error. Then, press the RESULTS key to select the correct value.


Need help?
Do you have a question about the 635 QuickBERT-T1 and is the answer not in the manual?
Questions and answers