Advertisement
Quick Links
Advertisement

Related Manuals for Kogan SMARTERHOME LX8


Summary of Contents for Kogan SMARTERHOME LX8
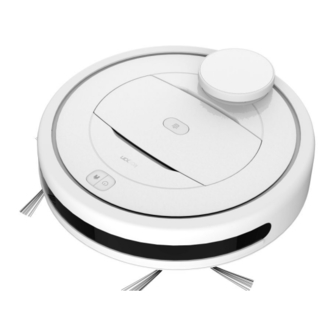
- Page 1 KOGAN SMARTERHOME™ LX8 ROBOT VACUUM WITH MOPPING FUNCTION KAVACRBLX8A...
-
Page 3: Safety And Warnings
Do not attempt to repair this product yourself. If the product or its power supply experiences any malfunction or damage, stop using it immediately and contact Kogan.com to arrange a repair. Remove from power before performing maintenance. - Page 4 Do not allow water, oil or other liquids to enter the machine. Ensure the area is clear of wires and other hazards before beginning operation as they may become tangled in the wheels or brushes. Remove all fragile objects from the area before beginning operation.
- Page 5 • Discard the plastic packaging so that it does not pose a choking hazard. Battery • Only use the original battery with the machine: contact Kogan for a replacement. • Switch off the cleaner before removing from the battery. •...
- Page 6 COMPONENTS Main Body x1 Charging Station x1 Adaptor x1 Side Brush x2 Cleaning Brush x1 HEPA Filter x1 Water Tank x1 Mopping Pad x1 EVA tape x1 Quick Start Guide x1 Screwdriver & Screw Kit x2 Note: The main body contains the battery, two side brushes and a filter.
- Page 7 OVERVIEW Front View Radar Top Cover Dust Bin Release Dust Bin Control Button Front Casing Sensor Bottom View Anti-Drop Sensor Change Contact Front Wheel Side Brush Middle Brush Main Brush Cover and Clip Left/Right Wheels...
- Page 8 Side View Anti-bump Sensor of Radar Cover PSD Along-wall Sensor Infrared Bump Sensor Recharge Sensor Charging Station Power Indicator Signal Emission Water tank Water inlet Seepage holes Buckle...
- Page 9 Front View Reset Button ON/OFF Button Dust-box Cover Box Stand HEPA Filter Filter Sponge Filter Stand Dust Pin...
-
Page 10: Installation
INSTALLATION Installation of Charging Base Adopter Socket Charging Terminal Over 0.5m Over 0.5m Over 0.5m... - Page 11 Wall Surface Ground Place the charging base on the flat ground against the wall. Ensure there is no obstacle within the range of 1.5 metres in length and 0.5 metres in width. Note: Do not frequently move the charging dock. � I f the charging dock’s location is changed, the robot vacuum may lose the layout in memory due to failure in positioning.
- Page 12 Connect the adapter to the charging station. Danger! Electric Shock Main Body Charging Base Ensure the unit is correctly aligned with the charging base contacts. Power on and charging: • If the unit has enough power to turn on, place it within a metre of the charging station and the unit will return.
- Page 13 Install App Download the “Kogan SmarterHome” app from the Play Store (Android) or App Store (iOS). Register If you do not have a Kogan SmarterHome™ account, register or sign in with a verification code sent by SMS. To register: Tap to enter registration page.
- Page 14 Set device in pairing mode When the device is first turned on, it may automatically enter pairing mode (the blue light will be continuously flashing). To turn the device on, remove the dust box and set the ON/OFF switch to ‘ON’. Then reinsert the dust box and press the power button. If not automatically in pairing mode when powered on, you can manually set the device in pairing mode by long-pressing both Power and Home buttons at the same time for more than 3 seconds until both lights begin flashing slowly.
- Page 15 The device will commence the pairing process and connect to the app. After successfully configuring the devices, the device will be shown on the home page. Tap to enter its control page. Kogan SmarterHome™ Controls Note: • When device is online, it can be controlled.
-
Page 16: Operation
OPERATION Light Indicators: Sweep/On-off Button: Light Indicators: 1. Blue light: Connected Short-press: start/pause� 1. Blue light: Connected WLAN WLAN Long press: turn off 2. Bi-colour lights: Not 2. Bi-colour lights: Not connected WLAN connected WLAN 3. Red light: error 3. Red light: error Tips: Press any key while cleaning, recharging or regional cleaning to pause the current task. - Page 17 State Display Beeping Initialisation after turning Blue light breathing Long beep on startup Initialisation finished Blue light on Two beeps No Wi-Fi connection after Bi-colour lights on initialisation Connecting to Wi-Fi Bi-colour lights on after flash One beep Connected to Wi-Fi Blue light on Two beeps Reset Wi-Fi connection...
- Page 18 USING MOP FUNCTION Install and use water tank Fill with water into the water inlet, sealing the water inlet cover when done. Attach the mopping pad. Attach the water tank to the bottom of the robot vacuum, ensuring it clips into place firmly and securely.
-
Page 19: Cleaning And Care
CLEANING & CARE Cleaning Charging Connector Charging Connector Charging Connector • Turn off the power switch or disconnect the power plug. • Clean the charging connectors monthly with a dry cloth. • Do not use oil for scrubbing. Removing Dust Bin The dust bin can be removed by pressing the button on the compartment as illustrated above. - Page 20 Cleaning Dust Bin Remove filter and empty dust. Scrub with the cleaning brush. Note: The dust bin should be cleaned periodically. The dust bin can be washed with running water. The dust bin should be completely air-dried before reinserting. Cold air Hot air After cleaning, reassemble the filter in the dust bin and then insert the dust bin into the cleaner.
- Page 21 Cleaning Main Brush To disassemble: Lift the main brush outward. Push the clip and lift it upward. 3. Remove the middle brushes and roller. Cleaning Main Brush and Rubber Brush Remove the hair and other Clean main and plastic brush with entanglements on the main brush the cleaning brush regularly.
- Page 22 Cleaning Side Brush Use a screwdriver to remove the Remove the side brush, clean hair screws on the side brush. and other rubbish on and inside the side brush base. Cleaning the Wheels Clean the front, left and right wheels regularly with a clean brush. Note: The wheel axle may get twisted by hair and screeds lease clear them out without delay.
- Page 23 Clean the Sensors Ground mounting sensor IR Sensor After cleaning work, use a dry cotton cloth to dry the transparent plate to prevent dust from being accumulated.
-
Page 24: Specifications
SPECIFICATIONS Main Body Parameters Accessories Parameters Working voltage 14.4V Adaptor Rated power Output voltage Battery Lithium battery Output current 630mA Battery capacity 2600mAh Charging station Charging time 4-5hrs Input voltage Working time 60-80min Work temperature 0°C-45°C range Work humidity range ≤80%RH Voice ≤68dB... -
Page 25: Troubleshooting
Red light solid with a beep. Charge unit Check if blower blades are loose or Blower failure Red light solid with 5 beeps. twisted Red light solid and beeps Unknown fault Restart unit 1.5 seconds. If an issue cannot be resolved, visit help.kogan.com for assistance. - Page 26 GOOGLE HOME CONTROL Note: You will need to have set up a Google Home account prior to linking your Kogan SmarterHome™ device. Select “Menu” and then “Home Control”. In the “Home Control” screen, select the “+” icon in the bottom right.
- Page 27 Set Up New Device Add and Manage Device Assign Room Update Home Control...
- Page 28 ALEXA Note: You will need to have set up an Alexa account prior to linking your Kogan SmarterHome™ device. Select “Menu” and then “Skills”. Search for the app and enable it. Login to your SmarterHome™ account with your email address or mobile number.
- Page 29 Login to App Discover Devices Setup Device Voice Commands: Try saying “Alexa, turn off <device name>,” or “Alexa, turn on <device name>.” You can edit the device name in the SmarterHome™ app.
- Page 30 NOTES...
- Page 32 This is a Quick Start Guide and we hope that this has given you the assistance needed for a simple set-up. For the most up-to-date guide for your product, as well as any additional assistance you may require, head online to help.kogan.com...
Need help?
Do you have a question about the SMARTERHOME LX8 and is the answer not in the manual?
Questions and answers