
Related Manuals for Monoprice SB-500


Summary of Contents for Monoprice SB-500
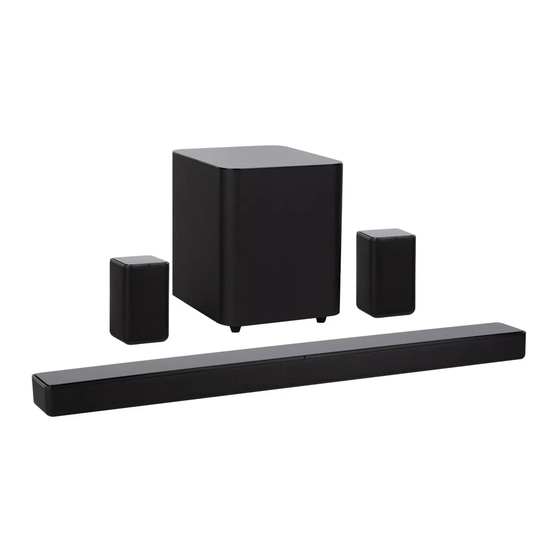
- Page 1 SB-500 5.1 Soundbar with Wireless Surround Speakers and Wireless Subwoofer P/N 42011 User's Manual...
-
Page 2: Safety Warnings And Guidelines
SAFETY WARNINGS AND GUIDELINES Please read this entire manual before using this device, paying extra attention to these safety warnings and guidelines. Please keep this manual in a safe place for future reference. • This device is intended for indoor use only. •... - Page 3 • Take care to prevent damage to the power cord. Do not allow it to become crimped, pinched, walked on, or become tangled with other cords. Ensure that the power cord does not present a tripping hazard. • Never unplug the unit by pulling on the power cord. Always grasp the connector head or adapter body.
-
Page 4: Customer Service
If you have any problem with your order, please give us an opportunity to make it right. You can contact a Monoprice Customer Service representative through the Live Chat link on our website www.monoprice.com or via email at support@monoprice.com. Check the website for support times and links. -
Page 5: Product Overview
PRODUCT OVERVIEW Soundbar : Press the button to turn the soundbar on or to put it into standby mode. : Press the button to cycle through the available inputs. The input selection order and the identifier that will show on the LED DISPLAY for each is shown in the following table. - Page 6 6. IR: IR receiver/sensor receives infrared signals from the included remote control. 7. DC 20V: DC barrel connector for connecting the included AC power adapter. 8. USB: USB port for streaming audio from a connected a PC. 9. AUX IN: 3.5mm analog stereo audio input. 10.
-
Page 7: Satellite Speakers
Satellite Speakers 1. MOUNT: Mounting keyhole for attaching the speaker to the wall. 2. DC 20V: DC barrel connector for connecting the included AC power adapter. 3. PAIR: Press and hold the PAIR button for about 5 seconds to pair the satellite speakers with the soundbar. -
Page 8: Installation
button to start or pause playback. Press and hold the button for about 3 seconds to delete the current Bluetooth® pairing and then put the soundbar in Bluetooth pairing mode. 7. ► : When Bluetooth or USB is selected as the input, press the button to skip ▍... - Page 9 Mounting the Satellite Speakers The satellite speakers feature built-in keyhole mounts, which resemble a traditional inverted keyhole with the hole below the slot. When a screw is installed in the wall with about a 1/8" gap between the wall and the screwhead, you can place the speaker over the screwhead, then slide it down so that the screwhead engages with the slot and holds the speaker securely in place.
- Page 10 Next, using a tape measure and a pencil, mark potential drill locations on the wall exactly 740mm (29.13") apart. Use a carpenter's level to ensure that the locations are level. This kit includes two screws and two wall anchors, which can be used for either the satellite speakers or the soundbar.
- Page 11 6. Using an S/PDIF digital coaxial cable, plug one end into the COAX port on the soundbar, then plug the other end into digital coaxial output of an audio source device. 7. Using a 3.5mm stereo audio cable, plug one end into the AUX IN jack on the soundbar, then plug the other end into the headphone output of a mobile device or into the audio output of an audio source device.
-
Page 12: Bluetooth Pairing
7. Plug one end of the second AC Power Adapter into the DC 20V jack on the Right satellite speaker. The LED will begin blinking blue. 8. Press and hold the button on the soundbar for about 5 seconds. The LED DISPLAY will show PAIRING. -
Page 13: Troubleshooting
3. Open the Bluetooth® settings on your mobile device and set it to scan for nearby Bluetooth connections. 4. Locate and select the MP42011 entry. If prompted for a passcode, enter 0000 (four zeros). Once the connection is established, a prompt sound will be heard and the bT will on the LED DISPLAY stops blinking. -
Page 14: Technical Support
TECHNICAL SUPPORT Monoprice is pleased to provide free, live, online technical support to assist you with any questions you may have about installation, setup, troubleshooting, or product recommendations. If you ever need assistance with your new product, please come online to talk to one of our friendly and knowledgeable Tech Support Associates. -
Page 15: Specifications
SPECIFICATIONS Model 42011 Soundbar Midrange Drivers 4x 45mm x 100mm panels Soundbar Tweeter Drivers 4x 1.75" domes Satellite Drivers 2x 2.5" cones Subwoofer Driver 1x 8" down firing cone Soundbar Output Power (all channels) 60 watts @4 ohms Satellite Output Power 2x 20 watts @8 ohms Subwoofer Output Power 100 watts @4 ohms... -
Page 16: Regulatory Compliance
Modifying the equipment without Monoprice's authorization may result in the equipment no longer complying with FCC requirements for Class B digital devices. In that event, your right to use the equipment may be limited by FCC regulations, and you may be required to correct any interference to radio or television communications at your own expense. -
Page 17: Notice For Industry Canada
This FCC Part 15 radio device operates on a non-interference basis with other devices operating at this frequency. Any changes or modification to said product not expressly approved by Monoprice, including the use of non-approved antennas, could void the user’s authority to operate this device. -
Page 18: Radio Notice For Industry Canada
This IC RSS-210 radio device operates on a non-interference basis with other devices operating at this frequency. Any changes or modification to said product not expressly approved by Monoprice, including the use of non-approved antennas, could void the user’s authority to operate this device.
Need help?
Do you have a question about the SB-500 and is the answer not in the manual?
Questions and answers