
Subscribe to Our Youtube Channel
Related Manuals for Monoprice SB-600


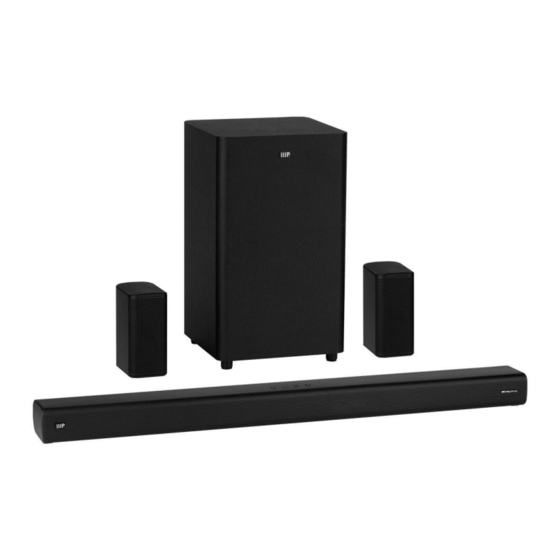
Summary of Contents for Monoprice SB-600
- Page 1 SB-600 Dolby Atmos® 5.1.2 Soundbar with Wireless Subwoofer and Wireless Surround Speakers P/N 42034 User's Manual...
-
Page 2: Table Of Contents
CONTENTS SAFETY WARNINGS AND GUIDELINES ......................4 INTRODUCTION..................................6 FEATURES ....................................6 CUSTOMER SERVICE................................ 7 PACKAGE CONTENTS ..............................7 PRODUCT OVERVIEW ..............................8 Soundbar Overall ................................8 Soundbar Top Panel ..............................8 Soundbar Rear Panel ............................... 9 Wireless Subwoofer ...............................10 Wireless Surround Speakers ...........................10 Remote Control................................11 INSTALLATION .................................. - Page 3 HDMI OUT ..................................19 HDMI IN 1/HDMI IN 2 ............................20 OPTICAL ...................................20 COAXIAL ..................................21 AUX...................................... 22 Surround Speakers ..............................22 PAIRING THE SUBWOOFER AND SURROUNDS..................23 Automatic Pairing ..............................23 Manual Pairing ................................25 POWER SAVING ................................26 AV SYNC ....................................26 BLUETOOTH OPERATION ............................
-
Page 4: Safety Warnings And Guidelines
SAFETY WARNINGS AND GUIDELINES Please read this entire manual before using this device, paying extra attention to these safety warnings and guidelines. Please keep this manual in a safe place for future reference. This device is intended for indoor use only. •... - Page 5 Do not place or install this device in an area where it can be exposed to • excessive amounts of dust, humidity, oil, smoke, or combustible vapors. Prior to operation, check the unit and power cord for physical damage. • Do not use if physical damage has occurred.
-
Page 6: Introduction
INTRODUCTION The Monoprice™ SB-600 Dolby Atmos® 5.1.2 Soundbar delivers a true and powerful Dolby Atmos home theater experience, with built-in Atmos height speakers on the soundbar, wireless surround speakers, and a wireless 8" subwoofer. Two HDMI® inputs, an HDMI eARC output, coaxial and optical digital audio inputs, and a 3.5mm analog audio input allow you to connect your various... -
Page 7: Customer Service
Check the website for support times and links. PACKAGE CONTENTS Please take an inventory of the package contents to ensure you have all the items listed below. If anything is missing or damaged, please contact Monoprice Customer Service for a replacement. 1x SB-600 Soundbar... -
Page 8: Product Overview
PRODUCT OVERVIEW Soundbar Overall DISPLAY: The DISPLAY shows information about the status of the system, including the selected input. When audio playback begins, the display shows DOLBY ATMOS, DOLBY DIGITAL, PCM, or NONSUPPORT FORMAT, depending on the audio format. IR RECEIVER: The IR RECEIVER accepts signals from the included IR remote control. -
Page 9: Soundbar Rear Panel
━/╋: Press the ━ button to decrease the volume level and the ╋ button to increase the volume level. Soundbar Rear Panel AC INPUT: AC power socket for connecting one of the included AC power cords. COAXIAL: Digital coaxial audio input for connecting the coaxial output on your TV. -
Page 10: Wireless Subwoofer
Wireless Subwoofer AC INPUT: AC power socket for connecting one of the included AC power cords. PAIR BUTTON: Press the PAIR BUTTON to activate the pairing function between the subwoofer and the soundbar. PAIR INDICATOR: The PAIR INDICATOR illuminates steadily when the subwoofer is paired with the soundbar. -
Page 11: Remote Control
SPEAKER (R): 2.5mm jack for connecting the 2.5mm surround speakers interconnect cable to connect to the left surround speaker. PAIR BUTTON: Press the PAIR button to activate the pairing function between the surround speakers and the surround speaker. WALL MOUNT MOUNTING POINTS: The included surrounds wall mount brackets attach to the surround speakers at these two points. -
Page 12: Installation
TREBLE: Press the ╋ button to increase the treble response or press ━ the button decrease the treble response. : Press the ╋ button to increase the volume level of the ╋/━/ system or press the ━ button to decrease the volume level of the system. -
Page 13: Positioning
studs on a wood stud drywall wall. Additional tools (not included) are required to install this speaker system. Positioning The soundbar should be placed or mounted below the TV. • The subwoofer should be placed on the ground at least 3 feet from the •... -
Page 14: Soundbar Wall Mounting
Soundbar Wall Mounting Perform the following steps to mount the soundbar to the wall. Use common sense at all times. Using a pencil, a carpenter's level, and a tape measure, mark two positions on the wall exactly 950mm apart. Use the level to ensure that these marks are at the same height on the wall. -
Page 15: Surround Speaker Wall Mounting
Remove the two screws at the wall mount mounting locations on the rear of the subwoofer. Store them in a safe place in case you need to use them in the future. Install the soundbar mounting screws into the screw holes at the wall mount mounting locations. - Page 16 Use two of the surround speaker mounting screws to attach one of the surround speaker wall mount brackets to the left surround, as shown in the image below. Plug the other end of the 2.5mm surround speakers interconnect cable into the Speaker (R) jack on the right surround speaker. Note that if the surround speakers are further apart than the included 4 meter cable can reach, you can use an extension cable or substitute a longer cable.
-
Page 17: Remote Control
Remote Control Perform the following steps to prepare the remote control for use. Press and slide back the battery compartment cover on the remote control. Insert two AAA batteries (included). Take care to match the polarity of the batteries with the markings inside the battery compartment. Slide the battery compartment cover back into place. -
Page 18: Earc/Arc
in the ceiling or high on the walls, it uses upward firing drivers that bounce sound off the ceiling to create the three dimensional audio experience. Please visit https://www.dolby.com/technologies/dolby-atmos for more details. The following elements are required for Dolby Atmos® support: Full Atmos support is only available when using one of the HDMI®... -
Page 19: Connections
CONNECTIONS HDMI OUT Use the included Premium High Speed HDMI® Cable to connect your TV to the soundbar. Plug one end of the cable into an HDMI input on your TV, then plug the other end into the HDMI OUT TV eARC/ARC port on the soundbar. Notes: Some 4K HDR TVs require the HDMI input or picture settings to be set •... -
Page 20: Hdmi In 1/Hdmi In 2
HDMI IN 1/HDMI IN 2 Use Premium High Speed HDMI® Cables, such as the one included in the package, to connect your video source devices to the soundbar. Plug one end of the cable into the HDMI IN 1 or HDMI IN 2 port on the soundbar, then plug the other end into the HDMI output on your video source device. -
Page 21: Coaxial
The OPTICAL input does not fully support Dolby Atmos®. For Dolby • Atmos playback, use one of the HDMI® inputs. The soundbar is not capable of decoding all digital audio formats. If an • unsupported format is detected, the audio will be muted. Ensure that the audio format of the input source device is set to Dolby Digital™... -
Page 22: Aux
The AUX input is used to connect an analog audio source, such as the headphone output of your smartphone, to the soundbar. To connect the headphone output of a device, plug one end of the included 3.5mm audio cable into the AUX input on the soundbar, then plug the other end into the headphone output of your source device. -
Page 23: Pairing The Subwoofer And Surrounds
If you did not mount the surround speakers, perform the following steps to connect them. Plug one end of the included 2.5mm surround speakers interconnect cable to the SPEAKER (L) jack on the left surround speaker, then plug the other end into the SPEAKER (R) jack on the right surround speaker. Plug the included AC power adapter into the DC IN jack on the right surround speaker. - Page 24 outlet. The PAIR INDICATOR will start blinking slowly, indicating that it is not paired and is not actively pairing. Plug one end of the other AC power cord into the AC INPUT jack on the soundbar rear panel, then plug it into a nearby AC power outlet. Press the button on the soundbar top panel or on the remote control.
-
Page 25: Manual Pairing
Congratulations, your system is now ready for use! Manual Pairing If the automatic pairing process fails or if the subwoofer and/or surround speakers lose their pairing, you can manually pair them. Note that the surrounds must be powered off when pairing the subwoofer, and the subwoofer must be powered off when pairing the surrounds. -
Page 26: Power Saving
POWER SAVING After about 15 minutes of no detected audio or video signal, the • soundbar will automatically enter standby mode to save power. If the soundbar is in standby mode, any detected audio or video signal • will cause the soundbar to turn on. After about 10 minutes of no buttons being pressed on the soundbar or •... -
Page 27: Bluetooth Operation
Open the Bluetooth settings on your mobile device and scan for nearby Bluetooth devices. Locate the SB-600 entry. If you cannot find the SB-600 entry, press and hold the or BT button on the remote control for about 3 seconds, to reinitiate Bluetooth pairing. -
Page 28: Usb Operation
If a connected device is moved out of range, it will automatically • disconnect. To reconnect, simply move the device back to within range of the soundbar. If your device fails to reconnect, perform the Bluetooth® pairing process • again. To disconnect your device from the soundbar, perform one of the following: Switch to a different mode on the soundbar. -
Page 29: Troubleshooting
TROUBLESHOOTING This section contains potential solutions to commonly issues. There is no power to the soundbar. Ensure that the soundbar is plugged into a nearby AC power outlet. • Ensure that the outlet is live by plugging another device into it, such as a •... - Page 30 • configured for HDR content. Refer to your TV's user's manual for instructions on configuring this setting. I cannot find the SB-600 entry in my Bluetooth® connections list. Ensure that Bluetooth is enabled on your device. • Perform a scan for active Bluetooth devices to connect to.
-
Page 31: Technical Support
TECHNICAL SUPPORT Monoprice is pleased to provide free, live, online technical support to assist you with any questions you may have about installation, setup, troubleshooting, or product recommendations. If you ever need assistance with your new product, please come online to talk to one of our friendly and knowledgeable Tech Support Associates. - Page 32 Center: 2x 2.0" cone L/R Midrange: 2x 2.5" cone Soundbar Drivers L/R Tweeters: 2x 20mm cone L/R Up-Firing: 2x 2.0" cone Center: 50 watts L/R Midrange: 25 watts each Soundbar Output Power L/R Tweeters: 25 watts each L/R Up-Firing: 25 watts each Subwoofer Driver 8"...
- Page 33 Remote Control Power Source 2x AAA batteries (included) Soundbar Input Power 100 ~ 240 VAC, 50/60 Hz Subwoofer Input Power 100 ~ 240 VAC, 50/60 Hz Surround Speakers Input Power 24 VDC, 1500mA AC Adapter Input Power 100 ~ 240 VAC, 50/60 Hz, 1A Soundbar Maximum Power 30 watts Consumption...
-
Page 34: Regulatory Compliance
(2) this device must accept any interference received, including interference that may cause undesired operation. Modifying the equipment without Monoprice's authorization may result in the equipment no longer complying with FCC requirements for Class B digital devices. In that event, your right to use the equipment may be limited by FCC regulations, and you may be required to correct any interference to radio or television communications at your own expense. -
Page 35: Radio Notice For Fcc
This FCC Part 15 radio device operates on a non-interference basis with other devices operating at this frequency. Any changes or modification to said product not expressly approved by Monoprice, including the use of non-approved antennas, could void the user’s authority to operate this device. -
Page 36: Radio Notice For Industry Canada
This IC RSS-210 radio device operates on a non-interference basis with other devices operating at this frequency. Any changes or modification to said product not expressly approved by Monoprice, including the use of non-approved antennas, could void the user’s authority to operate this device.
Need help?
Do you have a question about the SB-600 and is the answer not in the manual?
Questions and answers