Table of Contents
Advertisement
Quick Links
Advertisement
Table of Contents

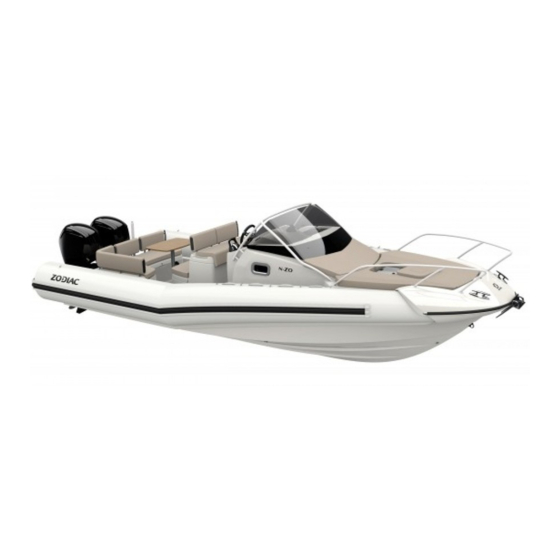
Related Manuals for Zodiac NZO 700


Summary of Contents for Zodiac NZO 700
- Page 1 Owner's Manual Volume 2 Page 1/68...
- Page 2 VOLUME 2 DESCRIPTION - BUOYANCY CHAMBER PROPULSION SYSTEM INSTALLATION AND CIRCUITS READ THIS MANUAL CAREFULLY BEFORE USING YOUR BOAT. THE OWNER'S MANUAL COMES IN TWO VOLUMES THAT SHOULD BE KEPT TOGETHER. WARNING THE OWNER'S MANUAL IS DIVIDED INTO TWO VOLUMES: - VOLUME 1 DEALS IN GENERAL WITH THE OPERATING PRECAUTIONS SAFETY...
- Page 3 TABLE OF CONTENTS PAGE I - GENERAL DESCRIPTIONS I-1-Technical characteristics -------------------------------------------------- I-2-Technical description------------------------------------------------------- I-3-Location of items------------------------------------------------------------ I-4-Handling ---------------------------------------------------------------------- II - BUOYANCY CHAMBER II-1-Assembling the buoyancy chamber on the hull---------------------- II-2-Fixing at the front---------------------------------------------------------- II-3-Inflation system------------------------------------------------------------- II-4-Pressure ---------------------------------------------------------------------- III - PROPULSION SYSTEM IV - INSTALLATION AND CIRCUIT IV-1- Fuel-------------------------------------------------------------------------- IV-2-Electricity-------------------------------------------------------------------...
- Page 4 VI-3-Plotter, VHF---------------------------------------------------------------- VI-4-220V connector------------------------------------------------------------ VI-5-Windlass console control------------------------------------------------ VI-6-Installation of radio and LS---------------------------------------- Page 4/68...
- Page 5 DESCRIPTION - Technical Characteristics I-1-TECHNICAL CHARACTERISTICS Hull 6.99 (ft) 22’11” 6.37 (ft) 20’11” 3.22 (ft) 10’7” 2.01 (ft) 6’7’’ 0.65 (ft) 2’2” Design category B / C (Directive 94/25/EC) Capacity C=12 (ISO) 1661 2036 Maximum 3661 4488 1489 1489 3282 3282 Compartment Engine configuration...
- Page 6 DESCRIPTION - Technical Characteristics Design category: Your boat is designed for category B or C sailing, which implies different loading cases and a different accessory layout (see previous table). As regards category B, the maximum number of people authorized is 7 and the deck layout must allow all passengers to be seated and hold on.
- Page 7 DESCRIPTION - Technical Characteristics Dimension tolerance: +/- 3% NOTE Weight tolerance: +/- 5% The maximum authorized load was calculated to standard ISO 6185. Navigate carefully when the boat carries the maximum load. Weight shown not including accessories The recommended power corresponds to optimum operation of the boat's capabilities for an average load.
- Page 8 TECHNICAL DESCRIPTION I-2-INVENTORY Hull • Polyester hull • Aft cabin upholstery and bolster • Rubbing strake for bow protection • 10 kg anchor • 1 anchor protection plate • 1 bow roller • 1 bow chainplate • 1 bow inspection hatch •...
- Page 9 • Teak floor* • Cabin upholstery seatback and bolster* • 1 gas stove in case* • 1 outside table and 1 table stand* • 1 ski mast* • * For more information on available optional accessories, see your ZODIAC dealer. Page 9/68...
- Page 10 Bolt for cabin door Cabin handrail Sunbathing deck (Optimum )* Pulpit Deck hatch Fairlead Through-hull Logo N-Zo Ski mast * Side bench Windscreen Two-colour light Flush-fitting cleat Logo N-Zo * For more information on available optional accessories, see your ZODIAC dealer. Page 10/68...
- Page 11 Navigation light Teak floor (Premium version) Portholes Logo N-Zo Through-hull toilet evacuation (Optimum version)* Through-hull toilet water inlet (Optimum version)* Scupper Chain plate Anchor protection plate * For more information on available optional accessories, see your ZODIAC dealer. Page 11/68...
- Page 12 DESIGNATION Aft door Table stand (Optimum version)* Exterior table (Optimum version)* Fire extinguisher bracket Rubbing strake Cabin sink waste / bolster 10 kg anchor (Optimum version)* * For more information on available optional accessories, see your ZODIAC dealer. Page 12/68...
- Page 13 Cabin interior upholstery (Optimum / Premium version) Bow inspection hatch Channel plate for buoyancy fixing Cabin floor Toilet (Optimum version) Toilet hatch Toilet switch (Optimum version) Electric busbar Petrol filter * For more information on available optional accessories, see your ZODIAC dealer. Page 13/68...
- Page 14 Wooden step, lower cabin * Wooden step, upper cabin * Toilet fixed bulkhead Toilet door Toilet fixed bulkhead Cabin interior upholstery seatback (Optimum version)* Mirror (Optimum version)* * For more information on available optional accessories, see your ZODIAC dealer. Page 14/68...
- Page 15 DESCRIPTION - Functional Items REFERENCE DESIGNATION Port cover plate LED light FWD ceiling LED light AFT ceiling, starboard AFT ceiling, port Switch LED light Stbd cover plate Stern channel plate Engine protection plate Boarding ladder handle Through-hull Hull water evacuation plug hole Page 15/68...
- Page 16 DESCRIPTION - Functional Items REFERENCE DESIGNATION Chainlocker cover Chainlocker bolt Remote-control connector (Optimum version) Windlass remote-control bracket (Optimum version) Chain pulley block or windlass (Optimum version) Side bench cover bolt Side bench cover Aft bench locker Aft bench locker Bolster aft cover Bolster cover Storage access door Page 16/68...
- Page 17 Compass (option) Speedometer (motorised version) Fuel gauge Switches Flywheel Cabin doorstop Cigar lighter Engine starter panel (motorised version) Engine control (motorised version) Driver station foot rest * For more information on available optional accessories, see your ZODIAC dealer. Page 17/68...
- Page 18 DESCRIPTION - Handling I-4-HANDLING I-4-1-Transport The trailer installation recommendations are specified in VOLUME I of the owner's manual. I-4-2-Storage THE BOAT MUST REST ON THE KEEL (SEE SKETCH BELOW). CAUTION Section Section I-4-3-Lifting The boat has no lifting devices. THE BOAT HAS NO LIFTING DEVICES. IT IS ESSENTIAL THAT SUITABLE LIFTING STRAPS, PASSED BENEATH THE HULL (AT 2 METRES AND 6 WARNING...
- Page 19 ALL EQUIPMENT MUST BE UNLOADED FROM THE BOAT FOR LIFTING. BEFORE LAUNCHING THE BOAT, OPEN THE DRAIN HOLE (34) TO DRAIN ANY RAINWATER FROM THE WARNING COCKPIT (CLOSE THE DRAIN HOLE AGAIN BEFORE LAUNCHING)) Page 19/68...
- Page 20 DESCRIPTION - Sailing I-4-4-Sailing DO NOT USE THE FORWARD SUNBATHING DECK WHEN SAILING IN ORDER TO PREVENT ANY RISK OF FALLING OVERBOARD. WARNING DO NOT CLIMB ONTO THE TTOP, IN ORDER TO PREVENT ANY RISK OF FALLING. AVOID USING THE WINDLASS WHEN THE ENGINE IS WARNING NOT RUNNING, AS OTHERWISE THERE IS A RISK OF DISCHARGING THE BATTERIES.
- Page 21 BUOYANCY CHAMBER – Assembling the buoyancy chamber on the hull II-1-INSTALLING THE BUOYANCY CHAMBER ON THE HULL The buoyancy chamber is delivered installed on the hull. Follow the instructions below when replacing the buoyancy chamber. NOTE: The buoyancy chamber is fitted to the hull with the buoyancy chamber deflated.
- Page 22 BUOYANCY CHAMBER – Assembling the buoyancy chamber on the hull - Repeat for the other side of the buoyancy chamber. - Bring the buoyancy chamber forward beneath the nose of the deck. - Once again, pull the buoyancy chamber as far aft as possible, entering the boltrope into the mini rail at the upper aft position.
- Page 23 BUOYANCY CHAMBER – Inflation System II-3-INFLATION SYSTEM II-3-1-The inflator a. adaptor b. tube nozzle c. tube connector d. inflation port * An electrical (12 V) high output inflator is available as an option. (Contact your dealer.) II-3-2-"Easy - Push" valves To change position In inflating position In deflating position...
- Page 24 BUOYANCY CHAMBER – Inflation System II-3-3-Inflating the buoyancy chamber Activate all valves in the inflation position. Attach the hose connector to the inflator inflation port. To inflate your boat properly, the inflator should be correctly placed on the ground. The boat inflates rapidly if the inflator is used smoothly and without haste. DO NOT USE A COMPRESSOR OR COMPRESSED AIR CYLINDER.
- Page 25 BUOYANCY CHAMBER - Pressure II-4-1-Inflating the buoyancy chamber • Place the adapter corresponding to the diameter of the semi built-in valve at the inflator hose nozzle. Inflate the buoyancy mechanism, balancing the pressure between the different compartments until the partitions (a) are no longer visible (pressure = 240 mb) Never pressurise a compartment when the others are completely...
- Page 26 BUOYANCY CHAMBER - Pressure Thus, it is important to anticipate: Check and adjust the pressure of the inflatable compartments (inflating or deflating according to the case) according to the temperature variations (especially when there is a considerable difference in temperature between morning and evening in particularly hot areas) and make sure that the pressure remains within the recommended pressure range (from 220 to 270 mb / green sector).
- Page 27 PROPULSION SYSTEM III-PROPULSION SYSTEM Comply with ZODIAC's recommendations and the engine manufacturer's recommendations regarding engine assembly. For optimum use of your boat, seek advice from your dealer. Page 27/68...
- Page 28 INSTALLATION AND CIRCUIT - Fuel IV-1-FUEL IV-1-1-Description of essential functional items The boat is fitted with a fuel tank located under the deck. It is filled through the port hatch; raising the latter exposes the fuel filler plug. REFERENCE DESIGNATION Fuel/water separator filter (supplied for single-engine configuration) Fuel tank Filling hole...
- Page 29 INSTALLATION AND CIRCUIT - Fuel IV-1-3-Fuel/water separator filter In order to protect the engine, a water / fuel separating filter is NOTE: placed on the engine’s fuel supply circuit. The water/fuel separator filter is located in the aft locker, on the starboard partition: (for a dual-engine configuration, contact your dealer to obtain a second filter) REFERENCE DESIGNATION...
- Page 30 INSTALLATION AND CIRCUIT - Fuel Changing the filter cartridge: Follow ZODIAC’s recommendations and those of the filter’s manufacturer. Place a draining funnel under the position of the cartridge to be replaced. Before replacing the filter, the pressure in the fuel feed system must be released.
- Page 31 INSTALLATION AND CIRCUIT - Fuel IV-1-5-Recommendations IN THE EVENT OF A PETROL LEAK OR A FIRE, THE PETROL CIRCUIT CLOSING VALVE LOCATED ON THE TANK ENABLES THE TANK TO BE CUT OFF FROM THE WARNING PETROL CIRCUIT AND MUST REMAIN CLOSED. HAVING A FULL TANK AVOIDS CONDENSATION APPEARING ON EACH OUTLET.
- Page 32 INSTALLATION AND CIRCUIT - Electricity IV-2-Electricity IV-2-1-Layout diagram Page 32/68...
- Page 33 INSTALLATION AND CIRCUIT - Electricity IV-2-2-Drawings of the master wiring harness Page 33/68...
- Page 34 INSTALLATION AND CIRCUIT - Electricity Insulated flat terminal Insulated female tab terminal 6.3 Cable cross-section-> AWG16 Insulated flat terminal LENGTH OF WIRE ALL POSITION = 200mm Sealed, round male terminal Sealed, round female terminal Fireproof split duct To be supplied: 2 bus bar DECK WASHER SHOWER...
- Page 35 INSTALLATION AND CIRCUIT - Electricity - Drawing of the windlass wiring harness (version). - Drawing of the radio wiring harness (option). Sealed, round male terminal Sealed, round fem. terminal To be supplied: Fireproof split duct + 8 Sealed, round male terminals + 9 Sealed, round female terminals Cable cross-sections ->...
- Page 36 INSTALLATION AND CIRCUIT - Electricity IV-2-3-Location of components Bilge pump Switchboard Water pump Petrol gauge Batteries Pump Deck courtesy light (Dark blue 6 – Black18) Navigation light white Circuit breaker+ distributor Lights Switch LS (option Windlass wiring harness Junction box Page 36/68...
- Page 37 INSTALLATION AND CIRCUIT - Electricity LS (option) Lights Lights LS (option) Page 37/68...
- Page 38 INSTALLATION AND CIRCUIT - Electricity IV-2-4-Wiring the console unit and switch Your boat is pre-fitted with an electrical harness, a switchboard (bus bar + fuse holder), and a switch panel. 1 Gauge receiver 2 Cigar lighter Some components remain to be connected on the console, namely: -Compass -Speedometer -Engine starter panel...
- Page 39 INSTALLATION AND CIRCUIT - Electricity Light control + bilge pump switches (also supplied). POINT NUMBER DESIGNATION Bilge pump 1 Bilge pump 2 Navigation light Unused Shower pump (version) Deck lighting Page 39/68...
- Page 40 INSTALLATION AND CIRCUIT - Electricity IV-2-5-Wiring details IV-2-5-1-Wiring details of the switchboard located in the console See switch label descriptions for the functions of each trip switch. Page 40/68...
- Page 41 INSTALLATION AND CIRCUIT - Electricity IV-2-5-2-Wiring details of the console switch (aft view on connections side) + Yellow 1 Fish well option Pump 1 Pump 2 Navigation lights Toilet emptying pump Shower pump Lighting pont Earth option for future switches IV-2-5-3-Wiring details of gauge dial Page 41/68...
- Page 42 INSTALLATION AND CIRCUIT - Electricity IV-2-5-4-Gauge wiring details IV-2-5-5-Wiring details of fuel tank filler cap IV-2-5-6-Wiring details of console negative bus bar Page 42/68...
- Page 43 INSTALLATION AND CIRCUIT - Electricity IV-2-5-7-Wiring details of aft locker negative bus bar IV-2-5-8-Bilge pump wiring details BILGE PUMP 1 Page 43/68...
- Page 44 INSTALLATION AND CIRCUIT - Electricity IV-2-6-Operation of circuit breaker & battery couplers Circuit breaker Coupler engine 1 Coupler engine 2 Battery 2 Battery 1 Battery 2 Battery 1 Battery 1&2 Battery 1&2 The boat is factory-mounted with a circuit breaker and two battery couplers (for dual- engine configuration).
- Page 45 INSTALLATION AND CIRCUIT The circuit-breaker isolates the console unit power supply. NOTE: After each use, set the circuit breaker back to OFF. The battery couplers allow the engines to be started either with one battery per engine, or by coupling the batteries (in parallel), or with a single battery. IV-2-7-Table of possible configurations COUPLER STATE RESULT...
- Page 46 INSTALLATION AND CIRCUIT – Connection of options IV-2-8-CONNECTION OF OPTIONS IV-2-8-1-Precautions The boat is fitted as standard or version with 2 bilge pumps, navigation lights, a shower kit, lighting for the deck and cabin and drain facilities for the toilet. However, 2 locations remain available on the fuse box (under the console) for the connecting of additional accessories under certain conditions: The accessories you want to add must be connected at the level of the console.
- Page 47 INSTALLATION AND CIRCUIT – Connection of options Example 1 You want to add: A 72W VHF, A 36W GPS, A 60W radio, A 72W cigar lighter, A 20W clock. Miscellaneous Bilge fan lighting Miscellaneous Radio 20W (clock) electronic equipment Depth sounder Shower pump Max power 60W (<...
- Page 48 INSTALLATION AND CIRCUIT – Connection of options Example 3 You want to add: A 60W GPS, A 60W radio, A 120W audio warning. Miscellaneous Bilge fan lighting Miscellaneous Radio electronic equipment Depth sounder Shower pump Max power 120W (> 60W) Searchlight Alarm system Refrigerator...
- Page 49 INSTALLATION AND CIRCUIT – Connection of options IV-2-9-BILGE PUMP OPERATION The bilge pump works independently from the battery isolation switch position, the control switch is always on. Automatic mode (fixed position); in this position the bilge pump works automatically. The indicator light is on. Off;...
- Page 50 PROTECT YOUR EYES WHEN WORKING CLOSE TO A BATTERY. If you do not plan to use your Zodiac® for a month or more, remove the battery and store it in a cool, dark and dry place. Fully recharge the battery before reusing it.
- Page 51 INSTALLATION AND CIRCUIT - Water IV–3-Water IV-3-1-Location of components Shower (option, deck) Drain for bolster sink Deck fill plug hole Pump Hull drain Bilge pump drain into aft trough (gooseneck in pipe Two bilge pumps Water tank Bolster valve Page 51/68...
- Page 52 INSTALLATION AND CIRCUIT - Gas IV–4-Gas A gas canister stove in a case is supplied as an optional extra. See recommendations on case. Do not place inflammable materials above the heater (papers, towels, etc…). Never leave the boat unattended when any gas appliance is operating. Do not smoke or approach with a naked flame when searching for a gas leak, changing a gas cylinder, or any other intervention on the gas circuit.
- Page 53 INSTALLATION AND CIRCUIT - Toilet IV–5-Toilet You may not always be able to use the full capability, it will depend on the trim, loading, and position of the filling and draining points (if any). Keep yourself informed about local regulations for respecting the environment, and comply with codes of good practice.
- Page 54 -2- Recovery using the harbour pumping system (ask the harbourmaster about the black water recovery arrangements in the harbour): - open the deck drain hole marked "waste", - insert the pumping suction rod into the opening, - continue suction until the tank is empty, - close the drain hole at the end of the operation.
- Page 55 INSTALLATION AND CIRCUIT - Draining IV-6-DRAINING IV-6-1-Description of essential functional items The boat is self-draining; for safety reasons you are advised to use the aft hatch 1. Page 55/68...
- Page 56 INSTALLATION AND CIRCUIT - Draining IV-6-2-Hull drain hole IV-6-2-1-Boat out of the water (on trailer, cradle, etc.) OPEN POSITION, DRAIN HOLE REMOVED. IV-6-2-2-Boat in the water, sailing or at anchor CLOSED POSITION, DRAIN PLUG FITTED. (MAKE SURE THE PLUG IS PROPERLY CLOSED) Drainhole Page 56/68...
- Page 57 INSTALLATION AND CIRCUIT - Steering IV-7-STEERING A hydraulic jack is factory supplied with the boat. It may be used for the single-engine configuration and in some cases for the dual-engine (see max. authorized power). Comply with the steering manufacturer's recommendations (installation, use and maintenance).
- Page 58 INSTALLATION AND CIRCUIT - Fire IV-8-FIRE WE RECOMMEND YOU KEEP AN EXTINGUISHER ON BOARD, AND COMPLY WITH THE LAWS APPLICABLE IN YOUR COUNTRY. WARNING DO NOT PLACE INFLAMMABLE MATERIAL CLOSE TO OR ABOVE COOKING EQUIPMENT. WARNING Liferaft stowage area Extinguisher Hatch T30 Battery switch The boat is delivered without a fire extinguisher;...
- Page 59 INSTALLATION AND CIRCUIT - Anchoring/Mooring IV-9-ANCHORING/MOORING IV-9-1-Description of essential functional items REFERENCE DESIGNATION Bow roller Anchor locker Chain pulley block or windlass (Optimum / Premium version) Anchor protection plate Chain plate Remote-control (Optimum / Premium version) IV-9-2-Use THE CLEATS CAN ONLY BE USED FOR OCCASIONAL MOORING OF THE BOAT.
- Page 60 INSTALLATION AND CIRCUIT – Door lock IV-10-CABIN DOOR LOCK Procedure for closing the door: Insert key in lock. Turn key 180° anticlockwise. Turn key 90° clockwise. Remove the key. WHEN UNDER WAY, USE THE DOOR LATCH IF YOU WANT TO KEEP THE DOOR OPEN. WHEN UNDER WAY, TAKE THE KEY OUT OF THE WARNING LOCK.
- Page 61 LABELLING V-1-POSITION OF SAFETY LABELS AND REGISTRATION PLATES 2, 6 3, 4, 5, 7 Page 61/68...
- Page 62 LABELLING V-2-DESCRIPTION OF SAFETY LABELS AND REGISTRATION PLATES Page 62/68...
- Page 63 LABELLING MAKE SURE THAT THE LABELS ARE PRESENT AND LEGIBLE. CONTACT YOUR DEALER TO OBTAIN NEW ONES IF NECESSARY. Page 63/68...
- Page 64 LOCATION OF OPTIONAL ACCESSORIES VI-1-INSTALLATION OF ENGINE (not supplied) - Throttle control (not supplied): To be positioned on the console front panel in zone (1) -Meters and accessories (not supplied) (2) -Engine starter panel To be positioned on the console in zone (3) -Steering cabling (pre-fitted) + Engine electrics (not supplied): Use the ducts (4) and PVC sleeves (5)
- Page 65 LOCATION OF OPTIONAL ACCESSORIES VI-2-SKI MAST Ski mast NEVER USE THE SKI MAST FOR ANYTHING OTHER THAN WATER SKIING AND WAKE BOARDING. USE THE AFT CHAIN PLATES FOR TOWING OR CAUTION TRACTION OF BUOYS. Page 65/68...
- Page 66 LOCATION OF OPTIONAL ACCESSORIES VI-3-PLOTTER, VHF (not supplied) Plotter Page 66/68...
- Page 67 LOCATION OF OPTIONAL ACCESSORIES VI-4-220V connector (not supplied) 220V connector LOCATION OF OPTIONAL ACCESSORIES VI-5-Windlass console control (not supplied) Remote-control for windlass on console Page 67/68...
- Page 68 LOCATION OF OPTIONAL ACCESSORIES VI-6-Installation of radio and LS (not supplied) Possible cut-out for LS Remote-control for radio Black box installation on wooden front panel of seat Page 68/68...
Need help?
Do you have a question about the NZO 700 and is the answer not in the manual?
Questions and answers