
Related Manuals for Chefman AIR FRYER+


Summary of Contents for Chefman AIR FRYER+
- Page 1 Multifunctional Air Fryer + This is your one-stop guide to using your product. From the below links, you can jump ahead to a specific document if desired. QUICK LINKS • Quick Start Guide • User Guide RJ38-10-RDO-V2...
- Page 2 QUICK START GUIDE BEFORE FIRST USE Remove all packaging materials, read and remove all stickers (except for rating label, which should remain on unit), and check that all parts and accessories are accounted for. Wipe interior and exterior with a damp cloth and dry thoroughly before use. Wash accessories with warm, soapy water and dry thoroughly.
- Page 3 Features and Accessories 1. Capacitive Touch Control Panel 7. Spit Forks and Screws (2 of each) 2. Rack Holders 8. Rotisserie Spit 3. Rotisserie Gear (not shown) 9. Rotating Basket 4. Rotisserie Holder (not shown) 10. Wire Cooking Racks (3) 5.
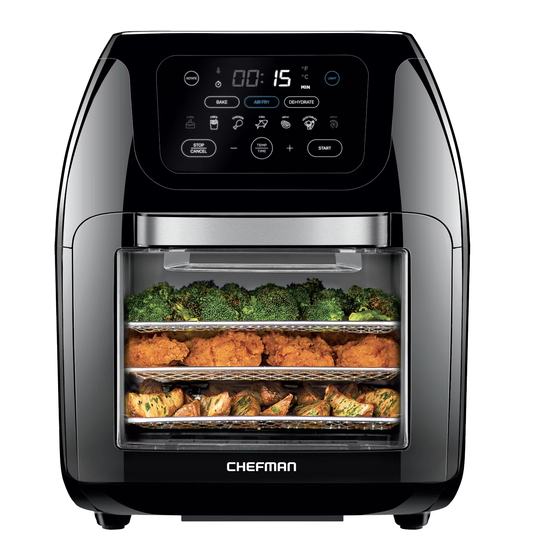
- Page 4 How to USE AIR FRYER+ STEP Place seasoned food on rack(s), baking pan, basket, or spit. Ensure drip tray is in (if not bottom of unit baking on it). STEP 2 Put food in Air Fryer+ and close door.
- Page 5 STEP 3 Select cooking function: Bake, Air Fry, or Dehydrate. To use cooking presets, press the icon that best matches what you want to cook. Otherwise adjust time and temperature as desired using TEMP/TIME button and plus and minus signs. (If cooking with the basket or spit, press Rotate button after START.) Press the START button.
- Page 6 COOKING FORWARD Welcome! Whether this is your first Chefman® appliance purchase or you’re already part of our family, we’re happy to be cooking with you! With your new Multifunctional Air Fryer+, you can air fry foods to crisp perfection with little to no oil for healthier eating as well as bake, dehydrate, and even roast foods rotisserie style.
-
Page 7: Table Of Contents
CONTENTS Safety Instructions Features Operating Instructions Air Fryer Cooking Tips Troubleshooting FAQs Cleaning and Maintenance Terms and Conditions Warranty... -
Page 8: Safety Instructions
Return appliance to the nearest Chefman authorized service facility for examination, repair, or adjustment. The use of accessory attachments not recommended by Chefman may cause injuries. 8. Do not use outdoors. 9. Do not let cord hang over edge of table or counter or touch hot surfaces. - Page 9 SAFETY INSTRUCTIONS IMPORTANT SAFEGUARDS 14. When using this appliance, provide adequate ventilation above and on all sides for air circulation. Do not allow this appliance to touch curtains, wall coverings, clothing, dish towels or other flammable materials during use. Do not cover Air Fryer+ and ensure air vents, located on the back of the fryer, are not covered.
- Page 10 SAFETY INSTRUCTIONS IMPORTANT SAFEGUARDS WARNING: This appliance has a polarized plug (one blade is wider than the other). This plug is intended to fit into a polarized outlet only one way. If the plug does not fit fully into the outlet, reverse the plug. If it still does not fit, contact a qualified electrician. Do not attempt to modify the plug in any way or force it into the outlet.
- Page 11 To disconnect appliance, grasp plug and remove it from outlet. Before each use, inspect the power cord for cuts and/or abrasion marks. If any are found, this indicates that the appliance should be serviced, and the power cord replaced. Please contact Chefman Support for assistance. ®...
-
Page 12: Features
FEATURES Capacitive Touch Control Panel Spit Forks and Screws (2 of each) Rack Holders Rotisserie Spit Rotisserie Gear (not shown) Rotating Basket Rotisserie Holder (not shown) 10. Wire Cooking Racks (3) Door with Viewing Window 11. Removable Drip Tray/Baking Pan Cool-Touch Handle 12. - Page 13 FEATURES CONTROL PANEL Rotate – Turns spit and basket Temperature/Cook Time Display – Automatically alternates between the two Light – Turns on interior light Cooking Functions – Bake, Air Fry, Dehydrate Cooking Presets – Sets suggested time and temperature for favorite foods (see chart on page 7) Stop/Cancel –...
- Page 14 FEATURES PRESET SETTINGS NOTE: These are guidelines only; always check foods for doneness according to proper food safety guidelines. AIR FRY Preset Default Time Default Temp Rotate Option Manual 15 min. 400˚F Fries 20 min. 400˚F Chicken 30 min. 375˚F Fish 10 min.
-
Page 15: Operating Instructions
FEATURES DEHYDRATE* Preset Default Time Default Temp Rotate Option Manual 10 hours 165˚F Chicken 6 hours 165˚F Fish 8 hours 165˚F Meat 6 hours 165˚F Vegetables 10 hours 125˚F Fruit 5 hours 135˚F * When dehydrating, follow a trusted recipe and follow food safety guidelines. NOTE: To change Fahrenheit to Celsius and vice versa: Press and hold the TEMP button until your desired unit illuminates on the top right part of the control panel. - Page 16 OPERATING INSTRUCTIONS 4. Wipe down the interior and exterior with a damp cloth. (Do not use abrasive cleansers or you could damage finishes.) CAUTION: Do not put the unit in the dishwasher or submerge in water or any other liquid. 5.
- Page 17 OPERATING INSTRUCTIONS If using cooking presets, choose the icon that best matches the food you want to cook and press that button; the button will turn blue and the programmed temperature and time will alternate in the control panel. (If desired, you can adjust the preset time and temperature by pressing the TEMP/TIME button then adjusting the time or temp using the Minus and Plus buttons.) NOTE: The time and temperature settings are recommendations;...
- Page 18 OPERATING INSTRUCTIONS Carefully remove food. Use potholders or oven mitts when removing hot pans, racks, or trays. If using the spit or rotisserie rack, use the fetch tool in one hand and a potholder or oven mitt in the other to remove hot basket or spit (see p. 13 for more detailed directions).
- Page 19 OPERATING INSTRUCTIONS Close door and proceed with cooking following the directions on p. 9 beginning with Step 5 and choosing the Air Fry or Bake function. CAUTION: Cooking basket will get hot during cooking. Use fetch tool and oven mitts and handle with care to avoid injury. Be sure to place hot basket on a heat-resistant surface to avoid damage.
- Page 20 OPERATING INSTRUCTIONS Hold the spit, with the meat or chicken secured on it, so that squared shaft is on the left. Guide the spit into the rotisserie position by placing left shaft into rotisserie gear located on the left interior wall. Once in place, lift and lay the right shaft on the rotisserie holder located on the right interior wall.
-
Page 21: Air Fryer Cooking Tips
AIR FRYER COOKING TIPS • Most prepared foods do not need to be tossed in oil before air frying. Most already contain oil and other ingredients that enhance browning and crispiness. (Frozen appetizers and hors d’oeuvres air fry very well.) •... -
Page 22: Troubleshooting Faqs
TROUBLESHOOTING FAQS Why is there white smoke coming from my unit? White smoke can be a sign that there’s too much fat in the fryer. Avoid cooking very fatty foods, such as sausages, in the air fryer, and be sure unit and accessories are clean before cooking. -
Page 23: Cleaning And Maintenance
CLEANING AND MAINTENANCE 1. Unplug unit and allow to cool completely before cleaning. 2. Gently wipe down exterior and interior with a damp cloth or paper towel. Never immerse the Air Fryer+ or its plug in water or any other liquid. The housing of the Air Fryer+ is NOT dishwasher safe. -
Page 24: Terms And Conditions
TERMS AND CONDITIONS Limited Warranty Our products are backed by a limited 1-year warranty. To register, follow the instructions on the Chefman ® Warranty Registration page in this User Guide. We offer a limited 1-year warranty from the date of purchase. This warranty is void without proof of purchase within the USA, Canada, or Mexico. - Page 25 Maintenance for information on proper maintenance. • Commercial Use - Damage that occurs from commercial use. • Altered Products - Damage that occurs from alterations or modifications by any entity other than Chefman ; removal of rating label. ® • Catastrophic Events - Damage that occurs from fire, floods, or natural disasters.
- Page 26 MADE IN CHINA/FABRIQUE EN CHINE AC ONLY/ AC SEULEMENT NOTE: Label depicted here is an exmaple. How Do I Register my Product? We offer two convenient ways to access the Chefman registration form: ® Visit chefman.com/register. Scan the QR code below to access site:...
- Page 27 WARRANTIES OF ANY KIND IS REQUIRED BY ANY JURISDICTION, INCLUDING MERCHANTABILITY AND FITNESS FOR A PARTICULAR PURPOSE, THE DURATION OF SUCH IMPOSED IMPLIED WARRANTY IS LIMITED TO ONE (1) YEAR. THIS WARRANTY DOES NOT COVER, AND CHEFMAN ® SHALL NOT BE LIABLE FOR, INCIDENTAL, INDIRECT, SPECIAL OR CONSEQUENTIAL DAMAGES, INCLUDING WITHOUT LIMITATION, DAMAGE TO, OR LOSS OF USE OF THE PRODUCT, OR LOST SALES OR PROFITS OR DELAY OR FAILURE TO PREFORM THIS WARRANTY OBLIGATION.
- Page 28 ®...
Need help?
Do you have a question about the AIR FRYER+ and is the answer not in the manual?
Questions and answers
my chefman mod rj36-10-rdo-v2. just stopped running,would not take power.
If your Chefman AIR FRYER+ model RJ36-10-RDO-V2 has stopped running and won't power on, the issue could be a failed internal thermal fuse. The symptoms described—unit shutting off during use, no lights or fan, and no response after checking the circuit breaker, GFCI, and power—match a thermal fuse failure. This component can stop power from reaching the unit if it blows due to overheating or a fault.
This answer is automatically generated
@Eugene Smith ( george.corrigan@xplornet.ca ) I did not get a Basket nor did i get a Manual and i can't figure out the Temper Cher gave me a French Manual
Can not turn on buttons don't light up
The Chefman AIR FRYER+ may not turn on or have its buttons light up due to several possible reasons:
1. Power Supply Issues – Check if the fryer is plugged into a working outlet and ensure that the home power supply matches the fryer’s voltage requirements.
2. Damaged Power Cord or Plug – Inspect the cord and plug for any cuts or damage. If damaged, do not use the fryer and contact Chefman Customer Service.
3. Incorrect Basket Placement – Ensure that the basket is properly aligned and fully inserted, as improper placement may prevent the fryer from turning on.
4. Internal Malfunction – If the fryer is plugged in and properly assembled but still not working, it may have an internal issue requiring professional repair or replacement.
If the fryer still does not turn on after these checks, contacting Chefman Customer Service for further assistance is recommended.
This answer is automatically generated
how to use air fryer mod 5008402