
Related Manuals for Chefman Multifunctional AIR FRYER+


Summary of Contents for Chefman Multifunctional AIR FRYER+
- Page 1 Multifunctional AIR FRYER+ USER GUIDE • Safety Instructions • Features • Operating Instructions • Air Fryer Cooking Tips • Troubleshooting FAQs • Cleaning and Maintenance • Terms and Conditions • Warranty Registration RJ38-10-RDO-V2...
- Page 2 COOKING FORWARD™ Welcome! Whether this is your first Chefman® appliance purchase or you’re already part of our family, we’re happy to be cooking with you! With your new Multifunctional Air Fryer+, you can air fry foods, using little to no oil, to crisp, healthy perfection! You can also bake, dehydrate, and roast foods rotisserie style.
- Page 3 CONTENTS Safety Instructions Features Operating Instructions Air Fryer Cooking Tips Troubleshooting FAQs Cleaning and Maintenance Terms and Conditions Warranty Registration...
-
Page 4: Safety Instructions
6. Do not operate any appliance with a damaged cord or plug or after the appliance malfunctions or has been damaged in any manner. Should this occur, contact Chefman ® Customer Support for examination, repair, or adjustment. - Page 5 SAFETY INSTRUCTIONS IMPORTANT SAFEGUARDS 14. When using this appliance, provide adequate ventilation above and on all sides for air circulation. Do not allow this appliance to touch curtains, wall coverings, clothing, dish towels or other flammable materials during use. Do not cover the air fryer and ensure air vents, located on the back of the fryer, are not covered.
-
Page 6: Short Cord Instructions
SAFETY INSTRUCTIONS IMPORTANT SAFEGUARDS WARNING: This appliance has a polarized plug (one blade is wider than the other). This plug is intended to fit into a polarized outlet only one way. If the plug does not fit fully into the outlet, reverse the plug. If it still does not fit, contact a qualified electrician. Do not attempt to modify the plug in any way or force it into the outlet. - Page 7 To disconnect appliance, grasp plug and remove it from outlet. Never use the product if the power cord shows signs of abrasion or excessive wear. Contact Chefman® Customer Support for additional guidance and support. Never wrap the cord tightly around the appliance, as this could place undue stress on the cord where it enters the appliance and cause it to fray and break.
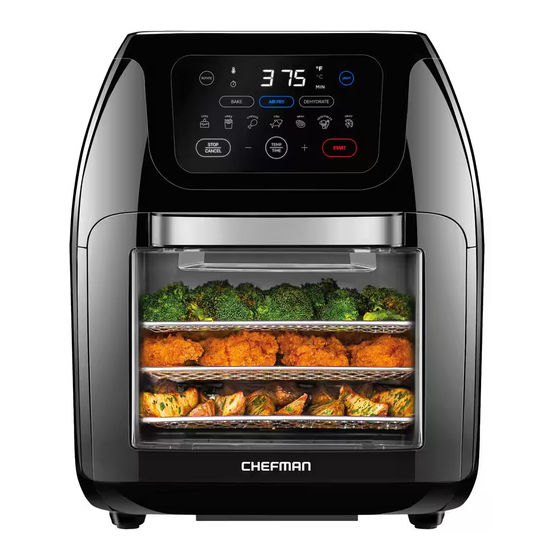
- Page 8 FEATURES Capacitive Touch Control Panel Spit Forks and Screws (2 of each) Rack Holders Rotisserie Spit Rotisserie Gear (in oven; not shown) Wire Cooking Racks (3) Rotisserie Holder (in oven; not shown) 10. Removable Drip Tray/Baking Pan Door with Viewing Window 11.
- Page 9 FEATURES CONTROL PANEL ROTATE – Turns rotisserie spit Temperature/Cook Time Display – Automatically alternates between the two LIGHT – Turns on interior light Cooking Functions – BAKE, AIR FRY, DEHYDRATE Cooking Presets – Sets suggested time and temperature for favorite foods (see charts on pp.
-
Page 10: Preset Settings
FEATURES PRESET SETTINGS NOTE: These are guidelines only; always check foods for doneness according to proper food safety guidelines. AIR FRY Preset Default Time Default Temp Manual 15 min. 400˚F Fries 20 min. 400˚F Chicken 30 min. 375˚F Fish 10 min. 350˚F Meat 25 min. - Page 11 FEATURES DEHYDRATE* Preset Default Time Default Temp Manual 10 hours 165˚F Chicken 6 hours 165˚F Fish 8 hours 165˚F Meat 6 hours 165˚F Vegetables 10 hours 125˚F Fruit 5 hours 135˚F * When dehydrating, follow a trusted recipe and follow food safety guidelines. NOTE: To change Fahrenheit to Celsius and vice versa: Press and hold the TEMP button until your desired unit illuminates on the top right part of the control panel.
-
Page 12: Before First Use
OPERATING INSTRUCTIONS BEFORE FIRST USE For best results, follow these steps before using your air fryer for the first time. 1. Remove all packaging materials, such as plastic bags and foam inserts. 2. Read and remove all stickers on the unit except for the rating label on the bottom, which should remain on the unit. - Page 13 OPERATING INSTRUCTIONS HOW TO USE THE AIR FRYER Place the air fryer on a flat surface away from all sources of heat and water and plug it in. If not using the drip tray for baking, position it on the floor of the unit for easy cleaning. Place seasoned food on rack(s), baking pan, or spit (see p.
- Page 14 OPERATING INSTRUCTIONS If cooking with the spit (see p. 15), press the ROTATE button. NOTE: Rotating will not occur automatically when using this accessory. The ROTATE button will turn blue when initiated and may be turned off or on at any time during cooking with the Air Fry or Bake functions. Cook until the timer ends.
- Page 15 OPERATING INSTRUCTIONS HOW TO USE THE ROTISSERIE SPIT (MAX: 4 LB) The spit is perfect for roasting a whole chicken to even, crisp perfection and for slowly cooking whole boneless pieces of meat, such as beef or pork tenderloins. You can also experiment with roasting a small cauliflower head or a peeled pineapple.
- Page 16 OPERATING INSTRUCTIONS HOW TO USE THE FETCH TOOL The fetch tool is handy for removing the hot spit from the air fryer. Hold the fetch tool by its handle with one hand. Have a potholder or oven mitt in or on the other hand.
- Page 17 AIR FRYER COOKING TIPS • Most prepared foods do not need to be tossed in oil before air frying. Most already contain oil and other ingredients that enhance browning and crispiness. (Frozen appetizers and hors d’oeuvres air fry very well.) •...
-
Page 18: Troubleshooting & Faqs
If your air fryer displays E1 or E2 on its control panel, it means there is a problem with the unit, such as a short circuit, and it will not function. Should this occur, please contact Chefman® Customer Support for a replacement. -
Page 19: Cleaning And Maintenance
CLEANING AND MAINTENANCE 1. Unplug the unit and allow it to cool completely before cleaning. 2. Gently wipe down the exterior and interior with a damp cloth or paper towel. Never immerse the air fryer or its plug in water or any other liquid. The housing of the air fryer is NOT dishwasher safe. -
Page 20: Terms And Conditions
Chefman®. Any changes to the Terms and Conditions of this Warranty must be in writing, signed by a representative of Chefman®. No other party has the right or ability to alter or change the Terms and Conditions of this Warranty. -
Page 21: What The Warranty Covers
• Altered Products – Damage that occurs from alterations or modifications by any entity other than Chefman® such as the removal of the rating label affixed to the product; • Catastrophic Events – Damage that occurs from fire, floods, or natural disasters; or... - Page 22 NOTE: Label depicted here is an example. How do I register my product? All you need to do is fill out a simple Chefman® registration form. You can easily access the form in one of the two ways listed below: Visit Chefman.com/register.
- Page 23 FAILURE TO PERFORM THIS WARRANTY OBLIGATION. THE REMEDIES PROVIDED HEREIN ARE THE EXCLUSIVE REMEDIES UNDER THIS WARRANTY, WHETHER BASED ON CONTRACT, TORT OR OTHERWISE. Chefman® is a registered trademark of RJ Brands, LLC. Cooking Forward is a trademark of RJ Brands, LLC.
- Page 24 FREE COOKBOOK! Scan for a digital cookbook of delicious recipes created just for your Multifunctional Air Fryer+. ©CHEFMAN 2023 RJ38-10-RDO-V2_UG_FINAL_OTP_042123...
Need help?
Do you have a question about the Multifunctional AIR FRYER+ and is the answer not in the manual?
Questions and answers