Advertisement
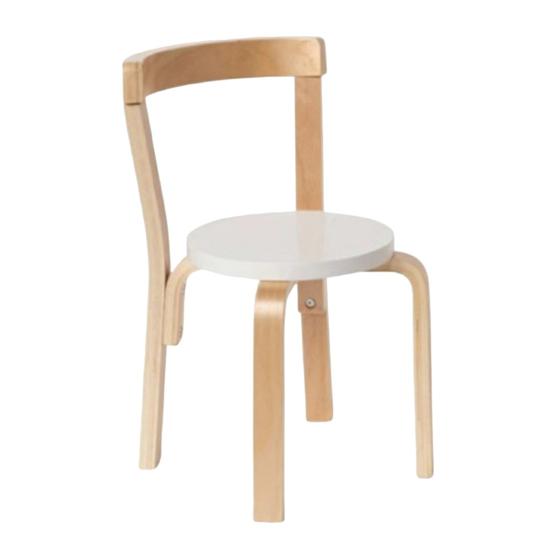
Hudson Wooden Chair
Thank you for your purchase.
Please follow the instructions below for correct assembly.
A
B
long screw
small screw
x 12
x 4
Hardware Supplied
Once fully assembled please ensure all legs are sitting flush
against the chair underside to ensure stability. Do not over-tighten
screws.
To ensure longevity of the wood please use a damp cloth only for
cleaning. Avoid use of household cleaners.
mocka.co.nz | mocka.com.au | PO BOX 6171, Maroochydore BC, QLD, 4558
C
D
nut
Allen key
x 4
x1
1
Advertisement
Table of Contents

Related Manuals for Mocka Hudson Wooden Chair


Summary of Contents for Mocka Hudson Wooden Chair
- Page 1 Do not over-tighten screws. To ensure longevity of the wood please use a damp cloth only for cleaning. Avoid use of household cleaners. mocka.co.nz | mocka.com.au | PO BOX 6171, Maroochydore BC, QLD, 4558...
- Page 2 3x long screws (A) in each leg. Tighten screws with the piece using 3x long screws (A) in each leg. Fasten screws using Allen Allen key (D) provided. key (D) ensuring pieces sit flush against the seat. mocka.co.nz | mocka.com.au | PO BOX 6171, Maroochydore BC, QLD, 4558...
- Page 3 Attach the backrest to the two back legs using 4x small screws (B) and Regularly check all screws are secure but not overly tightened. You’re 4x nuts (C) in the holes provided. Tighten screws with Allen key (D). done, enjoy! mocka.co.nz | mocka.com.au | PO BOX 6171, Maroochydore BC, QLD, 4558...
Need help?
Do you have a question about the Hudson Wooden Chair and is the answer not in the manual?
Questions and answers