Table of Contents
Advertisement
Quick Links
THE NEXT GENERATION
OF 3D PRINTING
IS HERE
DISPOSAL INSTRUCTIONS
Do not throw this electronic device into the waste when discarding. To minimize pollu-
tion and ensure utmost protection of the global environment, please recycle or return
to Photocentric for recycling.
UK
USA
Cambridge House, Oxney Road
2205 West Parkside Lane, Phoenix,
Peterborough PE1 5YW UK.
85027, AZ USA
info@photocentric.co.uk
www.photocentricgroup.com
www.photocentricgroup.us
Liquid Crystal
DENTAL
LC DENTAL
USER MANUAL
Liquid Crystal
DENTAL
Revision 4
21/09/2020
Advertisement
Table of Contents

Related Manuals for PhotoCentric Liquid Crystal Dental


Summary of Contents for PhotoCentric Liquid Crystal Dental
- Page 1 Do not throw this electronic device into the waste when discarding. To minimize pollu- tion and ensure utmost protection of the global environment, please recycle or return to Photocentric for recycling. Cambridge House, Oxney Road 2205 West Parkside Lane, Phoenix, Peterborough PE1 5YW UK.
-
Page 2: Table Of Contents
1. EU Declaration of Conformity 2. General Information 3. Safety Information 4. Box Contents 5. Installation 5.1 Printer Set-Up 5.2 Connecting to a Network 5.3 Photocentric Studio Setup 7-11 6. Printing 7. Cleaning Prints 8. Finishing Prints 12-16 9. Maintenance 12-14 9.1 Replacing the Resin Vat Film and Gasket... -
Page 3: Eu Declaration Of Conformity
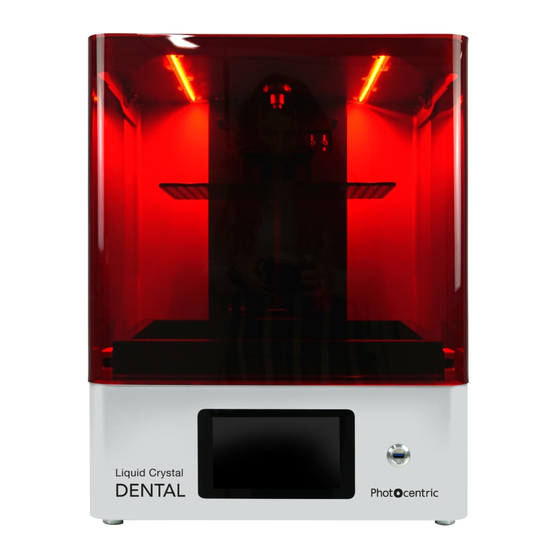
LCD screen. 2. Manufacturer: Liquid Crystal Dental has been designed specifically for the dental industry. It is a powerful tool for dental labo- Photocentric Ltd ratories, practices and hospitals. 3D printing is now an integral step in many digital dentistry procedures. -
Page 4: Safety Information
4. BOX CONTENTS INFORMATION Read this Liquid Crystal Dental User Manual Do not operate Liquid Crystal Dental with the carefully and retain it for future reference. hood open as you may be exposed to crush Take note of all warnings displayed on the 3D hazards, harmful UV light or other hazards. -
Page 5: Installation
12. Select ‘Browse…’ 13. Locate the print file on your PC, the name of Liquid Crystal Dental has a USB port and an RJ45 Allow a minimum of 150 mm at the rear of the the file will appear to the right of the ‘Browse…’... -
Page 6: Photocentric Studio Setup
- Installing the software 13. ‘PRINT’ You can ensure your printer is level at this point by - Getting started 14. Your Liquid Crystal Dental will start the printing WARNING: pouring a small amount of resin into the vat and - Adding supports and slicing files process Photopolymer resin is an irritant. - Page 7 37. Check the screen of your Liquid Crystal Dental 25. Finish your printed parts (see section 8) for any sign of resin contamination or damage 26. Take the resin bottle that you used earlier when 38.
-
Page 8: Cleaning Prints
DENTAL 7 CLEANING PRINTS 8 FINISHING PRINTS 9 MAINTENANCE 6. Lift off the vat ring assembly All parts produced using Liquid Crystal Dental will 9.1 REPLACING THE RESIN VAT We recommend using Photocentric Wash 15, and need to be finished using UV light and heat to fully Photocentric Resin Cleaner, to clean your prints. FILM AND GASKET... -
Page 9: Print Platform And Resin Vat Re-Calibration
14. Lay the bottom ring down with the countersinks 21. Secure the vat ring assembly to the vat body 9.2 PRINT PLATFORM AND RESIN 8. Close the printer hood and select ‘START’, the z facing upwards using the large screws axis will move to the top of its travel VAT RE-CALIBRATION 15. - Page 10 Liquid Crystal Liquid Crystal DENTAL DENTAL 21. Select ‘NEXT’ 10. Take the weight of the print arm in one hand 22. Keeping pressure on the print arm, use the 3 mm hex key to tighten the two bolts shown 17. Ensure the print platform is sitting square in the machine, use the screen as a visual reference NOTE 18.
-
Page 11: General Maintenance
27. Ensure the resin vat is clean shown 33. Select ‘FINISH’ 34. Your Liquid Crystal Dental is ready to print check that the print platform remains parallel to the screen 28. Use the 3 mm hex key to loosen the two bolts shown, it should be possible to manually move the 9.3 GENERAL MAINTENANCE...
Need help?
Do you have a question about the Liquid Crystal Dental and is the answer not in the manual?
Questions and answers