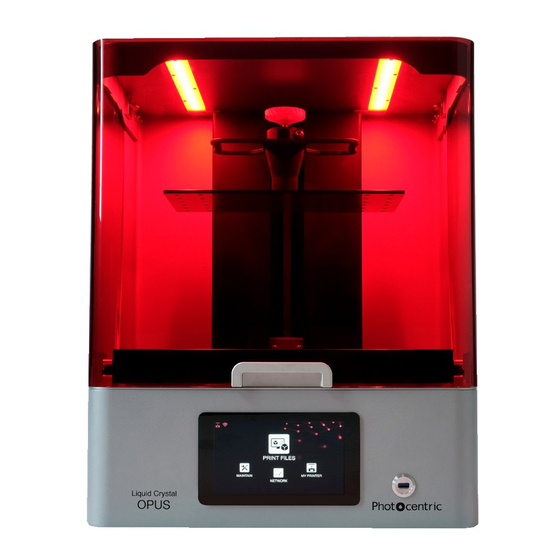
Table of Contents
Advertisement
Quick Links
THE NEXT GENERATION
OF 3D PRINTING
IS HERE
DISPOSAL INSTRUCTIONS
Do not throw this electronic device into the waste when discarding. To minimize pollu-
tion and ensure utmost protection of the global environment, please recycle or return
to Photocentric for recycling.
UK
USA
Cambridge House, Oxney Road
2205 West Parkside Lane, Phoenix,
Peterborough PE1 5YW UK.
85027, AZ USA
info@photocentric.co.uk
www.photocentricgroup.com
www.photocentricgroup.us
LC OPUS
USER MANUAL
Revision 7
08/02/2022
Advertisement
Table of Contents

Summary of Contents for PhotoCentric Liquid Crystal Opus
- Page 1 Do not throw this electronic device into the waste when discarding. To minimize pollu- tion and ensure utmost protection of the global environment, please recycle or return to Photocentric for recycling. Cambridge House, Oxney Road 2205 West Parkside Lane, Phoenix, Peterborough PE1 5YW UK.
-
Page 2: Table Of Contents
3. Safety Information 4. Box Contents 5. Installation 5.1. Printer Set-Up 5.2. GUI Introduction 5.3. Connecting to a Network 5.4. Photocentric Studio Set-Up 5.5. Uploading Files 6. Printing 7. Cleaning Prints 8. Post-Curing 8.1. Removing Parts from the Print Platform 9. -
Page 3: Eu Declaration Of Conformity
Liquid Crystal Opus has been designed with several industry applications in mind. As 3D printing becomes Photocentric Ltd more integral to optimized production, Liquid Crystal Opus is a powerful addition that will assist with boos- Address: Cambridge House, Oxney Road, Peterborough, PE1 5YW ting productivity and will quickly become an established unit in any context. -
Page 4: Safety Information
4. BOX CONTENTS INFORMATION This information must be read through carefully - Do not operate Liquid Crystal Opus with the hood for Liquid Crystal Opus User Safety. Retain this open as you may be exposed to crush hazards, information for any future reference. -
Page 5: Installation
5 INSTALLATION Maintain Page 5.1 PRINTER SET-UP 5.2 GUI INTRODUCTION By now and following Liquid Crystal Opus (LC Opus) initiate a print maintain printer features. It is recommended that LC Opus GUI is the main control for users to print,... -
Page 6: Connecting To A Network
1. Connect to a Network. (See Section 5.3 for further for Photocentric Studio. This allows you to activate guidance). a perpetual license for up to two PCs. Photocentric 2. Open a web browser on your PC. Studio can be downloaded from this webpage: To check the printer screen function, select 3. -
Page 7: Printing
NOTE: Make sure you have added the same resin as selected in Photocentric Studio. If correct resin is not used, the print will fail. 8. Add required volume reported on Photocentric Studio in addition to the 500 ml minimum level. -
Page 8: Cleaning Prints
If your printer is connected to your network (see To remove residual resin from printed parts, and Section 5.3), you can monitor print progress via platforms, they will need to be cleaned. Photocentric your web browser. recommends using the Photocentric Wash 15 or Air 14. -
Page 9: Post-Curing
Hub. Wear gloves when handling platforms with Here, you can also browse guidance on the Parts can be cleaned in 15 minutes using Photocentric following: Resin Cleaner or alternatively, in 10 minutes using traces of liquid resin or cleaning product on the - Using your cure unit Photocentric Resin Cleaner 30. -
Page 10: Housekeeping
9.1 CLEANING THE RESIN VAT LC Opus Resource Hub Page 10. Use a small amount of suitable cleaning solvent 1. If any Photocentric Resin Cleaner or residual 10.2 RESIN VAT RE-SKINNING 1. After printing, resin should be removed from the walls. -
Page 11: Print Platform & Resin Vat Re-Calibration
Liquid Crystal Liquid Crystal OPUS OPUS 8. Remove the small torx screws using the T10 L Shape Torx Key, keep them to one side. the vat body with no visible gaps. 21. Check that no damage has been caused to the 22. -
Page 12: Printer Hood Adjustement
Liquid Crystal Liquid Crystal OPUS OPUS 8. Open the hood and loosen the adjustment bolt 11. Tighten the adjustment bolt fully using the T25 4. Select ‘Vat’. 9. Tighten the two bolts on the vat bracket fully using until the platform is free to move, using the T25 L-Shape Torx Key.


Need help?
Do you have a question about the Liquid Crystal Opus and is the answer not in the manual?
Questions and answers