Marimba One WAVE Vibe Owner's Manual
Hide thumbs
Also See for WAVE Vibe:
- Assembly instructions & owner's manual (11 pages) ,
- Owner's manual (16 pages) ,
- Owner's manual (12 pages)
Advertisement
Quick Links
Advertisement

Related Manuals for Marimba One WAVE Vibe


Summary of Contents for Marimba One WAVE Vibe
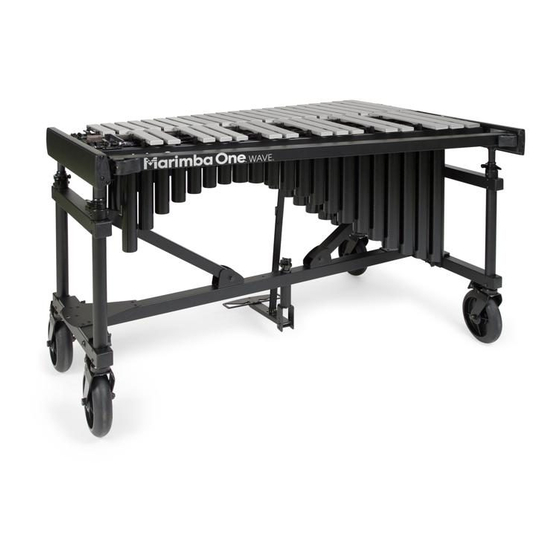
- Page 1 WAVE Vibe OWNER'S MANUAL www.marimbaone.com tel 707 822 9570 fax 707 822 6256...
- Page 2 A large open space with carpet (or a blanket to cover the floor) FOR ASSEMBLY, • An assistant to help you assemble the WAVE Vibe YOU WILL NEED: CAREFULLY UNPACK YOUR CRATE Compare the seven components as shown on this page.
- Page 3 ARRANGE FRAME COMPONENTS In a large open space with carpeting (or a blanket), arrange the frame components. Treble Frame Bass Frame Girder LOOSEN KNOBS Turn knobs counterclockwise. Bass Frame Treble Frame OPEN WAVE-LOCK LEVERS Push WAVE-lock levers into open position. Bass Frame Treble Frame 100120 - Rev.
-
Page 4: Center Support
CENTER SUPPORT LIFT DIAGONAL BRACE ATTACH DIAGONAL BRACE Have assistant hold bass frame upright. Lower slot onto clamp rod. Lift brace into open position. diagonal brace ATTACH GIRDER PLATE SECURE DIAGONAL BRACE Lower girder plate notches onto frame knobs. Push WAVE-lock lever into closed position. - Page 5 HARP PREPARE HARP Slide latches into open and secured position. Open There are four latches. Two on each headboard. Secured POSITION HARP With an assistant, align headboard sockets over frame posts. Post SECURE HARP TO FRAME CONNECT HARP AND FRAME Slide latches into closed and secured position.
- Page 6 PEDAL REMOVE PARTS INSERT PEDAL BOLT Slide bolt through hole on the bass end (left side) Remove knob, threaded of the center support. wheel, metal washer, and the black plastic washer. SECURE PEDAL TIGHTEN KNOBS Adjust tension using both wheel and threaded knob.
- Page 7 RESONATORS POSITION TREBLE END INSERT RESONATORS Insert resonators into the First, position treble end of resonators onto treble headboard. treble end headboard. INSERT RESONATORS LIFT BASS END Insert resonators into slots Lift bass end of resonators above top on bass headboard. edge of bass headboard.
- Page 8 KEYBOARDS POSITION NATURAL KEYBOARD SECURE TREBLE END Hold cords, push pedal down with foot, lay Slide cord around corner jacks on keyboard onto rails 1 and 2. treble end. POSITION BARS ON RAILS treble end close-up treble end close-up Place bars between rail jacks. rail jacks Set cord into slots on rail jacks.
- Page 9 damping pressure tension knob The tension knob is set at the factory for full damping pressure. Turn clockwise for less damping pressure. damper bar bass/treble sustain adjustment The damper bar is set at the factory for even damping across the keyboard. Adjust balance of sustain by turning the adjustment screw located at bass end.
- Page 10 bar cord tension Over time, as you play your instrument, the cord that suspends the bars may loosen and need to be adjusted. To increase tension in the bar cord, use the cleats behind the springs to hold the slack in the cord. UNHOOK SPRINGS cleat cleat...
-
Page 11: Height Adjustment
height adjustment CAUTION! DO NOT RELEASE LEVERS To prevent damage, always adjust the AT THE SAME TIME. height of the marimba with all rails, resonators and bars INSTALLED. RELEASE LEVERS ONE AT A TIME. Use gauges to ensure that Locate the height Raise or lower Close levers when both ends are always at... -
Page 12: Clamping Pressure Adjustment
clamping pressure adjustment To increase clamping pressure turn wheel clockwise. To decrease clamping pressure turn wheel counter-clockwise. height adjustment warnings • Always adjust the height of the marimba with rails, resonators and bars installed. • Release the levers one end at a time. •... - Page 13 Push green button to ON position and red button to RUN position. Push red button to STOP position. The WAVE Vibe fans always stop in the 12 o’clock/vertical position. DO NOT move green button to the OFF position. Doing so will result in fans stopping at random positions.
-
Page 14: Warranty
WARRANTS ON LY TO THE ORIGINAL PURCHASER THAT THIS INSTRUMENT IS FREE FROM DEFECTS IN MATERIALS AND/OR WORKMANSHIP AS FOLLOWS: 1. During a period of twelve (12) months from the date of receiving your instrument, marimba one ® will pay all labor and materials necessary to repair any defective instrument or part thereof. We will repair a defective instrument or part at the location of our factory.
Need help?
Do you have a question about the WAVE Vibe and is the answer not in the manual?
Questions and answers