
Related Manuals for Marimba One Educational Series


Summary of Contents for Marimba One Educational Series
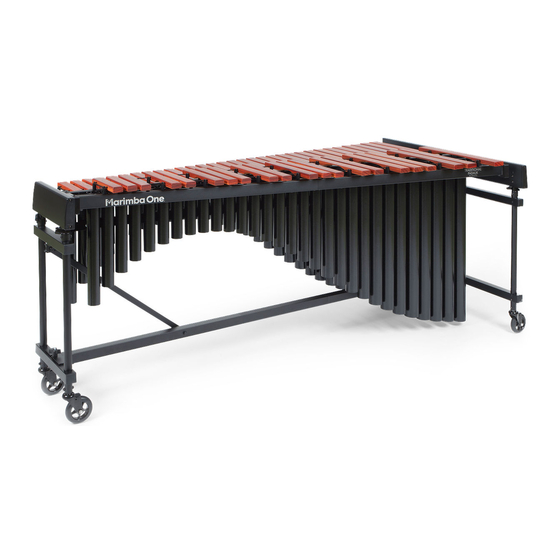
- Page 1 Educational Series 4.3 Octave Marimba OWNER’S MANUAL 707.822.9570 // marimbaone.com...
- Page 3 ASSEMBLY INSTRUCTIONS & OWNER'S MANUAL FOR ASSEMBLY, A large open space with carpet (or a blanket YOU WILL NEED: to cover the floor) AVOID INJURY — When opening crate, use wire cutters or scissors to cut zip ties. CAREFULLY UNPACK YOUR CRATE Treble Frame Compare the components as shown on this page.
-
Page 4: Center Support
ARRANGE FRAME COMPONENTS In a large open space with carpeting (or a blanket), arrange the frame components. Bass Frame Girders Treble Frame LOOSEN KNOBS ON THE END FRAMES Turn knobs counterclockwise. Bass Frame Treble Frame CENTER SUPPORT UNFOLD ARMS Unfold arms by swinging them over to the opposite side. Rev. - Page 5 CONNECT GIRDERS On a flat surface, align girders as shown. Slide slotted end over metallic end until fully engaged. When you hear or feel the girder tubes touch, the girders are fully engaged. SECURE GIRDER CONNECTION Push girder together, hold button down. ATTACH ANGLE BRACKET SECURE ANGLE BRACKET Have assistant hold bass frame upright.
- Page 6 ATTACH ARM Raise slotted arm up to knob. Bass Frame SECURE ARM Tighten frame knob firmly, turn clockwise. REPEAT PROCESS FOR TREBLE FRAME VERIFY KNOBS ARE SECURELY TIGHTENED Bass Frame Treble Frame Rev. 120522...
- Page 7 IDENTIFY NATURAL RESONATOR BANK (without resonators go to #18) The natural resonator bank has a plug inside every tube. The accidental resonators are missing a plug inside every 3rd or 4th tube. safety lock UNFOLD NATURAL RESONATOR With your assistant, unfold the natural resonator bank.
- Page 8 RAILS IDENTITFY RAIL SLOTS 1 – 4 Bass Frame Treble Frame UNFOLD RAILS IDENTIFY RAILS 1 – 4 With your assistant, unfold the rail while Numbers are engraved on the supporting each end. top of Bass and Treble ends. Rail Number NOTE: Gaps between the rail jacks are wider on the bass end of rail.
- Page 9 INSTALL RAIL 1 Lower Rail 1 into slots and onto flexible rail pins. Bass Frame Make sure the rail is fully engaged Treble Frame onto the flexible pegs. REPEAT FOR RAILS 2 – 4 Bass Frame Treble Frame Rev. 120522...
- Page 10 INSTALL NATURAL BARS Carefully unroll Natural bar bundle. Place natural bars over rails #1 and #2. Bass Frame Treble Frame POSITION BARS ON RAILS rail jacks Treble End Cord should rest on Rail Jacks. Wrap corner jacks the bar cord around Corner Jacks at the treble end.
-
Page 11: Height Adjustment
HEIGHT ADJUSTMENT: Always adjust the height of the instrument Raising/Lowering your marimba with rails, resonators, and bars installed. RELEASE LEVERS Locate the Izzy Height Gently lift or push down to Close levers when desired Adjustment™ clamp on raise or lower. Use gauges height is achieved. - Page 12 AFTER ASSEMBLY CARE & MAINTENANCE bar cord tension moving the marimba marimba cleaning bar cord tension Over time, as you play your instrument, the cord that suspends the bars may loosen and need to be adjusted. To increase tension in the bar cord, use the cleats behind the spring to hold the slack in the cord.
- Page 13 marimba cleaning USE A SOFT COTTON CLOTH OR TOWEL DAMPENED WITH WATER ONLY. Do not use furniture polish on your marimba! Most products of this type contain silicone, which will damage the finish and contaminate the wood. moving the marimba THE MARIMBA SHOULD ONLY BE LIFTED BY THE END FRAMES.
-
Page 14: Warranty
THAT THIS INSTRUMENT IS FREE FROM DEFECTS IN MATERIALS AND/OR WORKMANSHIP AS FOLLOWS: 1. During a period of twelve (12) months from the date of receiving your instrument, Marimba One will pay all labor and materials necessary to repair any defective instrument or part thereof. We will repair a defective instrument or part at the location of our factory. - Page 16 Rev. 120522...
Need help?
Do you have a question about the Educational Series and is the answer not in the manual?
Questions and answers