Table of Contents
Advertisement
Quick Links
Advertisement
Table of Contents

Subscribe to Our Youtube Channel
Related Manuals for Kathrein HDP 850 GPS


Summary of Contents for Kathrein HDP 850 GPS
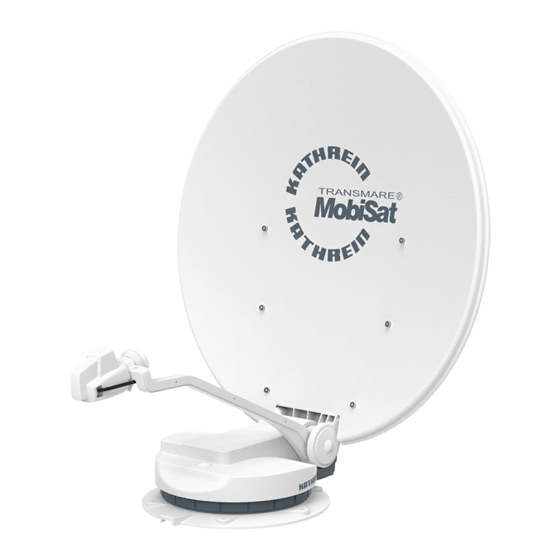
- Page 1 HDP 850 GPS 20450003 CAP 850 GPS 203500001 Fully Automatic Camping Satellite Antenna System with 85 cm Parabolic Refl ector Live Only with CAP 850 GPS Instruction Manual For information on the parking position see „Turntable in Parking Position While Driving“ on page 9...
-
Page 2: Table Of Contents
Contents About This Manual ............................. 4 Intended Use ............................. 4 Features Scope of Supply ............................5 Optional Accessories ..........................6 LCD 89 (Order No. 21510004) .............................. 6 HDS 50 (Order No. 20410070) ............................. 6 HDS 42 (Order No. 2040000006) ............................6 HDZ 100 (Order No. - Page 3 GPS Signal ..................................23 Technical Data and Dimensions ............................24 Technical Data ....................................24 Dimensions ......................................25 Important Information ..............................26 Control Unit ..............................27 Safety Instructions and General Notes ..........................27 Installation and Connection ............................. 29 Installing and Connecting the CAP converter ...........................29 Unpacking and Preparing ....................................29 Selecting the Installation Site ....................................29 Important Instructions for Installation ................................30...
-
Page 4: About This Manual
Intended Use The CAP 850 GPS and HDP 850 GPS fully automatic camping satellite systems are intended to be used for receiving digital TV and radio channels via satellite. The automatic positioners are intended to be used as a turntable for the Kathrein parabolic refl... -
Page 5: Scope Of Supply
Scope of Supply Turntable with integrated control unit Twin LNB Parabolic refl ector ∅ 85 cm CAP converter LNB arm support Scope of supply of the CAP 850 GPS The CAP 850 GPS consists of: ■... -
Page 6: Optional Accessories
The USB/Wi-Fi adapter is plugged into the CAP converter. HDS 52 (Order No. 20410079) The CI-BUS adapter enables you to operate your Kathrein satellite antenna system of the CAP series with the vehicle-specifi c control panel of your motorhome/caravan. Please contact your vehicle manufacturer for further information. -
Page 7: Turntable
CAP 850 GPS, BN: 203500003 are in compliance with Directive 2014/53/EU. The full text of the EU declaration of confor- mity are available at the following internet address: www.kathrein-ds.com KATHREIN Digital Systems GmbH is not liable for product damage due to external infl uences, wear or improper handling, unauthorised repair, modifi cations or accidents. Safety Instructions and General Notes Danger to life from electric shock when touching electrical installations! ►... -
Page 8: Proper Installation And Safety
► When extending the antenna cable, use a 75 coaxial cable with a screening factor of at least 75 dB. ► We recommend an extension cable that has at least the electrical characteristics of the Kathrein cable LCD 89! 8 / 44... -
Page 9: Supply Voltage, Fusing
Material damage due to reversed polarity! When connecting the power cables, reversed polarity can lead to thermal overload and damage to compo- nents when the equipment is powered up. ► Never reverse the poles of the power cables used to connect the CAP converter and the turntable to the vehicle electrical system. -
Page 10: Installation And Connection
Installation and Connection For more information on mounting, see Installing and Connecting the Turntable, p. 40. Installing and Connecting the Turntable Required Tools and Equipment ● Circular drill, Ø 38 mm ● Open-ended or ring spanners, 10 and 11 mm across fl... -
Page 11: Installing The Turntable
Installing the Turntable Selecting the Installation Site The cable lengths of the supplied components and parts allow free choice of the installation location on the caravan or motor home. Observe the following points when selecting the installation location: ► Before installation, fi nd out whether the operating manual for your vehicle permits the installation of non-vehicle- specifi... - Page 12 Elevation 45° Elevation max.65° Direction of travel Park position Shading due to nearby attachments on the vehicle roof may impede satellite reception! Area around the turntable Recommended clearance within which objects up to 170 mm high may be attached (radius min. 907.5 mm) to the roof (min.
-
Page 13: Installing The Cable Gland Underneath The Turntable
Installing the Cable Gland Underneath the Turntable If you have previously used a Kathrein HDM 140/141 jointed tripod mast or another mast with a diameter of 34 mm, you can continue using the existing through hole in the roof. There is no need to enlarge this hole, as the roof gland also requires a borehole of 38 mm diameter. - Page 14 The mounting plate should always be screwed and glued on. Alternatively, having a certifi ed specialist dealer glue on the mounting plate professionally may eliminate the need for screwing it on. 1. Place the mounting plate on the roof of the vehicle so that the centre hole is aligned centrically to the cable gland. The arrow symbol must be visible from above and point forwards in the direction of travel (see Aligning the moun- ting plate, p.
-
Page 15: Cable Gland Underneath The Turntable
Cable Gland Underneath the Turntable 1. Feed the ends of the cables with the connectors as far as possible through the cable gland into the interior of the vehicle. 2. Lift the turntable and carefully place it on the mounting plate in the direction of travel (see Cable gland under- neath, p. -
Page 16: Mounting The Lnb Arm Support
Mounting the LNB Arm Support To ensure that the LNB arm is securely fi xed and that no vibrations can occur during travel, the LNB arm is seated on a support. 1. Select a mounting location for the support (see distances in Mounting the LNB arm support, p. -
Page 17: Functional Instructions For Connection To The Vehicle Electrical System
Malfunction and material damage due to reversed polarity! When connecting the power cables, reversed polarity can lead to thermal overload and damage to compo- nents when the equipment is powered up. If the earth (-) of the ignition signal and the earth (-) of the vehicle battery for the turntable do not have the same potential, the automatic lowering of the turntable will not work! ►... -
Page 18: Reception Range/Footprint
Reception Range/Footprint The footprint is the reception area on earth which the satellite covers with its transmission beam (spot) and in which satellite reception is possible. The transmission power is at its highest in the centre of this spot – it becomes progressi- vely weaker towards the edges. -
Page 19: Polarisation Setting
Polarisation Setting Polarisation Setting Explained The LNB of the turntable is factory-set to the polarisation setting 0. In this position, you can still receive signals from satellites with deviations of 15° to 20° . For larger deviations it may be useful to set the required polarisation angle by rotating the LNB. -
Page 20: Safety Instructions
Safety Instructions Observe the Safety Instructions and General Notes, p. 7. Risk of material damage due to obstacles in the range of rotation or malfunction due to incorrect setting! ► Make sure that there are no obstacles in the range of rotation of the turntable. ►... -
Page 21: What To Do In The Event Of Faults
What to Do in the Event of Faults Removing the Turntable for Repair If repairs to the system or individual components are necessary, contact your specialist dealer or our service centre. Risk of injury from opening the turntable! ► Never open the turntable. Material damage to the unit by cutting cables! ►... -
Page 22: Manually Lowering The Turntable To The Parking Position
Manually Lowering the Turntable to the Parking Position Risk of material damage due to a defect in the electronic controls! In the event of a defect in the electronic control system, the turntable cannot automatically move to the parking position. After some disassembly work, the turntable can be manually folded into the park position. Before manually folding in the turntable, note the following: ►... -
Page 23: Updating The Turntable Via The Cap Converter
Fold the antenna into the parking position. 4. Remove the M12 screw. → The rocker can be put back on the tapered shaft. 5. Screw the M8 screw back in and tighten it. 6. Insert the plastic cap. Rocker displacement Loosening the rocker from the tapered shaft changes the zero position of the rocker. -
Page 24: Technical Data And Dimensions
Technical Data and Dimensions Technical Data HDP 850 GPS / 204500003 Type / Order No. CAP 850 GPS / 203500001 2 switchable outputs: V/H (14/18) Low/High (0/22) Supply voltage LNB Vertical: 11.5 – 14 Horizontal: 16 – 19 Input frequency 10.70 –... -
Page 25: Dimensions
Dimensions Direction of travel 694.45 118.3 118.3 Elevation 45 ° Elevation max. 65 ° (694.5) (679.4) (907.4) ∅ 38 Clamping range 20/50 25 / 44... -
Page 26: Important Information
Important Information In the following operating instructions, we assume that the CAP converter and the turntable have been properly installed and connected. If you have not already done so, read the safety instructions in this installation and operating manual and observe them when handling the CAP converter and the turntable! Your location has a clear view of the satellite positions to the south and is not shaded by trees or other obstacles (see Correct location of caravan/motor home, p. -
Page 27: Control Unit
Control Unit Safety Instructions and General Notes WARNING! Risk of death due to electric shock and risk of fi res resulting from electric current. Note the following points: 12 V connection (vehicle power supply) ► Make sure that the 12 V connection cable (power supply cable) is not reversed and damaged during installation. - Page 28 If new software which a ects the information in this manual (e.g. changes to functions) is released for your CAP converter, we will, if we consider it necessary, provide a new manual for download at www.kathrein-ds.com. Repair Make sure that repairs to the unit are only carried out by qualifi...
-
Page 29: Installation And Connection
Installation and Connection For more information on the installation, see Installing and Connecting the Turntable, p. 40. Installing and Connecting the CAP converter Unpacking and Preparing ► The packaging of the CAP converter can be opened at the front. The converter is packed in an antistatic fl... -
Page 30: Important Instructions For Installation
Ventilation The heat generated in the CAP converter is dissipated on all sides of the housing. When selecting the installation place, make sure that these sides are not obstructed or covered. If the device is permanently insu ciently venti- lated, this can have a negative e ect on the service life of the device! 20 cm Maintain a clearance of at least 20 cm above/below, 2 cm... -
Page 31: Installing The Cap Converter
Installing the CAP Converter The distances of the drilling points can be seen in the diagram below. Material damage to the device by overtightening the screws! If you apply too much force when tightening the screws, you may damage the screw holes and the housing of the CAP converter or any cables already connected to it. -
Page 32: Installing The Cap Converter On The Rear Panel Of A Tv Set
Installing the CAP Converter on the Rear Panel of a TV Set Danger to life due to high voltage! Screws that are screwed in too deeply may damage the TV set beyond repair and cause danger to life through electric shock. ►... -
Page 33: Functional Instructions For Connection To The Vehicle Electrical System
Diagram, p. 39 Operating the CAP Converter External Pushbutton Plug the included Kathrein push button into the CONTROL UNIT RJ12 socket on the CAP converter (see Connecting the CAP Converter, p. 32). Moving the Turntable from the Parking Position Press the button ►... -
Page 34: Software Update
Software Update Updating the Channel List ✔ A USB stick formatted to FAT32 is available. 1. On the USB stick, create the folder „kathrein“ with the subfolder „capconverter“. 2. Download the channel.xml fi le with the current channel list from https://www.kathrein-ds.com/support/downloadbereich/ 3. -
Page 35: Led Status Indicator On The Cap Converter/External Pushbutton
LED Status Indicator on the CAP Converter/External Pushbutton Function LED Colour Signal Description LED fl ashes 1 x for 0.5 sec, then pauses for 2 sec No connection to CAP LED fl ashes 2 x for 0.5 sec, then pauses for 2 sec Satellite not found LED fl... -
Page 36: Technical Data And Dimensions
Technical Data and Dimensions Technical Data Type / Order No. CAP Converter / 204500001 Colour Black Sat IF range 950-2150 Input level range dB V 44-83 Modulation, FEC, demultiplexer DVB-S(2) Input data rate MSymb/s 2-45 (30 at DVB-S2 / 8PSK) Supply voltage (car battery) 10.5 –... -
Page 37: Important Information
Ulm. 1. On a USB stick, create the folder kathrein with the subfolder capconverter (use lower case for the folder name). 2. Copy the confi g.xml fi le to the subfolder capconverter. 3. Plug the USB stick into the switched-on CAP converter. -
Page 38: Parabolic Refl Ector
Parabolic Refl ector Installing the Parabolic Refl ector Required Fitting Aids and Tool ● 6 fi xing screws M6 x 6 (included) ● Allen key (5 mm AF) Unpacking the Parabolic Refl ector For space and shipping reasons, the parabolic refl ector is packed separately. ►... -
Page 39: Further Information
Further Information Overall Wiring Diagram UFZ 132* TV set 1 Wi-Fi Hotspot with satellite tuner l y c a b r s u p p Ignition TV set 2 P o w e with satellite tuner a l c a b c o a x i M a s t e S l a v e... -
Page 40: Installing And Connecting The Turntable
Installing and Connecting the Turntable Pages 40 to 42 show the installation steps required to install the turntable (without the parabolic refl ector) on the vehicle roof and the control unit inside the vehicle. All other detailed instructions in this operating manual must also be observed. - Page 41 7. Align the mounting plate 8. Applying the sealing adhesive – Arrow in the direction of travel – Apply the adhesive in wavy lines between the two grooves – Mark out and drill the holes for the mounting plate – Spread with a spatula or similar tool Risk of skin injuries! ►...
- Page 42 Material damage due to impermissible tightening torque! ► If the torque is too high, the thread in the mounting plate can be destroyed. If the torque is too low, the screws can come loose due to vibrations ► Observe tightening torque of 6 Nm! 13.
-
Page 43: Addresses
Customer Support Eiselauer Weg 13 89081 Ulm, Germany Phone: +49 731 270 909 70 Email: support@kathrein-ds.com Business Hours: Monday to Thursday 8 am to 5 pm | Friday 8 am to 4 pm (CET) Factory Repair Centre CSS Caravan-Sat-Service GmbH Bahnhofstr. -
Page 44: Disposal
At the end of its service life, take this unit for disposal at a designated public collection point. www.kathrein-ds.com | support@kathrein-ds.com 936500025/c/STM/0521/GB | Subject to change. KATHREIN Digital Systems GmbH Anton-Kathrein-Str. 1–3 83022 Rosenheim Germany...
Need help?
Do you have a question about the HDP 850 GPS and is the answer not in the manual?
Questions and answers