
Related Manuals for Ubiquiti U-LTE


Summary of Contents for Ubiquiti U-LTE
- Page 1 Package Contents U-LTE Stand Mounting Bracket Double-Sided Adhesive Self-Tapping Screws (Qty. 2) Screw Anchors (Qty. 2) Create PDF in your applications with the Pdfcrowd HTML to PDF API PDFCROWD...
-
Page 2: System Requirements
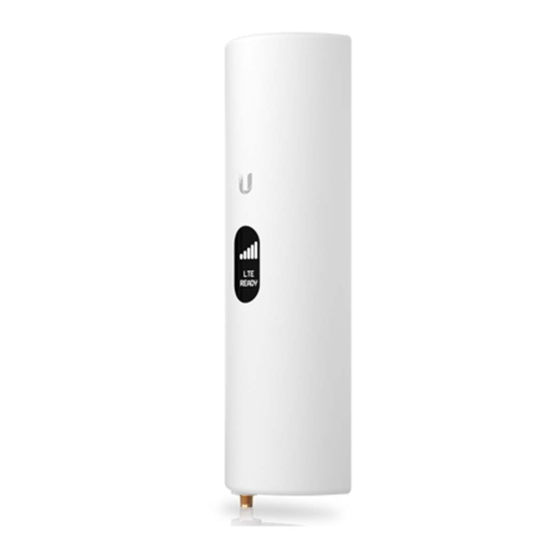
RP-SMA Cap System Requirements Linux, Mac OS X, or Microsoft Windows 7/8/10 Java Runtime Environment 1.8 or above recommended Web Browser: Google Chrome (Other browsers may have limited functionality) UniFi Controller software v5.12.x (or newer), available at: ui.com/download/unifi Hardware Overview Create PDF in your applications with the Pdfcrowd HTML to PDF API PDFCROWD... - Page 3 RP-SMA Antenna Connector You can connect an optional external LTE antenna (not included). If you are not using an external antenna, then you can cover the connector with the RP-SMA Cap. Reset Button The Reset Button serves two functions: Restart Press and release the Reset button quickly. Restore to Factory Default Settings Press and hold the Reset button for more than five seconds, until the display indicates “Factory Reset”.
-
Page 4: Installation Requirements
UniFi Security Gateway, model USG, USG-PRO-4, or USG-XG-8 UniFi cloud account Note: The U-LTE can only be adopted via remote access at: unifi.ui.com Activation of Ubiquiti LTE data plan For indoor applications, use Category 5 (or above) UTP cabling approved for indoor use. -
Page 5: Hardware Installation
To reduce the risk of fire or electric shock, do not expose this product to rain or moisture. Note: Although the cabling can be located outdoors, the U-LTE itself should be housed inside a protective enclosure. Hardware Installation The U-LTE can be mounted in three ways: Screw Mount “Adhesive Mount”... - Page 6 Create PDF in your applications with the Pdfcrowd HTML to PDF API PDFCROWD...
- Page 7 Create PDF in your applications with the Pdfcrowd HTML to PDF API PDFCROWD...
- Page 8 Create PDF in your applications with the Pdfcrowd HTML to PDF API PDFCROWD...
- Page 9 Create PDF in your applications with the Pdfcrowd HTML to PDF API PDFCROWD...
-
Page 10: Adhesive Mount
Proceed to “Connecting Ethernet”. Adhesive Mount Create PDF in your applications with the Pdfcrowd HTML to PDF API PDFCROWD... - Page 11 Create PDF in your applications with the Pdfcrowd HTML to PDF API PDFCROWD...
- Page 12 Create PDF in your applications with the Pdfcrowd HTML to PDF API PDFCROWD...
-
Page 13: Desktop Mount
Proceed to “Connecting Ethernet”. Desktop Mount Create PDF in your applications with the Pdfcrowd HTML to PDF API PDFCROWD... -
Page 14: Connecting Ethernet
Connecting Ethernet Create PDF in your applications with the Pdfcrowd HTML to PDF API PDFCROWD... - Page 15 Setup Overview You will do the following: Adopt the U-LTE in the UniFi Controller software. Set up your LTE account. You can manage your LTE subscription at: account.ui.com/subscriptions If the primary WAN 1 or 2 goes offline, then the configured networks fail over to the U- LTE.
- Page 16 1. In the UniFi Controller, click the Devices tab. The U-LTE should be automatically detected and begin the setup wizard; proceed to step 2. Otherwise, select the U-LTE and click Adopt. 2. Click Setup LTE. Create PDF in your applications with the Pdfcrowd...
- Page 17 3. For your ui.com account, enter your email address or username and password. Select I agree to the Terms of Service and click Next. If you do not have a ui.com account, click Create a new ui.com account and follow the on-screen instructions.
- Page 18 4. For payment information, enter the following: Credit card number Expiration month and year in this format: MM/YY CVC (Card Verification Code) on the back of your card Click Next. Create PDF in your applications with the Pdfcrowd HTML to PDF API PDFCROWD...
- Page 19 5. The U-LTE will reboot. It can take up to 20 minutes to activate on the cellular network. Click Done to close this screen. Create PDF in your applications with the Pdfcrowd HTML to PDF API PDFCROWD...
- Page 20 Using the U-LTE To monitor data usage, click the U-LTE on the Devices screen. Its Properties panel will appear. Create PDF in your applications with the Pdfcrowd HTML to PDF API PDFCROWD...
- Page 21 Create PDF in your applications with the Pdfcrowd HTML to PDF API PDFCROWD...
- Page 22 Click the Settings icon to access the following: Enable External Antenna If you attach an external antenna to the U-LTE, click this option. Enable PoE Passthrough If you have connected a secondary PoE device to the U- LTE, click this option.
- Page 23 When LTE failover is active, an alert will appear in the Properties panel and the Controller’s list of alerts. Note: LTE failover is active by default. Create PDF in your applications with the Pdfcrowd HTML to PDF API PDFCROWD...
- Page 24 An alert will appear when LTE failover is activated or deactivated. Create PDF in your applications with the Pdfcrowd HTML to PDF API PDFCROWD...
-
Page 25: Specifications
Specifications U-LTE Dimensions 66 x 202.12 x 32.2 mm (2.60 x 7.96 x 1.27") Weight Without Mounting 200 g (7.06 oz) With Mounting 316 g (11.15 oz) Interfaces Networking (2) 10/100/1000 RJ45 Ports WP7603 LTE Management Ethernet, Bluetooth Max. Power Consumption 8.5W... -
Page 26: Safety Notices
U-LTE Power Supply UniFi PoE Switch Supported Voltage Range 44 to 57VDC 1.54" Display LTE Category Cat 4 LTE Bands B2/4/5/12 Antenna (1) 2x2 2.4 GHz (1) 1x1 2.4 GHz Antenna Gain 1.5 dBi BT Operating Frequency 2400 - 2483.5 MHz... -
Page 27: Electrical Safety Information
WARNING: Avoid using this product during an electrical storm. There may be a remote risk of electric shock from lightning. Electrical Safety Information 1. Compliance is required with respect to voltage, frequency, and current requirements indicated on the manufacturer’s label. Connection to a different power source than those specified may result in improper operation, damage to the equipment or pose a fire hazard if the limitations are not followed. - Page 28 Compliance Changes or modifications not expressly approved by the party responsible for compliance could void the user’s authority to operate the equipment. This device complies with Part 15 of the FCC Rules. Operation is subject to the following two conditions. 1.
- Page 29 CAN ICES-3(A)/NMB-3(A) Le présent appareil est conforme aux CNR d’ISDE Canada applicables aux appareils radio exempts de licence. L’exploitation est autorisée aux deux conditions suivantes : 1. l’appareil ne doit pas produire de brouillage; 2. l’appareil doit accepter tout brouillage radioélectrique subi, même si le brouillage est susceptible d’en compromettre le fonctionnement.
-
Page 30: Online Resources
Online Resources © 2020 Ubiquiti Inc. All rights reserved. Create PDF in your applications with the Pdfcrowd HTML to PDF API PDFCROWD...
Need help?
Do you have a question about the U-LTE and is the answer not in the manual?
Questions and answers