Advertisement
Available languages
Available languages
Quick Links
Manuale d'uso
LD140-M7 + SM25
LD141-M7-R-...
LD142-M7-R-...
Descrizione
Il presente manuale è stato realizzato per i prodotti
della serie LD140 e SM25. Questo sistema con
alimentazione a batterie (incluse nella fornitura) è
stato sviluppato per funzionare in modo autonomo
e indipendente (senza alimentazione dall'esterno). Lo
strumento funziona esclusivamente in abbinamento
con i sensori magnetici della serie SM25 e la banda
magnetica MT25.
Elenco sezioni
1 - Norme di sicurezza
2 - Identificazione
3 - Installazione
4 - Istruzioni di montaggio
5 - Connessioni elettriche
6 - Programmazione
7 - Interfaccia RS232 (opzione I1)
8 -Dima di foratura
1 - Norme di sicurezza
Per i collegamenti elettrici si consiglia di seguire
scrupolosamente le note applicative di carattere
elettrico riportate sul catalogo generale. Con
particolare riferimento alla direttiva 2004/108/CE
sulla compatibilità elettromagnetica si devono
rispettare le seguenti precauzioni:
____________________________________________________________________________________________
MAN LD14x I_E_D 4.4.odt
LD14x
Evitare di far passare il cavo dei segnali del
•
sensore vicino a conduttori che trasportano
segnali di potenza (per es. provenienti da
inverter).
Installare il dispositivo il più lontano
•
possibile
elettromagnetici presenti sulla macchina.
Qualora non fosse possibile è necessario
schermarlo in maniera efficace.
Rispettare le connessioni riportate nella sezione "5 -
Connessioni elettriche".
2 - Identificazione
Il dispositivo si identifica mediante il codice e il
numero di serie stampati sull'etichetta e attraverso i
documenti di trasporto dello stesso. Per dettagli
relativi alle caratteristiche elettriche dello strumento
sensore fare riferimento al catalogo del prodotto.
3 - Installazione
Il visualizzatore e il sensore devono essere installati
esclusivamente in accordo al loro grado di
protezione e la temperatura di lavoro previsti e
devono essere protetti da urti accidentali, da
sfregamenti contro altre parti mobili nonché da
soluzioni acide.
4 - Istruzioni di montaggio
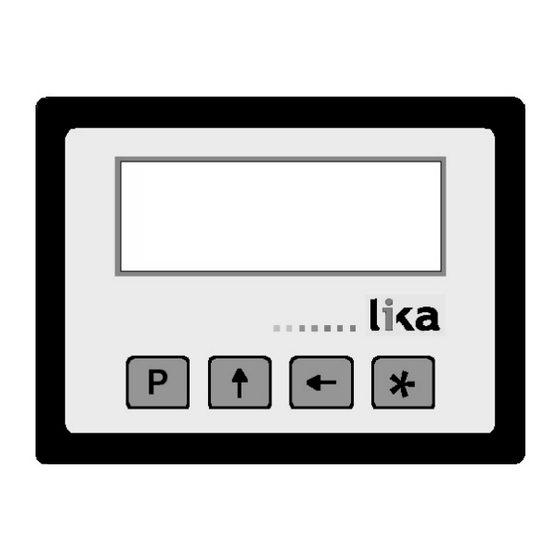
4.1 Visualizzatore
Inserire lo strumento nel foro ricavato nel pannello
senza le clip di fissaggio.
Agganciare le clip sul lato della custodia del
visualizzatore.
Stringere con un cacciavite le viti finché il
visualizzatore è sufficientemente stabile.
Lo strumento è alimentato da 1 batteria 1,5V tipo C
(o AM2 / BABY / LR14 / MN1400 / SP/HP11).
4.2 Banda magnetica
Vedere le istruzioni allegate alla banda magnetica.
4.3 Fissaggio sensore magnetico
4.3.1 Sensore rettangolare SM25-R
Verificare che il sistema meccanico di supporto
garantisca il rispetto delle tolleranze di planarità e
parallelismo tra sensore e banda (Figura 1). Evitare il
contatto tra sensore e banda. Fissare il sensore con 2
viti M3 passanti nelle due asole presenti.
1
dalle
fonti
di
www.lika.it
www.lika.biz
disturbi
Advertisement

Related Manuals for Lika LD14 Series


Summary of Contents for Lika LD14 Series
- Page 1 (Figura 1). Evitare il rispettare le seguenti precauzioni: contatto tra sensore e banda. Fissare il sensore con 2 viti M3 passanti nelle due asole presenti. ____________________________________________________________________________________________ MAN LD14x I_E_D 4.4.odt www.lika.it www.lika.biz...
-
Page 2: Connessioni Elettriche
OFSx è l'Offset attualmente impostato). (solo per LD140) La funzione è attiva solo se il parametro F_rSt è Connettere il sensore magnetico al rispettivo impostato su “yES” connettore Mini-DIN (circolare) presente sullo strumento. ____________________________________________________________________________________________ MAN LD14x I_E_D 4.4.odt www.lika.it www.lika.biz... - Page 3 La corsa su 360° pertanto è 785,4 mm; La funzione è attiva con il parametro “F_rEF” su 90,0° è: 785,4 : 4 = 196.35 mm impostato su “yES” COn = 900 : 19635 = 0,045836 ____________________________________________________________________________________________ MAN LD14x I_E_D 4.4.odt www.lika.it www.lika.biz...
- Page 4 Al termine del set-up compare la scritta “rESEt” OFS x è l'Offset attualmente impostato). * = salvare, P = prossimo, P x 3s. = uscire * si effettua Premendo 2 volte il tasto ____________________________________________________________________________________________ MAN LD14x I_E_D 4.4.odt www.lika.it www.lika.biz...
- Page 5 P. stesso comando inviato seguito da ? e checksum (es.: comando inviato |02azs risposta |02azs?EF). E possibile inviare i comandi tramite qualsiasi emulatore di terminale (ad es. Hyperterminal). Il ____________________________________________________________________________________________ MAN LD14x I_E_D 4.4.odt www.lika.it www.lika.biz...
- Page 6 Valore della risoluzione lineare in mm o inch . Risposta: ADTRAE:+0000000XCHKS X=1 0.001/ 0.0001 , X=5 0.005/ 0.0005 , X=10 0.01/ 0.001 , X=50 0.05/ 0.005 , X=100 0.1/ 0.01 , X=500 0.5/ 0.05 , X=1000 1/ 0.1 ____________________________________________________________________________________________ MAN LD14x I_E_D 4.4.odt www.lika.it www.lika.biz...
- Page 7 P e ) |ADROF3=X X=0 oFF, X=1 on Impostazione del valore di Offset3 (impostare il Risposta: ADTOFE:+0000000XCHKS valore in centesimi). Risposta: ADTOF3:XCHKS Lettura funzione di Offset |ADTOFE Lettura dello stato della funzione di Offset. ____________________________________________________________________________________________ MAN LD14x I_E_D 4.4.odt www.lika.it www.lika.biz...
- Page 8 Smaltire separatamente Lika Electronic Via S. Lorenzo, 25 - 36010 Carrè (VI) - Italy Tel. +39 0445 806600 Fax +39 0445 806699 Italy: eMail info@lika.it - www.lika.it World: eMail info@lika.biz - www.lika.biz ____________________________________________________________________________________________ MAN LD14x I_E_D 4.4.odt www.lika.it www.lika.biz...
-
Page 9: Installation
Avoid contact between the parts. You can manual and following the installation guidelines: check planarity and parallelism between the sensor and the magnetic scale using a feeler gauge. Sensor head should be installed as close as ____________________________________________________________________________________________ MAN LD14x I_E_D 4.4.odt www.lika.it www.lika.biz... -
Page 10: Electrical Connections
5.1 SM25 sensor set to “yES”. (only LD140) Plug in the sensor's Mini-DIN connector (circular) on 6.2.2 Incremental measurement the backside of the display Press P and * keys simultaneously to switch from ____________________________________________________________________________________________ MAN LD14x I_E_D 4.4.odt www.lika.it www.lika.biz... - Page 11 Press P key for 3 sec. to enter setup, “SEtUP” is COn = 3600 : 35953 = 0.10013 displayed. * = save, P = next parameter, P for 3 s. = exit Press key to enter MENU 1 (parameters) ____________________________________________________________________________________________ MAN LD14x I_E_D 4.4.odt www.lika.it www.lika.biz...
- Page 12 = disabled Device address [01, 31] * = save, P = next parameter, P for 3 s. = exit Setting of device address, only if the device is fitted with serial interface (option I1). ____________________________________________________________________________________________ MAN LD14x I_E_D 4.4.odt www.lika.it www.lika.biz...
- Page 13 X=0 uP = standard direction CHKS: checksum X=1 dn = inverted direction The checksum is equal to the least significant byte Answer: ADTDIR:+0000000XCHKS resulting from the sum of the hex values of all ____________________________________________________________________________________________ MAN LD14x I_E_D 4.4.odt www.lika.it www.lika.biz...
- Page 14 Parameter list MENU 1). It enables the Datum function (pressing * key). Answer: ADTFCO:+XCHKS X=0 oFF, X=1 on Read COn conversion factor Answer: ADTRSE:+0000000XCHKS |ADTFCO It reads the value of the current COn factor. ____________________________________________________________________________________________ MAN LD14x I_E_D 4.4.odt www.lika.it www.lika.biz...
- Page 15 Check details on product catalogue. Read Datum value |ADTREF It reads the current Datum value. Answer: ADTREF:XCHKS Offset1 value [-999999, 999999] |ADROF1=X It sets the Offset1 (OFS1) value (the value has resolution 0.01). ____________________________________________________________________________________________ MAN LD14x I_E_D 4.4.odt www.lika.it www.lika.biz...
- Page 16 Dispose separately LIKA Electronic Via S. Lorenzo, 25 - 36010 Carrè (VI) - Italy Tel. +39 0445 806600 Fax +39 0445 806699 Italy: eMail info@lika.it - www.lika.it World: eMail info@lika.biz - www.lika.biz ____________________________________________________________________________________________ MAN LD14x I_E_D 4.4.odt www.lika.it www.lika.biz...
- Page 17 Inbetriebnahme und Montage sorgfältig durch. Des Magnetsensor mit zwei M3 Schrauben an den weiteren sollten beim elektrischen Anschluss Langlöchern befestigen und ggf. justieren. folgende Hinweise, gemäß der EMC-Vorschriften, beachtet werden. ____________________________________________________________________________________________ MAN LD14x I_E_D 4.4.odt www.lika.it www.lika.biz...
-
Page 18: Elektrischer Anschluss
6.2.2 Kettenmaß (nur LD140) Nach Betätigung der Tasten P und * wird die Der Sensor kann direkt über den MiniDIN-Stecker an Anzeige von Absolute- auf Relativmaß (blinkender die Anzeige angeschlossen werden. Dezimalpunkt) umgestellt. ____________________________________________________________________________________________ MAN LD14x I_E_D 4.4.odt www.lika.it www.lika.biz... - Page 19 Die Funktion ist nur dann aktiv wenn Parameter Der Verfahrweg auf 360° ist 785,4 mm; F_rEF auf “yES” eingestellt ist. daher ist 90,0°, 785,4 : 4 = 196.35 mm COn = 900 : 19635 = 0,045836 ____________________________________________________________________________________________ MAN LD14x I_E_D 4.4.odt www.lika.it www.lika.biz...
- Page 20 Mit der Taste * wird die Anzeige geeicht und die yES = freigegeben no = nicht freigegeben Parameterebene verlassen (Eichwert und Offset * = speichern, P = wechseln, P für 3 s. = verlassen werden dabei berücksichtigt). ____________________________________________________________________________________________ MAN LD14x I_E_D 4.4.odt www.lika.it www.lika.biz...
- Page 21 (z.B. gesendeter Befehl |02azs Antwort |02azs? Geräteadresse bis drücken der P Taste angezeigt. Befehle können über die serielle Schnittstelle mit jedem frei verfügbaren Terminalprogramm gesendet werden (z.B. Hyperterminal). Der Befehl wird nach ____________________________________________________________________________________________ MAN LD14x I_E_D 4.4.odt www.lika.it www.lika.biz...
- Page 22 Lineare Auflösung in mm oder inch wird gesetzt. X=1 0.001/ 0.0001 , X=5 0.005/ 0.0005 , X=10 0.01/ 0.001 , X=50 0.05/ 0.005 , X=100 0.1/ 0.01 , X=500 0.5/ 0.05 , X=1000 1/ 0.1 ____________________________________________________________________________________________ MAN LD14x I_E_D 4.4.odt www.lika.it www.lika.biz...
- Page 23 Offsetfunktion [0, 1] |ADROF3=X |ADROFE=X Wert Offset3 (OFS3) wird gesetzt (der Wert hat Freigabe Offsetfunktion (durch Auflösung 0,01). Tastenkombination P und ) Antwort: ADTOF3:XCHKS X=0 oFF (nicht freigegeben) X=1 on (freigegeben) Antwort: ADTOFE:+0000000XCHKS ____________________________________________________________________________________________ MAN LD14x I_E_D 4.4.odt www.lika.it www.lika.biz...
- Page 24 Getrennt entsorgen LIKA Electronic Via S. Lorenzo, 25 - 36010 Carrè (VI) - Italy Tel. +39 0445 806600 Fax +39 0445 806699 Italy: eMail info@lika.it - www.lika.it World: eMail info@lika.biz - www.lika.biz ____________________________________________________________________________________________ MAN LD14x I_E_D 4.4.odt www.lika.it www.lika.biz...
Need help?
Do you have a question about the LD14 Series and is the answer not in the manual?
Questions and answers