
Subscribe to Our Youtube Channel
Related Manuals for Spartherm Varia Bh-P7


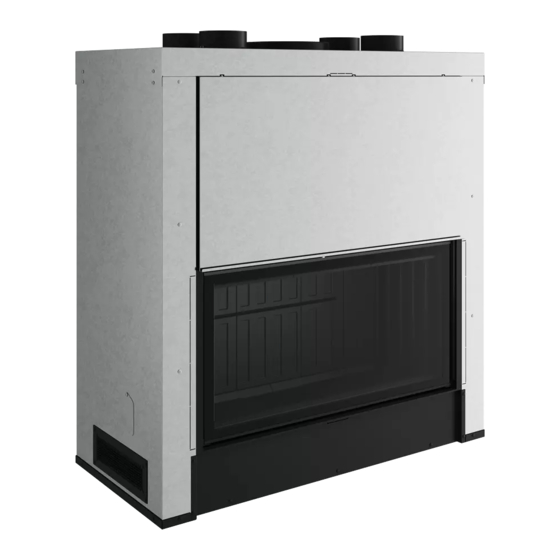
Summary of Contents for Spartherm Varia Bh-P7
- Page 1 NEW ZEALAND – Single XL (Varia Bh-P7), Single large lift door (Varia ASh-P8), Double sided (Varia A-FDh-P8), Corner (Varia 2L 80h-P7 & Varia 2R 80h-P7) 630359_5...
-
Page 2: Table Of Contents
Fuel Safety Information Smoking Ash Removal Procedure Product Dimensions Creosote Formation & Removal Single XL Chimney Cleaning (Varia Bh-P7) Do’s and Don’ts Single Large Lift Door (Varia ASh-P8) Servicing and Maintenance Double Sided Care of the Glass (Varia A-FDh-P8) Cleaning the Ceramic Glass... -
Page 3: Safety Information
INSTRUCTIONS INCLUDED. AS/NZS 4012:2014 & AS/NZS 4013:2014. • READ, UNDERSTAND AND FOLLOW THESE This appliance must be installed by a Spartherm trained and • INSTRUCTIONS FOR SAFE INSTALLATION AND approved installer. - Page 4 Young children and elderly people should be carefully • Make sure not to create negative pressure in the installation • supervised when they are in the same room as the appliance. room, e.g. by means of an exhaust fan or similar mechanical Toddlers, young children and others may be susceptible to blower, as this could affect the combustion of the fireplace or accidental contact burns.
-
Page 5: Product Dimensions
2.0 PRODUCT DIMENSIONS Figure 2 Figure 1 630359_5... - Page 6 Figure 3 630359_5...
- Page 7 Figure 4 630359_5...
- Page 8 Figure 5 630359_5...
-
Page 9: Varia Bh-P7
2.6 FRAME DETAILS Figure 7 Figure 6 Model Door “A” “B” “C” “D” Model Door “A” “B” “C” “D” Height Height Varia ASh-P8 Varia 2L 80h-P7 1098 Varia Bh-P7 1003 1063 Varia 2R 80h-P7 Varia A-FDh-P8 630359_5... -
Page 10: Specifications Table
2.7 SPECIFICATIONS TABLE Average Average Separate Fixed or Average Average Flue Unit Flue Emission Product Type Frame variable Peak power* Efficiency** diameter weight Damper power* factor Required Aeration (kW) (mm) (Kgs) (kW) (g/kg) Single XL (Varia Bh- Lift Door Fixed 16.0 65.3 0.92... -
Page 11: Installation
• Non-toxic smoke will be emitted during the paint curing 3.0 INSTALLATION process, to help dissipate the smoke open a window near the appliance. • Remove any dust or debris off the top of the appliance before firing the appliance as the paint will become soft as the appliance heats up and will harden as the appliance cures. - Page 12 The wood burning appliance and chimney vent system also DO NOT DRAW OUTSIDE AIR FROM GARAGE SPACES - requires a sufficient supply of combustion air not only to EXHAUST PRODUCTS OF GASOLINE ENGINES ARE support the combustion in the combustion chamber but to HAZARDOUS.
-
Page 13: Overview
3.2 INSTALLATION - OVERVIEW CONVECTION Spartherm wood fires are convection fires with “central heating” capabilities. Convection means that there is a natural circulation of air, which ensures that the heat is distributed more evenly throughout the entire room or dwelling. The cold air is drawn in at the base of the fire, and then moved up through the convection channel, which runs along the fire’s... -
Page 14: Planning
10. Fit remainder of flue system to comply with AS/NZS 2918:2001 Fit the frame to the fireplace. Fit and seal the flue converter to flue spigot (Single XL {Varia Bh-P7}, Double-sided 11. Fit cavity sidewalls and flue damper control shaft / knob. Use flashings for {Varia A-FDh –... - Page 15 INSTALLATION PROCESS - DETAIL In areas that are likely to become hot (above the fireplace door etc.) then an approved adhesive with a higher operating temperature is required. For these areas you must use skamo enclosure glue. Recommended screws are 10g x 75mm on 200mm to 300mm centres.
- Page 16 Figure 10 100mm thick).Suitable seismic restraint must be provided. This can easily be achieved by screwing or bolting the 4 feet Varia Bh-P7 inlet Varia ASh-P8, A-FDh-P8, of the fireplace securely to the concrete slab. A-FDh-P8 & 2L/R 80h-P7 inlet Combustion air –...
-
Page 17: Ducting Installation
• Ensure that the air intake pipe cannot suck air out of the system (placed in negative pressure zone) • Ensure that smoke from the flue will not be sucked in again by the air intake. If taking combustion air from the immediate room, ensure that the area has sufficient ventilation. - Page 18 Ensure that the area requirements are respected and that the Ensure that the ducting is well supported throughout its length vents are not able to be inadvertently or otherwise blocked, and that no downwards direction or “dips” in the ducting are closed or obstructed.
- Page 19 THE AIR EXPELLED FROM THE DUCTING / VENTS IS HOT AND MAY PRESENT A RISK OF BURNS OR HEAT DAMAGE. When placing outlets in rooms other than the room the appliance is installed, it is important to allow for return air to equalise pressure between the rooms.
-
Page 20: Safety Clearances
Outside the confines of the cavity, the aluminium ducting should be run and completely housed within a box cavity Eterpan/Promina construction made entirely from skamo enclosure board. Do board. Min not use any combustible materials within this boxing. distance 300mm all around. - Page 21 An insulating hearth conforming to the size requirements in Wherever there are joins between the double layer sheets of the following table must be installed unless the floor is made skamo enclosure board they should be “staggered” or “offset” entirely from a non-combustible material. The hearth must be by at least 150mm.
- Page 22 Refer to the following table and diagrams for minimum Single Sided XL & L (Varia Bh-P7, Varia ASh-P8) clearances: (back) (sides) Placed centrally Single XL (Varia 1570 Bh-P7) Single Large 1360 (Varia ASh-P8) Corner L/R (Varia D1=450 E1=260 2L/2R 80h-P7)
- Page 23 Corner L/R (Varia 2L/2R 80h-P7) Double Sided (Varia A-FDh-P8) Figure 23 Figure 24 630359_5...
-
Page 24: Installing The Flue
3.6 INSTALLING THE FLUE Any flue system used on this fire must comply and be installed to fully meet the requirements of AS/NZS 2918:2001 Domestic solid fuel burning appliances – Installation. Refer to the specification section to ascertain the correct flue diameter for your appliance. - Page 25 After the dropbox passes through the Skamotec enclosure, To protect the drop box against undesired ingress of debris or slide the steel closure plate up against the Skamotec and rodents/birds ensure that the supplied grilles are fitted as attach the dropbox to the steel closure plate using rivets. shown in the following image: Figure 29 Figure 28...
-
Page 26: Example Of Cavity Construction
3.7 EXAMPLE OF CAVITY CONSTRUCTION Figure 30 Figure 31 630359_5... -
Page 27: Finishing The Enclosure
3.8 FINISHING THE ENCLOSURE The enclosure may be finished by adopting conventional GIB stopping (plastering) materials and techniques but with some further considerations: Skamo enclosure board is a particularly absorbent material and should be sealed with a suitable heat resistant primer (Mapei Primer G or Skamol Enclosure Primer) prior to finishing or plastering. -
Page 28: Bricks And Baffles Installation
If practical, try to create the aperture for the fireplace glass 4.0. BRICKS & BAFFLES INSTALLATION frame entirely within one piece of skamo enclosure board (no joins at corners). Internal and external corners of the enclosure can be finished using an appropriate dry wall corner beading system. The OPERATION OF THE APPLIANCE WITHOUT THE design of the enclosure should ensure that corners are not FIREBRICKS (CHAMOTTE) OR BAFFLES IN PLACE CAN... - Page 29 Single Sided XL (Varia Bh-P7) Single Sided Large (Varia ASh-P8) Chamotte must be assembled in numerical order Chamotte must be assembled in numerical order Figure 34 Figure 33 630359_5...
- Page 30 Corner Fireplace Left (Varia 2L 80h-P7) Corner Fireplace Right (Varia 2R 80h-P7) Chamotte must be assembled in numerical order Chamotte must be assembled in numerical order Figure 35 Figure 36 630359_5...
-
Page 31: Operation
Double Sided (Varia A-FDh-P8) 5.0 OPERATION Chamotte must be assembled in numerical order DO NOT MODIFY THIS APPLIANCE. BURN WELL SEASONED SOFT WOOD ONLY (LESS THAN 25% MOISTURE). ALWAYS OPERATE THIS APPLIANCE WITH THE DOOR CLOSED AND LATCHED EXCEPT DURING START UP AND RE-FUELING. - Page 32 (25mm) until all kindling is burning. Your Spartherm product is designed with the most advanced To maintain a brisk fire, a hot ember bed must be established technology. The appliance is extremely airtight. It has an and maintained.
- Page 33 You can safely fill the firebox with wood up to the air inlet on the backside of the firebox or any other “MAX” mark indicated. On the Double Sided Fire (A-FDh-P8) there is a line about two NEVER LOAD THE WOOD HIGHER THAN THE AIR BAR thirds of the way up the side vermiculite pieces which AT THE REAR OF THE FIREBOX OR ANY OTHER “MAX”...
- Page 34 intensify or diminish quickly as is the case with liquid or gas Step1 fuels. Solid fuels like firewood react more slowly. • Ensure that all air controls in the fireplace are Top – Down Lighting Method (Alternative) open (if available). Put the logs on the bottom of the fireplace.
-
Page 35: Use Of The Flue Damper
• After the initial burn, add required amount of Can’t get the fire going? Use more kindling and paper. Assuming the chimney and vent wood and adjust the aeration setting to the are sized correctly and there is sufficient combustion air, the desired position. -
Page 36: Fuel
Whenever you refuel the appliance it is advised that you 5.2 FUEL adhere to the following procedure: • Open the flue damper to its most unrestrictive (open) position (TURN FULLY ANTI-CLOCKWISE). • Wait a few moments for the appliance to react to this THIS APPLIANCE IS DESIGNED TO BURN NATURAL new position and settle down. -
Page 37: Smoking
cleanliness of the glass are good indicators of your operating 5.3 SMOKING efficiency. Not enough heat is produced when only a few pieces of wood are burned or the wood may not burn A properly installed appliance should not smoke. If yours completely. -
Page 38: Ash Removal Procedure
approximately 1” (25mm) deep on the firebox bottom to help 5.4 ASH REMOVAL PROCEDURES maintain a hot charcoal bed. Keep the closed container on a non-combustible floor or ground, well away from all combustible materials. The ashes should be retained in the closed container until all IMPROPER DISPOSAL OF ASHES MAY RESULT IN cinders have thoroughly cooled. -
Page 39: Chimney Cleaning
• Close air control on appliance. RUNAWAY OR CHIMNEY FIRE • Call local fire department. Have a fire extinguisher handy. Contact local authorities for further information on how to handle a chimney fire. • After the chimney fire is out, clean and inspect the chimney A CHIMNEY FIRE CAN PERMANENTLY DAMAGE YOUR for stress and cracks prior to lighting another fire. -
Page 40: Do's And Don'ts
• The chimney connector and dampers as well as the chimney 5.7 DO’s and DON’Ts should be cleaned. • The appliance’s firebox and baffle system should be cleaned if needed. • Build a hot fire. • The chimney should be inspected and repairs made if •... -
Page 41: Servicing And Maintenance
/ or blemishes may result. Normally a hot fire will clean the 6.0 SERVICING / MAINTENANCE glass. The most common reasons for dirty glass include: not using sufficient fuel to get the appliance thoroughly hot, using green or wet wood, or closing the draft so far that there is insufficient air for complete combustion. -
Page 42: Cleaning The Ceramic Glass
6.2 CLEANING THE CERAMIC GLASS THE GLASS CERAMIC SHEET MAY ONLY BE CLEANED WHEN COLD (FIREPLACE INSERT NOT BURNING AND Figure 42 COOLED DOWN; NO HOT ASH IN THE FIRE CHAMBER). Using one hand, tilt the door open up to its end stop. FLAT DOOR CORNER/BAY DOOR 1. -
Page 43: Care Of Plated Parts
NOTE: The protective wrap on plated parts is best removed when the assembly is at room temperature but this can be improved if the assembly is warmed, using a hair dryer or similar heat source. Figure 44 6.4 GLASS REPLACEMENT Then twist open the top catch. - Page 44 Contact your dealer for questions concerning prices and policies on replacement parts. Normally all parts can be ordered through your authorised dealer / distributor. An up to date list of authorised dealers can be found at sparthermfires.co.nz FOR WARRANTY REPLACEMENT PARTS, A PHOTOCOPY OF THE ORIGINAL INVOICE WILL BE REQUIRED TO HONOUR THE CLAIM.
-
Page 45: Troubleshooting
pipe. 7.0 TROUBLESHOOTING • Not enough air? Ensure air control is fully open. Also ensure that the air opening is not obstructed. Wood burns too fast. • Air control may need to be adjusted down. • Check to see ash plug is properly APPLIANCE MAY BE HOT, DO NOT SERVICE UNTIL seated (if equipped). - Page 46 This warranty is provided by the New Zealand Distributor of seals and glass** Spartherm Fires, who trade as Escea Limited (referred to in this document as Escea). The warranty applies from the date of purchase from or through an authorised Spartherm fire * From date of purchase dealer.
-
Page 47: General Warranty T&C's
2.1.3 The use of products, including flue systems that 2.1.12 Damage caused by water affecting the Spartherm are not specified in accordance with installation fire. manual. 2.1.13 Operation of the Spartherm fire without its fire clay 2.1.4 Installation fireplace, repairs bricks,... - Page 48 Spartherm fireplace, the reinstatement of the inspect the Spartherm product. Escea may charge you a skamol board will be covered under warranty. The service call fee if a repairer will be required to travel...
- Page 49 4.1.1 Repair the relevant part of the Spartherm product; New Zealand Spartherm Filing a Claim 4.1.2 Replace the relevant part of the Spartherm Distributor product with a product of identical specification (or Escea Limited Contact the dealer you where the product is superseded or no longer in...
-
Page 50: Service History
9.0 SERVICE HISTORY & DATA PLATE The appliance must be serviced at least annually and possibly more frequently – dependant on usage. Date Dealer name Service Technician Service performed Notes 630359_5... - Page 51 630359_5...
- Page 52 Data Plate: Installer - Adhere duplicate data plate here: 630359_5...
- Page 53 Distributed in New Zealand by Escea Ltd, 17 Carnforth Street, Dunedin 9058. Ph. 0800 173 000 630359_5...
Need help?
Do you have a question about the Varia Bh-P7 and is the answer not in the manual?
Questions and answers