Spartherm S600 Installation And Operating Instructions Manual
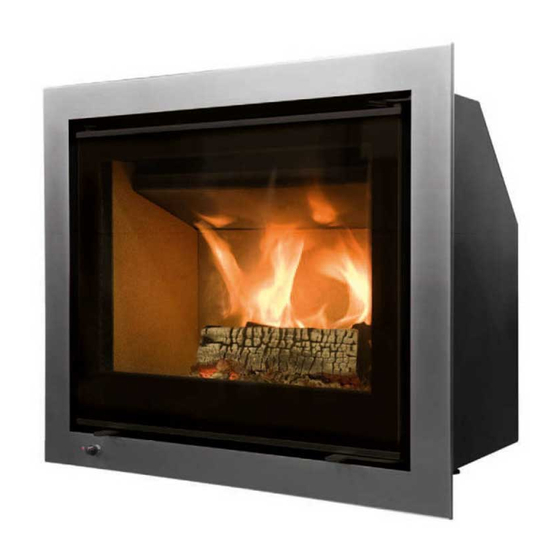
Zero clearance fireplace
Hide thumbs
Also See for S600:
- Installation and operating instructions manual (52 pages) ,
- Installation and operating instructions manual (36 pages)
Table of Contents
Advertisement
Advertisement
Table of Contents

Related Manuals for Spartherm S600


Summary of Contents for Spartherm S600
-
Page 1: Installation And Operating Instructions
Installation and Operating Instructions ZERO CLEARANCE FIREPLACE S 600 ZERO CLEARANCE FIREPLACE Spartherm Feuerungstechnik GmbH Maschweg 38 · D-49324 Melle Phone +49 (0) 5422 94 41-0 M 700 ZERO CLEARANCE FIREPLACE Fax +49 (0) 5422 9441-14 www.spartherm.com Keep this insruction for future use. - Page 2 INDRODUCTION AND UNIT DESCRIPTION SPARTHERM S600/M700 ZERO CLEARANCE FIREPLACE This range of modules/stoves/zero clearance modules have been tested by… POLYTEST – Polytests Services Inc. 695 B rue Gaudette, PLEASE READ THIS ENTIRE MANUAL BEFORE YOU INSTALL St-Jean-sur-Richelieu YOUR S600/M700 ZERO CLEARANCE FIREPLACE.
-
Page 3: Safety Information
SAFETY INFORMATION • seasoned hardwoods, as compared to softwoods or to green or freshly cut hardwoods. WARNING • Do not burn green or freshly cut wood. • Do not start a fire with chemicals or fluids such as gasoline, engine oil, etc. -
Page 4: Safe Wood-Burning Practices
Do not burn: Safe Wood-Burning Practices Garbage Lawn clippings or yard waste When using your wood burning appliance, follow these guidelines for safe operation: Materials containing rubber, including tires Keep flammable items, like curtains, furniture, newspapers, and books, away from your appliance. -
Page 5: Table Of Contents
EXAMPLES OF AIR INTAKE OPTIONS · FUEL – WOOD · CLOSURE VALVE-INTAKE AIR · LIGHTING A FIRE · INSTALLATION PLANNING · FLASH FIRE · MINIMUM CLEARANCES TO COMBUSTIBLES · EXTENDED FIRE · PLACEMENT 0F S600 INSTALLATION · SMOKING · PLACEMENT OF M700 INSTALLATION... - Page 6 · MAINTENANCE · ASH REMOVAL PROCEDURES · CREOSOTE FORMATION AND REMOVAL · RUNAWAY OR CHIMNEY FIRE · CHIMNEY CLEANING · GLASS REPLACEMENT · CARE OF GLASS · CLEANING THE GLASS CERAMIC SHEET · CARE OF PLATED PARTS · REPLACEMENTS · EXPLODED VIEW ·...
- Page 7 U.S. ENVIRONMENTAL PROTECTION AGENCY Certified to comply with 2020 particulate emission standards using cordwood 600 module 1.67 g/hr and 700 module 1.14 g/hr, Method 28R This wood heater needs periodic inspection and repair for proper operation. It is against federal regulations to operate this wood heater in a manner inconsistent with operating instructions in this manual.
- Page 8 Specifications Cassette 600 zero clearance fireplace / 700 zero clearance fireplace : Spartherm Cassette Zero Clearance Fireplace 600 zero clearance fireplace 700 zero clearance fireplace Weight of Module 265 lbs (120kg) 298 lbs (135kg) Module exterior: Width/depth/height (inches) 22 1/8“ / 24 1/4“ / 16 2/3“...
-
Page 9: Installation Overview 10
1. INSTALLATION OVERVIEW 2. INTRODUCTION The Spartherm module stoves have been tested and certified by CSA based on the following standards: ULC 127 / ULC S-610-18. EPA : U.S.ENVIRONMENTAL PROTECTION AGENCY Certified to comply with 2020 emissionstandards using cord wood. Before installing your Spartherm fireplace,PLEASE NOTE: THE LOCAL... - Page 10 • temperature and should stay away to avoid burns or clothing ignition. • If the appliance is not properly installed, a house fire may result. Do • Young children should be carefully supervised when they are in the not expose the appliance to the elements (ex. rain, etc.) and keep the same room as the appliance.
-
Page 11: Examples Of Identification Plates
U.S. Enviroment Protection Agency: Certified to comply with 2020 U.S. Enviroment Protection Agency: Certified to comply with 2020 Particulate emission standards using cord wood Particulate emission standards using cord wood Model: Spartherm Cassette 600 Zero Clearance Model: Spartherm Cassette 600 Zero Clearance Date of Manufacture Date de Fabrication: Month/Year:11/2019 Mois/Année: 11/2019... - Page 12 U.S. Enviroment Protection Agency: Certified to comply with 2020 U.S. Enviroment Protection Agency: Certified to comply with 2020 Particulate emission standards using cord wood Particulate emission standards using cord wood Model: Spartherm Cassette 700 Zero Clearance Model: Spartherm Cassette 700 Zero Clearance Date of Manufacture Date de Fabrication: Month/Year:11/2019 Mois/Année: 11/2019...
- Page 13 Allgemeintoleranzen nach DIN 7168 mittel 2.2 DIMENSIONS S 600 fireplace 18 7/9” / 477mm 25 5/9” / 649mm 23 1/3” / 592mm 6’’ / 152mm 17 1/3” / 441mm 24 4/5” / 630mm back cumbustion air connector Example shown: S 600...
- Page 14 Nennmaß des kürzeren Schenkels: >10−50 >400 <=10 >50−120 >120−400 Abmaße [Winkelminuten]: Abmaße [mm auf 100 mm]: 0,15 Allgemeintoleranzen nach DIN 7168 mittel 2.2.2 DIMENSIONS SINGLE FACED M 700 fireplace 20” / 510mm 29 4/7” / 751mm 25 1/3” / 643mm 6’’...
-
Page 15: General Instructions
2.3 SPECIFICATION Fire chamber volume Minimum Power Maximum power Efficiency* Chimney type Unit weight ideal fuel size USA: 6”x2” 0,95 ft 10 613 BTU/h 47 417 BTU/h 70.29 % 265lbs / 120kg 17" S 600 FIREPLACE CANADA: 6”x1” USA: 7”x2” only 1,58 ft 13 129 BTU/h 29 452 BTU/h... -
Page 16: General Information
• Non-toxic smoke will be emitted during the paint curing process, to We suggest that our woodburning hearth products help dissipate the smoke open a window near the appliance. be installed and serviced by professionals who are • Remove any dust or debris off the top of the appliance before firing the certified in the U.S. - Page 17 2.6 AIR SYSTEM When mounting the air system ensure that the air control system provides fresh air from the outside. In order for the air system to function, you have to ensure in the structure that no vacuum occurs in the housing.
-
Page 18: Connection Directly To The Unit
2.6.1 CONNECTION DIRECTLY TO THE UNIT To connect the separate combustion air directly to the unit you need to have the right separate combustion air connector Ø 5/6”. Fix the connector directly to the unit. It can be oriented to the left side, right side or to the back. - Page 19 Closure valve Please note that the infiltration of wind, weather , snow and water can effect or If you decide to connect separate combustion air it is mandatory to install a damage the air combustion system. closure valve to prevent condensate formation and to prevent the room from becoming cold while the stove is not in use.
-
Page 20: Installation Planning
Please contact your dealer who offers suitable parts for air inlet ducts MUST BE UNRESTRICTED WHILE APPLIANCE IS IN USE TO PREVENT ROOM (pipes and damper). AIR STARVATION WHICH CAN CAUSE SMOKE SPILLAGE AND AN INABIL- ITY TO MAINTAIN A FIRE. SMOKE SPILLAGE CAN ALSO SET OFF SMOKE Make sure that the wire mesh is mounted at the combustion air inlet. - Page 21 3.1.1 PLACEMENT FROM NON COMBUSTIBLE MATERIALS Für die Herstellung und den Entwurf wird das Eigentum ausdrücklich vorbehalten und der gesetzliche Schutz gemäß BGB §§ 823 ,826, 1004 voll in Anspruch genommen. Unbefugte Vervielfältigungen, Verbreitungen und Wiedergaben - ganz oder teilweise - werden gemäß §§ 2 Absatz Ziffer 7, 96 ff. und 106 ff. Urhebergesetz sowie u.U. nach 1, 3, 4, 18 und 19 UWG zivil- und strafrechtlich verfolgt. Bezüglich Rechtsansprüche u.
- Page 22 PLEASE NOTE- 1/2” SPACERS ON THE SIDES AND 1 5/8” AT THE BACK. PLEASE KEEP THE SPACES CLEAR OF INSTALLATION MATERIAL. Distance to furniture The recommend minimum distance from stove to furniture is 48 inches. Note that some furniture is more easily affected by heat and may need to be moved to greater distance.
-
Page 23: Flanges And Anchor Plate
3.1.2 PLACEMENT FROM NON COMBUSTIBLE MATERIALS no distance needed no distance needed S 600 fireplace 25 5/9” / 649mm 1/2” / 13mm 1 5/8” / 41mm Minimum hearth requirement (Cassette Insert 600) 3.2 FLANGES AND ANCHOR PLATE Make sure there is enough space for the wood heater. If the fireplace is NOTE! The anchor plate is not included with the unit. - Page 24 no distance needed no distance needed M 700 fireplace 29 4/7” / 751mm 1/2” / 13mm 1 5/8” / 41mm Minimum hearth requirement (Cassette Insert 700) Make sure there is enough space for the wood heater. If the fireplace is fitted with a frame (that’s conceals the contours of the recess) an additional tolerance of 1-1/2”...
- Page 25 4.1.1 S 600 4. INSTALLATION 4.1 HEARTH EXTENSION WARNING INSTALL THE HEARTH EXTENSION ONLY AS ILLUSTRATED! A 20” (500mm) minimum hearth extension in front of the stove made of non combustible material is required.In front of the unit, the hearth exten- sion must extend 6’’...
- Page 26 The hearth requirements are summed up in the following table: All floor protection materials must be non-combustible material. FLOOR PROTECTECTOR MUST BE LISTED TO UL 1618 Floor protection reqiurements Distance from floor to the bot- How to convert the specification to R-value for a given material: tom of the door glass Greater than 6’’...
-
Page 27: Distance To Combustible Mantle
4.2 DISTANCE COMBUSTIBLE MANTLE MANTLE MINIMUM CLEARANCES For mantle that is 8“ deep 7 1/4” 7 1/4“ Min. 9.25“... - Page 28 4.2.1 COMBUSTIBLE WALL CHIMNEY CONNECTOR PASS-THROUGHS Method A: 12” (304.8 mm) Clearance to Combustible Wall Member: Using a minimum thickness 3.5” (89 mm) brick and a 5/8” (15.9 mm) minimum wall thickness clay liner, construct a wall pass-through. The clay liner must conform to ASTM C315 (Standard Specification for Clay Fire Linings) or its equivalent.
- Page 29 Method C: 6” (152.4 mm) Clearance to Combustible Wall Member: Starting with a minimum 24 gage (.024” [.61 mm]) 8” (203.2 mm) met- alchimney connector, and a minimum 24 gage ventilated wall thimble which has two air channels of 1” (25.4 mm) each, construct a wall pass- through.
-
Page 30: Chimney Installation
• All chimney installations must include at least one support. Reducing the amount of chimney weight 4.3 CHIMNEY INSTALLATION on the fireplace will help avoid the noise created when the fireplace expands. This can be achieved by This fireplace is designed and approved for installation with the following having the chimney supported by the supports. -
Page 31: Chimney Installation Instructions
2. From below, install a firestop supplied by the chimney manufacturer in The table below shows the minimum height requirements, fireplace each ceiling/floor separation through which the chimney will pass. At the included, according to the number of elbows: attic level, install an attic radiation shield from above. chimney number of elbows minimum height... -
Page 32: Examples Of Typical Installations
4.3.4 EX AMPLES OF T YPICAL INSTALLATIONS rain cap Fireplace cannot be installed directly on the floor, needs 9.25 inches step minimum. storm collar solin flashing rain cap attic attic radiation shield storm collar flashing attic elbow attic radiation shield 1st floor radiation shield chimney section... - Page 33 rain cap rain cap storm collar storm collar flashing chimney attic flashing attic chimney section wall band wall band 1st floor offset support radiation shield offset support 1st floor insulated elbow basement insulated wall radiation shield chimney section insulated elbow basement fireplace fireplace...
- Page 34 rain cap chimney 10" strom collar less than 10 ft. flashing roof 10 ft. to nearest roofline minimum chimney height pitched roof recommended location recommended location marginal location location NOT recommended wall or parapet location NOT recommended 10 ft. or more less than 10 ft.
- Page 35 4.4 MASONRY This appliance must be installed with a listed 6“(150 mm) chimney system approved under the following standards: CAN-ULC S629(IN CANADA) OR UL 103HT(IN U.S.). 4.4.1 T YPICAL EXISTING MASONRY MAINTAIN CLEARANCES TO COMBUSTIBLES AS SPECIFIED IN THE CHIMNEY WARNING MANUFACTURERS INSTALLATION INSTRUCTIONS.
-
Page 36: Factory Built Fireplace 38
In Canada: Install flexible stainless steel liner from the top of the chimney to follow manufactures´s the module flue collar. Attach a stainless steel liner connector or elbow to the instructions for maximum rain cap liner and module onto the flue collar. Fasten with three screws. Secure the top liner extension above of the liner to the chimney cap using a liner support and chimney flashing. -
Page 37: Convection Air
4.6 CONVECTION Circulation of convection air The convection air enters into the fireplace via the inlet at the bottom of the fireplace. The hot air for convection comes out of the fireplace via the front outlet and the top outlet. -
Page 38: Operation
5. FINISHING 5.1 BRICKS AND BAFFELS INSTALLATION WARNING OPERATION OF THE APPLIANCE WITHOUT THE BAFFLES CAN RESULT IN EXCESSIVE TEMPERATURES THAT COULD DAMAGE THE APPLIANCE, CHIM- NEY AND THE SURROUNDING ENCLOSURE. NOTE: DO NOT OPERATE IF BAFFLE AND MANIFOLD SHIELD ARE NOT IN POSITION. -
Page 39: Door Removal/Installation 41
5.2 DOOR REMOVAL / INSTALLATION WARNING BURNING YOUR APPLIANCE WITH THE DOORS OPEN OR AJAR CREATES A FIRE HAZARD THAT MAY RESULT IN A HOUSE AND/OR CHIMNEY FIRE. DO NOT STRIKE OR SLAM DOOR. NEVER REMOVE THE DOOR WHEN THE APPLIANCE IS HOT. -
Page 41: Operation 43
THE USE OF THE PROTECTIVE GLOVE IS MANDITORY!!! NEVER EVER, NOT EVEN FOR A BRIEF MOMENT, LEAVE CHILDREN UNAT- Your Spartherm product is designed with the most advanced technology. The TENDED WHEN THERE IS A FIRE BURNING IN THE APPLIANCE. - Page 42 The flames, however, are more efficient. The flames will remain lazy but Spartherm Modules are equipped with an air control System that is easy and ef- become larger again as soon as the firebricks have been heated thoroughly and fective to use.The air control system is designed to give you the ability to adjust the...
- Page 43 A - Air supply open: Caution: (when lighting the fire or adding new wood). The control lever is pushed Never close the air lever of the air control completely or before the fire has started completely to the right. The firebox will now receive the maximum volume of to burn efficiently as it will create smoke and the fire would be inefficient and the combustion air and secondary air.
- Page 44 DOOR ASSEMBLY.-SPARE PARTS. ROBAX 4MM CERAMIC GLASS. USE ONLY AS PER MANUFACTURERS STANDARD AND SPARE PARTS. 7 600 GLASS REPLACEMENT PART NUMBER - SP 898 700 GLASS REPLACEMENT PART NUMBER - SP 899...
-
Page 45: Fire Extinguishers/Smoke Detectors
of the firebox or, if not present, to 50% of the fireboxes backside height 6.1 FIRE EXTINGUISHERS / SMOKE DETECTORS and burn at a medium low setting. The whiteness of the bricks and the All homes with a solid fuel burning appliance should have at least one fire cleanliness of the glass are good indicators of your operating efficiency. - Page 46 Firewood should be split, stacked in a manner that air can get to all parts of it and covered in early spring to be ready for burning that fall. Dry firewood has cracks in the end grain. Cut the wood so that it will fit horizontally, front to back, making for easier loading and less of a likelihood that the wood will roll onto the glass.
-
Page 47: Lighting A Fire
6.3 LIGHTING A FIRE 11. When the wood has been completely burnt and only embers are remaining from the initial wood added to the fire, new wood can now be added as required (hardwood is ideal). Lighting the fire in your fireplace cassette is very easy if you follow the 12. -
Page 48: Flash Fire
6.3.1 FLASH FIRE 6.3.3 SMOKING A flash fire is a small fire burned quickly when you don’t need much heat. A properly installed appliance should not smoke. If yours does, check the following: After your kindling has “caught”, load at least 3 pieces of wood, stacked loosely. -
Page 49: Ash Removal Procedures
7.1 ASH REMOVAL PROCEDURES 7.2 CREOSOTE FORMATION AND REMOVAL When wood is burned too slow, it produces tar and other organic vapors, WARNING which combine with expelled moisture to form creosote. The creosote vapors condense in the relatively cooler chimney flue of a slow-burning fire. -
Page 50: Chimney Cleaning
• Do not burn green or freshly cut wood. Certain items and considerations are important in chimney cleaning: • Be careful not to overfire the appliance by leaving the door open too long after the initial start-up. A thermometer on the chimney connector •... -
Page 51: Care Of Glass
WARNING is insufficient air for complete combustion. All Spartherm modules are supplied with Robax glass in the door. Robax is a ceramic glass. Do not use substitute glass and order replacement glass from Spartherm If it is necessary to clean the glass, buff lightly with a clean dry cloth and through your dealer. -
Page 52: Care Of Plated Parts
NOTE: The protective wrap on plated parts is best removed when the assembly is at room temperature but this can be improved if the assembly 7.8 CARE OF PLATED PARTS is warmed, using a hair dryer or similar heat source. If the appliance is equipped with plated parts, you must clean fingerprints or other marks from the plated surfaces before operating the appliance 8. -
Page 53: Exploded View
Herstellung und den Entwurf wird das Eigentum ausdrücklich vorbehalten und der gesetzliche Schutz gemäß BGB §§ 823 ,826, 1004 voll in Anspruch genommen. Unbefugte Vervielfältigungen, tungen und Wiedergaben - ganz oder teilweise - werden gemäß §§ 2 Absatz Ziffer 7, 96 ff. und 106 ff. Urhebergesetz sowie u.U. nach 1, 3, 4, 18 und 19 UWG zivil- und strafrechtlich verfolgt. ich Rechtsansprüche u. -
Page 54: Troubleshooting
Insufficient draft? Add more pipe. Not enough air? Ensure air control is fully open. Also ensure that Spartherm Feuerungstechnik GmbH gives a 24-month warranty on elevat- the air opening is not obstructed. ing mechanisms, operating devices such as handles, adjustment levers, Wood burns too fast. -
Page 55: Warranty Exclusions
• installation that does not comply with industry practice on installation warranty claim. instructions If such proof is not produced Spartherm Feuerungstechnik GmbH shall not 10.5 NOTE be obliged to honour the warranty. Your specialist dealer/contractor will gladly advise and assist you in mat- ters not covered by our warranty terms and conditions and undertakings. - Page 56 10.6 FOR YOUR INFORMATION...
- Page 57 10.6 FOR YOUR INFORMATION...
- Page 58 10.6 FOR YOUR INFORMATION...
-
Page 59: Service History
11. SERVICE HISTORY Appliance Service History This heater must be serviced annually depending on usage. Date Dealer Name Service Technician Name Service Performed Special Concerns... - Page 60 SPARTHERM THE GLOBAL BRAND FOR YOUR LIVING ROOM Your specialist dealer Spartherm Feuerungstechnik GmbH · Maschweg 38 · D-49324 Melle Phone +49 (0) 5422 94 41-0 · Fax +49 (0) 5422 9441-14 · www.spartherm.com...
Need help?
Do you have a question about the S600 and is the answer not in the manual?
Questions and answers