Table of Contents
Advertisement
Quick Links
Advertisement
Table of Contents

Related Manuals for DFI WL551


Summary of Contents for DFI WL551
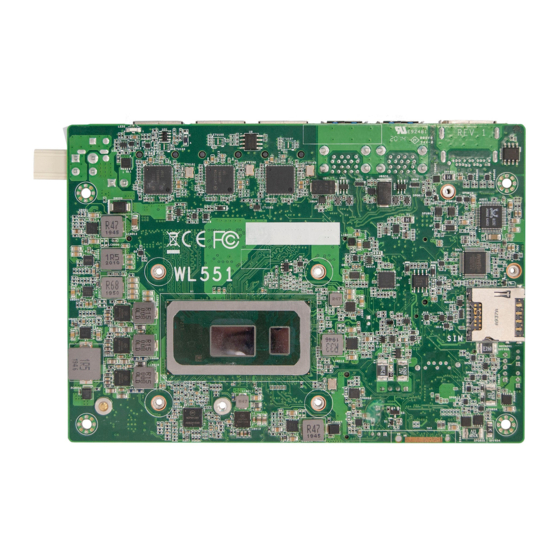
- Page 1 WL551 3.5" SBC Motherboard User’s Manual Preliminary A-598-M-2040...
- Page 2 1. The changes or modifications not expressly approved by the party responsible for compliance could void the user’s authority to operate the equipment. 2. Shielded interface cables must be used in order to comply with the emission limits. User's Manual | WL551...
-
Page 3: Table Of Contents
LVDS Panel ........................22 M.2 B Key 3042/2042 ....................23 Expansion Slots ......................23 M.2 E Key 2230 ......................23 Installing the M.2 Module .....................23 Installing the Mini PCIe Module ...................24 Front Panel ........................26 Battery Header .......................27 Heater ..........................27 SMBus ..........................28 User's Manual | WL551... - Page 4 To avoid damage to the system, use the correct AC input voltage range. • To reduce the risk of electric shock, unplug the power cord before removing the system chassis cover for installation or servicing. After installation or servicing, cover the system chassis before plugging the power cord. User's Manual | WL551...
- Page 5 The board and accessories in the package may not come similar to the information listed above. This may differ in accordance with the sales region or models in which it was sold. For more information about the standard package in your region, please contact your dealer or sales representative. User's Manual | WL551...
-
Page 6: Chapter 1 - Introduction
3 x Intel® I211AT PCIe (10/100/1000Mbps) or 3 x Intel® I210IT PCIe (10/100/1000Mbps) Bottom Side: 4mm REAR I/O Ethernet 3 x GbE (RJ-45) CERTIFICATIONS CE, FCC, RoHS 4 x USB 3.1 Gen 2 Display 1 x COMBO port (DP++/HDMI) User's Manual | WL551... -
Page 7: Features
IRQ or DMA interrupt. Wake-On-USB This function allows you to use a USB keyboard or USB mouse to wake up a system from the S3 (STR - Suspend To RAM) state. User's Manual | WL551... -
Page 8: Chapter 2 - Hardware Installation
Backlight Switch USB 7/8 BGA 1528 (SW1) & Voltage (USB 2.0) Inverter Power Select SATA M.2 M Key LED CPU Fan SATA Power Panel Power Select LVDS Battery M.2 M Key Clear CMOS 2242/2280 (JP1) LVDS Backlight User's Manual | WL551... -
Page 9: System Memory
4. Make sure the notch on memory card is aligned to the key on the socket. BGA 1528 Memory Module Notch The system board supports the following memory interface. Socket Top View Eject Tab Eject Tab Socket Side View Step 1 User's Manual | WL551 Step 2... -
Page 10: Removing The Memory Module
The tabs snap automatically to the edges of the card and lock the card in place. Step 1 Step 1 Step 1 Step 1 Step 2 Step 2 Step 2 Step 2 Step 3 Step 3 Step 3 Step 3 User's Manual | WL551... -
Page 11: Installing The Heat Sink
4 mounting holes around the board. 3. Screw tight two of the spring screws at opposite corners into the mounting holes. And then proceed with the other two spring screws. Mounting holes Intel BGA 1528 User's Manual | WL551... -
Page 12: Jumper Settings
2. Put a jumper cap on JP5’s pin 2 and pin 3. Wait for a few seconds and set JP5 back to its default setting, i.e. jumper cap on pin 1 and pin 2. 3. Plug the power cord and power-on the system. 1-2 On: 2-3 On: Normal (default) Clear CMOS User's Manual | WL551... -
Page 13: Dio Power Select (Jp2)
Chapter 2 HARDWARE INSTALLATION Jumper Settings DIO Power Select (JP2) Intel BGA 1528 JP2 is used to select the power of DIO (Digital I/O) signal. 1-2 On: 2-3 On: 5V 5VSB (default) User's Manual | WL551... -
Page 14: Panel Backlight Selection (Dpjp604)
Intel Intel BGA 1528 BGA 1528 DPJP604 is used to select the panel backlight power. DPJP602 is used to select the panel inverter power. 1-2 On: 2-3 On: 1-2 On: 2-3 On: 3V3 (default) +12V (default) User's Manual | WL551... -
Page 15: Panel Power Selection (Dpjp603)
DPJP603 is used to select the panel power. JP6 is used to configure the InnoAGE Remote Management. InnoAGE Remote Management Assignment Assignment PC Reset Recovery 1-2 On: 3-4 On: 5-6 On: Power LED HDD LED +12V (default) +3.3V Power Button User's Manual | WL551... -
Page 16: Switch Settings
BGA 1528 SKUs M.2 E-Key M.2 B-Key M.2 M-Key SATA_5V 000G~800G SW1 1-8 ON 2-7 ON 3-6 ON 4-5 ON +3V3SB +3V3SB +3V3SB +5VSB 900G 1-8 OFF 2-7 OFF 3-6 OFF 4-5 OFF +3.3V +3.3V +3.3V User's Manual | WL551... -
Page 17: Rear I/O Ports
Plug and Play peripherals. Wake-On-USB Keyboard/Mouse The Wake-On-USB Keyboard/Mouse function allows you to use a USB keyboard or USB mouse to wake up a system from the S3 (STR - Suspend To RAM) state. User's Manual | WL551... -
Page 18: Graphics Display
DP++ is supported by the system board for converting to DVI and HDMI signals. HDMI The HDMI port which carries both digital audio and video signals is used to connect a LCD monitor or digital TV that has the HDMI port. User's Manual | WL551... -
Page 19: Usb Ports
The Wake-On-USB Keyboard/Mouse function allows you to use a USB keyboard or USB mouse to wake up the system from the S state(s). Intel BGA 1528 „ USB2.0 Pin Assignment Assignment Assignment -DATA -DATA +DATA +DATA N.C. User's Manual | WL551... -
Page 20: Front Audio
„ Digital I/O Pin Assignment „ Front Audio Pin Assignment Pin Assignment Pin Assignment Assignment Assignment DIO_7 DIO_6 Mic-L DIO_5 DIO_4 Mic-R N.C. DIO_3 DIO_2 Line-Out-R Mic-JD (sense) DIO_1 DIO_0 N.C. DIO Power Line-Out-L Line-JD (sense) User's Manual | WL551... -
Page 21: Power Connector
Using a voltage more than the recommended range may fail to boot the system or cause „ COM1 Pin Assignment damage to the system board. RS232 RS422 RS485 DCD- TXD- Data- TXD+ Data+ SOUT RXD+ N.C. DTR- RXD- N.C. DSR- N.C. N.C. RTS- N.C. N.C. CTS- N.C. N.C. N.C. N.C. User's Manual | WL551... -
Page 22: Lvds Panel
LCD Display Panel. LVDS_DDC_CLK LVDS_DDC_DATA +3.3V Panel Power Panel Power Panel Power Panel Power „ LVDS Backlight Pin Function Pin Function Control +12V/+5V via jumper Backlight On/Off PWM Brightness Control User's Manual | WL551... -
Page 23: B Key 3042/2042
M.2 E key socket (22mm x 30mm) and an M.2 M Key socket (22mm x 42mm or 22mm x 80mm). Mini PCIe (optional) The Mini PCIe socket allows for a full-size Mini PCIe module, and supports PCIe 2.0 or USB 2.0 signals. User's Manual | WL551... -
Page 24: Installing The Mini Pcie Module
Screw tight the card onto the stand-off with a screw driver and a stand-off screw until the gap between the card and the stand-off closes up. The card should be lying parallel to the board when it’s correctly mounted. User's Manual | WL551... - Page 25 Screw tight the card onto the stand- off with a screw driver and a stand- off screw until the gap between the card and the stand-off closes up. The card should be lying parallel to the board when it’s correctly mounted. User's Manual | WL551...
-
Page 26: Front Panel
„ Front Panel Pin Assignment Assignment Pin Assignment Power Button SUS LED PWR SUS LED Reset HDD LED „ Front Panel Pin Combination Name Pin Name 3V3SB PWSIN PWR-LED PWR-SW SUS_LED 3V3SB HD-LED RESET HD_LED RESET User's Manual | WL551... -
Page 27: Battery Header
• Replace only with the same or equivalent type recommended by the manufacturer. • Dispose of used batteries according to local ordinance. • Higher temperature or harsh environment may limit the functionality of the tape wrapped on battery. User's Manual | WL551... -
Page 28: Smbus
„ SMBus Pin Assignment Assignment Assignment 3V3SB SMBus_Clock SMBus_SDA SMBus_Alert N.C. User's Manual | WL551...
Need help?
Do you have a question about the WL551 and is the answer not in the manual?
Questions and answers