Asko T712C Operating Instructions Manual
Asko t712c: operating instruction
Hide thumbs
Also See for T712C:
- User manual (32 pages) ,
- Operating instructions manual (32 pages) ,
- Use and care manual (28 pages)
Table of Contents
Advertisement
Operating Instructions
Tumble dryer
Dear ASKO customer,
Thank you for choosing this quality product from Scandinavia,
which was made in Sweden.
We want you to feel assured that the inside of your new ma-
chine is just as good as the outside and that the ethics and
standards that went into the production of this machine are
just as high as the quality and performance that you will re-
ceive from it. We hope that this product will give you many
years of pleasure.
To ensure that you get the most from your new machine, we
recommend that you read the operating instructions before
using the machine. The operating instructions also contain
information on how to avoid damaging the environment.
Asko T712C
Advertisement
Table of Contents

Subscribe to Our Youtube Channel
Related Manuals for Asko T712C


Summary of Contents for Asko T712C
-
Page 1: Operating Instructions
Operating Instructions Tumble dryer Dear ASKO customer, Thank you for choosing this quality product from Scandinavia, which was made in Sweden. We want you to feel assured that the inside of your new ma- chine is just as good as the outside and that the ethics and... -
Page 2: Table Of Contents
Contents Before using your machine for the first time Do not tumble-dry Safety instructions General Installation Safety Interrupting a program Transport/Winter storage Packing material Recycling Child safety Description of the tumble dryer Front panel Options button Advice and tips before you tumble-dry Have the clothes been spun? Materials that can be tumble-dried... -
Page 3: Before Using Your Machine For The First Time
Before using your machine for the first time Do not tumble-dry Certain materials are not suitable for tumble- drying. Always check and follow the instruc- tions on each item's laundry label. You can find more information in the chapter "Advice and tips before you tumble-dry". -
Page 4: Safety Instructions
Safety instructions General • Read the operating instructions and keep them in a safe place! • Electrical installation, if required, should be carried out by a qualified electrician. • The machine should only be used for tum- ble-drying as described in these instruc- tions. -
Page 5: Recycling
Safety instructions Recycling This machine is manufactured and labelled for recycling. to prevent injuries, the machine must be made unusable before disposing of it.. Contact your local authority for information about where and how your machine can be recycled correctly. •... -
Page 6: Child Safety
Child safety Do not allow children to play with the tumble dryer. The tumble dryer does not start automatically when the door closes (e.g. if a child closes the door from inside). The tumble dryer has a magnetic catch, that allows the door to be opened from the inside. -
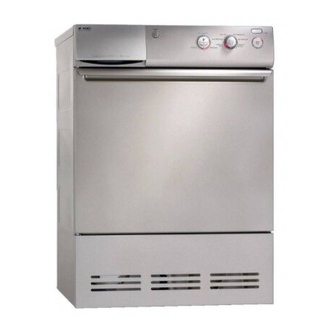
Page 7: Description Of The Tumble Dryer
Description of the tumble dryer Panel Condensed water container Serial Number Lint filter holder Outer door Fan (behind hatch) Condenser (behind the front plate) Lint filter... -
Page 8: Front Panel
Front panel Options button Main power switch Options buttons Program selector Display Start/Stop Button for selecting Low Temperature Button for selecting Anti crease Button for selecting Delayed Start 1-24h... -
Page 9: Advice And Tips Before You Tumble-Dry
Advice and tips before you tumble-dry Here are some tips that may help you before you begin tumble-drying. Have the clothes been spun? Items to be tumble-dried should be spun at 1000 rpm or faster. Higher spin speeds save both energy and drying time. Materials that can be tumble-dried This symbol means that the material is suitable for tumble-drying. -
Page 10: Tumble Drying
Tumble drying Below are step-by-step instructions to help you achieve the best possible tumble-drying results. Sort your fabrics You will achieve the most uniform drying results if the items are made of the same type of material. Do up zips and buttons, fas- ten belts, sort the items and adjust the load and temperature. -
Page 11: Program Chart
Tumble drying Menu overview Program chart For the consumption values given below, the requirements are as follows: Temperature of intake air: Moisture content of intake air: Drying temperature: Heater output: Before tumble-drying, cotton fabrics should be spun at 800 and 1600 rpm (long spin). Before tumble-drying, other fabrics (crease-resistant and acrylic) should be spun at 800 rpm (short spin). -
Page 12: Drying Program Finished
Tumble drying Drying program finished The text "END" appears on the display when the program is finished. If the Anti- crease option has been selected, the drum will rotate every minute for 2 hours after cooling. Important! • Clean the lint filter after each load. •... -
Page 13: Selecting Options
Selecting Options By selecting options, you can tailor drying programs to suit your own laundry requirements. The machine remembers the option you have chosen and uses it the next time you select the program in question. You can, of course, change this if you want. Low temperature Select or deselect Low Temperature by pressing the Temperature button. -
Page 14: Care And Cleaning
Care and cleaning Cleaning the lint filter The lint filter must be cleaned after each load. If you have very hard water, this can cause limescale deposits in the lint filter. Check for any limescale deposits when cleaning the lint filter and, if necessary, wash the filter by hand. -
Page 15: Cleaning The Condenser
Care and cleaning Cleaning the condenser The condenser should be cleaned at least three times a year. If you have pets, the con- denser must be cleaned more frequently. 1. Turn off the main power switch. 2. Remove the lower plinth. 3. -
Page 16: Troubleshooting
Troubleshooting The machine will not start Check • that the door is properly closed. • that the main power switch is on. • that the Delayed Start option has not been selected. If so, the time remaining until the start will be shown in full hours in the dis- play (e.g. -
Page 17: Technical Information
Technical information Technical data Height: Width: Depth: Weight: Cylinder volume: Max. drying capacity: Speed: Rated power: Drum material: Outer casing material: Setup Drain: Standard tests Australia: Drying performance: Energy declaration: Test method for noise measurement: 850 mm 595 mm 585 mm 47 kg 111 l 6 kg... -
Page 18: Service
Service Before contacting the service division Before contacting the service division, you Model Number should find out whether you can resolve the fault yourself. See the "Troubleshooting" and Serial Number "Care and cleaning" chapters. If you still need to contact the service division, make sure that you know the model designa- tion, type designation and serial number. -
Page 19: Installation
B. Stack The tumble dryer can be placed on top of a Asko washing machine. In this case you use the stacking attachments (foot cups and anti- tilt devices) that come with the machine: You will find 2 foot cups in a bag in the drum and 2 anti-tilt devices are attached to the bottom left corner at the back of the machine. -
Page 20: Adjusting The Feet
Installation 5. Fit the plastic cups so that the “tags” marked with arrows are against the front edge or side edge of the cover and press them firmly onto the cover. Then break off the remaining tags. 6. Push out the knock-out hole on the back of the dryer (you must not remove it, just open it) using a hammer and screwdriver. -
Page 21: Electrical Installation
Installation Electrical installation The machine must only be connected to an earthed wall socket. If this appliance is supplied from a cord exten- sions set or electrical portable outlet device, the cord extension ser or electrical portable outlet device must be positioned so that it is not subject to splashing or ingress of mois- ture. -
Page 22: Door Hanging
Door hanging Door hanging The tumble dryer comes with the door hung on the left. However, it is possible to change the door so that it is hung on the right. Follow these instructions: 1. Remove the lower front plate and undo the three screws holding the hinge attachment. - Page 23 Door hanging 8. Insert the door magnet in place of the cover washer. 9. Insert the cover washer in place of the door magnet. 10.Insert the screws so that the door magnet and cover washer are held in place. 11.Remove the screw indicated. If using a condenser dryer, you must also open the condenser panel.
-
Page 24: Quick Guide
Quick guide Fabrics • Dry fabrics of the same type together to ensure that they dry as evenly as possible. Turn on the main power switch Load the laundry • Close the door. Select a program and any options • Turn the program selector to the re- quired program.
Need help?
Do you have a question about the T712C and is the answer not in the manual?
Questions and answers