
Related Manuals for Zodiac RE 42 Series


Summary of Contents for Zodiac RE 42 Series
- Page 1 Instructions for installation and use - English Electric robotic cleaner Translation of the original instructions in french More documents on: www.zodiac.com H0700300_REVA - 2020/11- EN11-- / EN31--...
- Page 2 • The distribution or modification of this document in any way is prohibited, without prior authorisation from Zodiac®. • Zodiac® is constantly developing its products to improve their quality. The information contained herein may therefore be modified without notice. GENERAL WARNINGS •...
- Page 3 WARNINGS ASSOCIATED WITH ELECTRICAL APPLIANCES • The power supply to the appliance must be protected by a dedicated 30 mA Residual Current Device (RCD), complying with the standards and regulations in force in the country in which it is installed. •...
-
Page 4: Table Of Contents
CONTENTS ❶ Information before using the appliance 1.1 I Description 1.2 I Technical specifications and parts list 1.3 I Operating principle 1.4 I Pool preparation ❷ General use 2.1 Immersing the cleaner 2.2 Attachment to the base 2.3 I Electricity supply connection 2.4 I Control box functions 2.5 I Starting a cleaning cycle 2.6 I Removing the cleaner from the water... -
Page 5: ❶ Information Before Using The Appliance
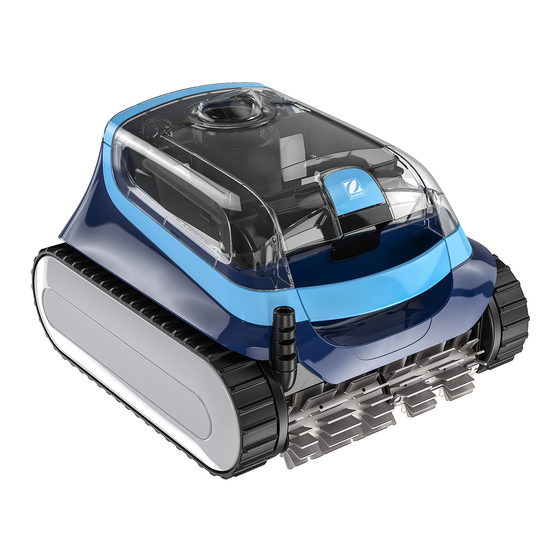
❶ Information before using the appliance 1.1 I Description RE 42 - - RE 44 - - iQ RE 46 - - iQ XA 20 - - XA 30 - - iQ XA 40 - - iQ 20 XA 30 XA iQ 40 XA iQ CNX 20 - - CNX 30 - - iQ... -
Page 6: I Technical Specifications And Parts List
RE 42 - - RE 44 - - iQ RE 46 - - iQ XA 20 - - XA 30 - - iQ XA 40 - - iQ 20 XA 30 XA iQ 40 XA iQ CNX 20 - - CNX 30 - - iQ CNX 40 - - iQ Surface type... -
Page 7: I Operating Principle
1.3 I Operating principle The cleaner is independent of the filtration system and can therefore operate autonomously. It just simply needs to be connected to the mains power supply. It finds the best route to move around and clean the areas of the pool for which it has been designed (depending on the model: floor, walls, water line or floor only). -
Page 8: ❷ General Use
❷ General use 2.1 Immersing the cleaner • Roll out the full length of the cable alongside the pool to avoid the cable becoming tangled during immersion (see figure • Position yourself halfway along the length of the pool before immersing the cleaner (see figure ). -
Page 9: Attachment To The Base
2.2 Attachment to the base 2.3 I Electricity supply connection In order to avoid any risk of electrocution, fire or serious injury, please follow the instructions below: • Use of an electrical extension is prohibited when connecting the control box. •... -
Page 10: I Control Box Functions
2.4 I Control box functions The control box is used to control the main functions or to connect the cleaner to the home Wi-Fi network (see "❸ Using the iAquaLink™ app (for iQ models)"). Function Keys Start/stop the cleaning cycles Change the "Surface to be cleaned"... -
Page 11: I Starting A Cleaning Cycle
2.5 I Starting a cleaning cycle In order to avoid any risk of injury or material damage, please follow the instructions below: • Bathing is prohibited when the appliance is in the pool. • Do not use the appliance during a shock chlorination. Wait until the chlorine level has reached the recommended value before immersing the cleaner. -
Page 12: I Removing The Cleaner From The Water
2.6 I Removing the cleaner from the water • To prevent damaging the equipment, use only the handle to remove the appliance from the pool. 2.6.1 For models without the Lift System mode • Switch off the appliance by pressing •... -
Page 13: I Good Practices After Each Cleaning Operation
2.7 I Good practices after each cleaning operation 2.7.1 Clean the filter as soon as the appliance is out of the pool • The cleaner's performance may be reduced if the filter is full or dirty. • Clean the filter in clean water as soon as the appliance is removed form the pool after each cleaning cycle. -
Page 14: ❸ Using The Iaqualink™ App (For Iq Models)
❸ Using the iAquaLink™ app (for iQ models) Mobile device Cleaner Home Wi-Fi control box Cleaner (smartphone or tablet) network The iAquaLink™ app is available for iOS and Android systems: it provides additional functions. Use the iAquaLink™ app to benefit from advanced functions such as troubleshooting assistance by inputting error codes and have full control over the cleaner wherever you are, at all times. - Page 15 • Download the iAquaLink™ app from the App Store (iOS) or Google Play Store (Android). • Select "Robotic cleaner". • Press the icon to add a new • Log in or register. • Select your model. appliance. Home Wi-Fi network •...
-
Page 16: I Available Functions In The Iaqualink™ App (On Iq Models)
3.2 I Available functions in the iAqualink™ app (on iQ models) RE 44 - - iQ RE 46 - - iQ XA 30 - - iQ XA 40 - - iQ Smartphone via the iAquaLink™ app: 30 XA iQ 40 XA iQ CNX 30 - - iQ CNX 40 - - iQ Remote control (Wi-Fi) - Page 17 3.2.2 Remote control (depending on the model) • Use the remote control only if you have the cleaner within view. • The cleaner can be controlled using your smartphone or tablet as a remote control via "Joystick mode": - Press the icons to move the cleaner and to turn forwards and backwards left or right.
-
Page 18: ❹ Maintenance
❹ Maintenance To avoid serious injury: • Disconnect the cleaner from the power supply. 4.1 I Cleaning the cleaner • The appliance must be cleaned regularly using clean or slightly soapy water. Do not use solvents. • Rinse the appliance thoroughly with clean water. •... -
Page 19: I Cleaning The Impeller
4.3 I Cleaning the impeller To avoid serious injury: • Disconnect the cleaner from the power supply. • Wear gloves when maintaining the impeller • Open the filter access hatch by lifting the lock (see figure • Remove the filter (see figure •... -
Page 20: I Replacing The Brushes
4.4 I Replacing the brushes Are the brushes worn? • Replace the brushes if the wear indicators are similar to example Remove the worn brushes • Remove the tabs from the holes inside which they are fastened, then remove the brushes. Position the new brushes. -
Page 21: ❺ Troubleshooting
❺ Troubleshooting • If a problem occurs, before you contact your retailer, please carry out these few simple checks using the following tables. • If the problem persists, contact your retailer. • : Actions to be performed by a qualified technician only. 5.1 I Appliance behaviour •... -
Page 22: I User Alerts
5.2 I User alerts • The status indicator on the control box flashes to alert the user, follow the recommended troubleshooting tips below. User alerts can also be accessed in the iAquaLink™ app (on iQ models). Display in the iAquaLink™ app LED (Power) Solutions (depending on... -
Page 23: I Troubleshooting The Connection To The Iaqualink™ App
5.3 I Troubleshooting the connection to the iAquaLink™ app Control box status Possible causes Solutions • The version of the app • Update the app version. used is obsolete. • The control box is • The LED is connected to the router Contact your Internet service provider. - Page 24 Control box status Possible causes Solutions • The is lit and the "PROG" message is displayed (depending on the • A software update is in • Wait for the update to complete. model). A message progress. • Do not disconnect the power cable from the cleaner during is displayed in the an update.
- Page 25 For more information, product registration and customer support: www.zodiac.com ©2020 Zodiac Pool Systems LLC. All rights reserved. ZODIAC® is a registered trademark of Zodiac International, S.A.S.U., used under license. All other trademarks are the property of their respec- tive owners.
Need help?
Do you have a question about the RE 42 Series and is the answer not in the manual?
Questions and answers