
Related Manuals for Zodiac ALPHA iQ iAquaLink CONTROL


Summary of Contents for Zodiac ALPHA iQ iAquaLink CONTROL
- Page 1 ALPHA™ iQ Instructi ons for installati on and use - English Electric roboti c cleaner Translati on of the original instructi ons in french More documents on: www.zodiac.com H0655700.A - 2019/09 - EC1102A...
- Page 2 WARNINGS GENERAL WARNINGS • Failure to respect the warnings may cause serious damage to the pool equipment or cause serious injury, even death. • Only a person qualifi ed in the technical fi elds concerned (electricity, hydraulics or refrigerati on) is authorised to perform any servicing or repairs to the appliance.
-
Page 3: Table Of Contents
• Distributi ng or modifying this document in any way without authorisati on from Zodiac® is prohibited. • Zodiac® is constantly developing its products to improve their quality; therefore, the informati on contained in this document may be modifi ed without noti ce. -
Page 4: ❶ Specifi Cati Ons 3 En
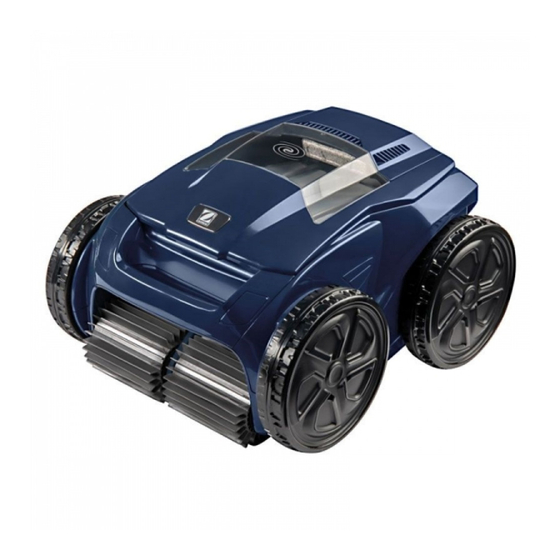
❶ Specifi cati ons 1.1 I Package contents (x2) (x2) (x2) (x2) RA 6300 iQ - RA 6370 iQ - RA 6500 iQ - RA 6570 iQ - RA 6700 iQ Cleaner + fl oati ng cable Control unit Caddy kit 60µ... -
Page 5: I Cleaner Functi Ons
1.2 I Cleaner functi ons RA 6300 iQ - RA 6500 iQ - Symbol Designati on RA 6700 iQ RA 6370 iQ RA 6570 iQ Control unit : Start/Stop the appliance Initi ate iAquaLink™ Control connecti on Bluetooth™ connecti on status Wi-Fi connecti on status Remove from pool mode «Lift System»... -
Page 6: I Technical Specifi Cati Ons And Marking
1.3 I Technical specifi cati ons and marking 1.3.1 Technical specifi cati ons RA 6300 iQ - RA 6370 iQ- RA 6500 iQ - RA 6700 iQ RA 6570 iQ 220-240 V ac, 50 Hz, short circuit-proof safety isolati ng type* Control unit supply voltage Cleaner supply voltage 30 V dc... -
Page 7: ❷ Installati On
❷ Installati on 2.1 I Set-up 3.5 Meters Minimum : Control unit : Caddy : Cleaner : Floati ng cable : Plug : Mains cable : "iAquaLink™" Wi-Fi remote control... -
Page 8: Assembling The Caddy
2.2 l Assembling the caddy • Tool-less assembly (x2) (x2) (x2) Tighten the nut loosely Finish ti ghtening the nut... -
Page 9: ❸ General Use
❸ General use 3.1 I Operati ng principle The cleaner is independent of the fi ltrati on system and can therefore operate autonomously. It just simply needs to be connected to the mains power supply. It fi nds the best route to move around and clean the areas of the pool for which it has been designed (depending on the model: bott om, walls, water line). -
Page 10: I Electrical Supply Connecti Ons
3.4 I Electrical supply connecti ons To prevent risk of electrocuti on, fi re, or serious injury, be sure to adhere to the following: • The use of an electrical extension cord is prohibited when connecti ng the control unit. •... -
Page 11: I Starti Ng And Stopping A Cleaning Cycle
3.5 I Starti ng and stopping a cleaning cycle To prevent risk of injury or property damage, be sure to adhere to the following: • Bathing is prohibited while the device is in the pool. • Do not use the device during a shock chlorinati on. Wait unti l the chlorine level has reached the recommended value before immersing the cleaner. - Page 12 3.5.3 Ending the cleaning cycle To prevent damaging the equipment: Do not pull on the cable to remove the appliance from the pool. Use the handle. • • Do not leave the appliance to dry out in sunlight aft er use. •...
-
Page 13: ❹ Control Using The Iaqualink™ App
❹ Control using the iAquaLink™ app Cleaner Mobile device Domesti c Wi-Fi control unit (smartphone or tablet) Robot cleaner network The iAquaLink™ app is available for iOS and Android systems. With the iAquaLink™ app you can control the cleaner from any locati on at any ti me and have the benefi t of advanced functi ons such as additi onal programming and troubleshooti ng assistance. - Page 14 The Wi-Fi LED fl ashes when connected to the The connecti on to the internet is established when the Wi-Fi LED is solid. home router and the Bluetooth LED turns off . • It can take several minutes to connect. •...
-
Page 15: I Iaqualink™ Control
4.2 I iAquaLink™ control Before controlling the cleaner with the applicati on, take care to: • Connect the control box to a power outlet, • Immerse the cleaner in the pool. 4.2.1 Programming and controlling cleaning cycles From the applicati on: •... - Page 16 4.2.3 Remote control (according to model) The cleaner can be controlled using your smartphone or tablet as a remote control. • Use the remote control mode only if you have the cleaner within view. • 2 modes are available for piloti ng the cleaner: "Joysti ck mode": Press the icons to move the cleaner forwards and backwards and to turn left or right.
-
Page 17: ❺ Maintenance
❺ Maintenance To avoid serious injury: • Disconnect the cleaner from the power. 5.1 I Cleaning the cleaner • The device must be cleaned regularly using clean or slightly soapy water. Do not use solvents. • Rinse the device generously using clean water. •... -
Page 18: I Cleaning The Propeller
5.3 I Cleaning the propeller To avoid serious injury: • Disconnect the cleaner from the power. • You must wear gloves when doing maintenance on the propeller • Loosen the screw on the grille (see image • Remove the grille (see image •... -
Page 19: I Replacing The Brushes
5.4 I Replacing the brushes Are the brushes worn? • Replace the brushes if the wear indicators are similar to example : Remove the worn brushes • Remove the tabs from the holes in which they are fi xed. Positi on the new brushes. •... -
Page 20: I Changing The Tyres
5.5 I Changing the tyres Remove the worn tyres Positi on the new tyres... -
Page 21: ❻ Troubleshooti Ng
❻ Troubleshooti ng • Before you contact your retailer, we invite you to carry out some simple checks for yourself in the event of a malfuncti on, using the following tables. • If the problem conti nues contact your retailer. •... -
Page 22: I Error Codes
6.2 I User alerts Control Unit Display Error code Blinking LED In-App Display Suggested Soluti on (in accordance (in accordance to the model) to the model) • Check for any small debris or cable impeding the brushes from turning freely. •... -
Page 23: I Troubleshooti Ng The Connecti On To The Iaqualink™ App
Dismissing an Error Code From the Control Unit: • Aft er you have completed the troubleshooti ng soluti on steps, press any key to clear the error code (except the butt on ). From the iAquaLink™ App: • Aft er you have completed the troubleshooti ng soluti on steps, press Clear Error to return to normal operati on. Or, press OK if you need to complete the soluti on steps at a later ti me. - Page 24 Control unit status Possible causes Soluti ons • The LED is ON and it's displaying "PROG"on the control box (in accordance to the model) and • A soft ware update is in • Wait the end of the soft ware update. informati on is progress.
- Page 25 Appliance model Numéro de série Serial number Pour plus d’informati ons, enregistrement produit et support client : For more informati on, product registrati on and customer support: www.zodiac.com ZODIAC® is a registered trademark of Zodiac Internati onal, S.A.S.U., used under license.
Need help?
Do you have a question about the ALPHA iQ iAquaLink CONTROL and is the answer not in the manual?
Questions and answers