
Related Manuals for Feig Electronic ID ISC.ANT.U500/270


Summary of Contents for Feig Electronic ID ISC.ANT.U500/270
-
Page 1: Id Isc.ant.u500/270
INSTALLATION ID ISC.ANT.U500/270 Type DM Direction Mode final - public (B) –M71110-0e-ID-B.doc 2018-04-18... - Page 2 FEIG ELECTRONIC call explicit attention that devices which are subject of this document are not designed with components and testing methods for a level of reliability suitable for use in or in connection with surgical implants or as critical components in any life support systems whose failure to perform can reasonably be expected to cause significant injury to a human.
-
Page 3: Table Of Contents
Safety Instructions / Warning - Read before Start-Up ! Maintenance Performance Features Scope of delivery ......................7 3.1.1 Antenna ID ISC.ANT.U500/270 Type DM (Direction Mode) ........7 Performance Features of the ID ISC.ANT.U500/270 Antennas ........ 7 Available Antenna Types ................... 8 Installation and Wiring Mounting Preparation ....................9 Installing the antenna .................... - Page 4 Configure the reader in accordance with national RF regulations 6.1.1 EU reader according to EN 302 208 ............... 44 6.1.2 FCC Reader according to FCC 47 Part 15 ............. 46 Technical Data Antenna ID ISC.ANT.U500/270 Type DM ..............47 FEIG ELECTRONIC GmbH Page 4 of 48 M71110-0e-ID-B.doc...
-
Page 5: Safety Instructions / Warning - Read Before Start-Up
Identification Installation ID ISC.ANT.U500/270–DM Safety Instructions / Warning - Read before Start-Up ! The device may only be used for the intended purpose designed by for the manufacturer. The operation manual should be conveniently kept available at all times for each user. -
Page 6: Maintenance
Installation ID ISC.ANT.U500/270–DM Maintenance The antenna ID ISC.ANT.U500/270 is a design product with high quality surfaces, and should al- ways be handled with caution. The antenna was designed to work reliably and flawlessly for years without special maintenance. Attention! The surfaces should be cleaned with a clean, soft cloth dampened in a dishwashing liquid –... -
Page 7: Performance Features
Mounting Instruction 3.2 Performance Features of the ID ISC.ANT.U500/270 Antennas The ID ISC.ANT.U500/270-DM (Direction Mode) antenna is a version with integrated Long Range Reader ID ISC.LRU1002 Depending on the antenna configuration, one, two or all three read orientations of the Smart Tags and various distances are possible. -
Page 8: Available Antenna Types
Identification Installation ID ISC.ANT.U500/270–DM 3.3 Available Antenna Types The following products are currently available: Antenna Type Description ID ISC.ANT.U.500/270-DM Antenna with Reader, Multiplexer and Mounting bracket Order No. 4922.000.00 ID ISC.ANT.U500/270-DM Antenna with Reader, Multiplexer and Mounting bracket Order No. 4923.000.00 ID NET.24V-B... -
Page 9: Installation And Wiring
Identification Installation ID ISC.ANT.U500/270–DM Installation and Wiring 4.1 Mounting Preparation For the assembly of the antenna it has to be carefully unpacked. This is done as described in the following steps: Place the packed antenna on the floor or table with the top side facing up. Carefully open the box and then remove the antenna. -
Page 10: Installing The Antenna
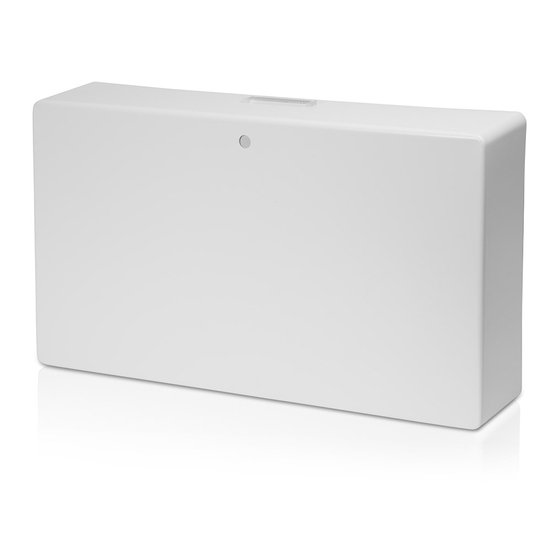
Identification Installation ID ISC.ANT.U500/270–DM 4.2 Installing the antenna 4.2.1 Dimensions of the antenna The overall dimensions of the antenna are shown in Fig. 2 Fig. 2: Antenna outside dimensions All dimensions are in mm with general tolerance according to ISO 2768 m (mean). -
Page 11: Drilling The Mounting Holes
Identification Installation ID ISC.ANT.U500/270–DM 4.2.2 Drilling the Mounting Holes If the position of the antennas has been marked or determined, the mounting holes can be marked and drilled for the antenna mounting bracket. The mounting bracket could be used as drilling template. -
Page 12: Installing The Antenna On The Wall Or Ceiling
Identification Installation ID ISC.ANT.U500/270–DM 4.2.3 Installing the Antenna on the wall or ceiling The antenna could be mounted on the floor or ceiling with the mounting bracket directly or with the use of a VESA bracket. Step Action Note Do not open the antenna... - Page 13 Identification Installation ID ISC.ANT.U500/270–DM Step Action Note Pull the mounting bracket from the antenna housing. Install the mounting bracket at its position. e.g. Here at the wall at 85cm 85cm FEIG ELECTRONIC GmbH Page 13 of 48 M71110-0e-ID-B.doc...
- Page 14 Identification Installation ID ISC.ANT.U500/270–DM Step Action Note Hang the antenna on the mounting bracket and fix the antenna body at the mounting bracket with the 4 screws. FEIG ELECTRONIC GmbH Page 14 of 48 M71110-0e-ID-B.doc...
- Page 15 Identification Installation ID ISC.ANT.U500/270–DM Step Action Note Remove the plugs and make the needed cabling. FEIG ELECTRONIC GmbH Page 15 of 48 M71110-0e-ID-B.doc...
-
Page 16: Disassembly Of The Antenna (For Replacement/Repair)
Identification Installation ID ISC.ANT.U500/270–DM 4.2.4 Disassembly of the Antenna (for replacement/repair) Step Action Note Do not open the antenna body ! Do not remove ! Remove the plugs and all cable connections. Unscrew the 4 screws of the mounting bracket. - Page 17 Identification Installation ID ISC.ANT.U500/270–DM Step Action Note Pull the antenna upwards and away from the wall. FEIG ELECTRONIC GmbH Page 17 of 48 M71110-0e-ID-B.doc...
-
Page 18: Typical Antenna Configuration
The standard configuration of the antenna with three-dimensional tag orientation consists of one ID ISC.ANT.U500/270-DM antenna with reader. If a tag moves, at horizontal line through the detection area, it can be detected with a high reliability. Best performance could be achieved if the antenna is mounted on the ceiling. - Page 19 Identification Installation ID ISC.ANT.U500/270–DM Ceiling mounted Wall mounted Fig. 4: Capture area of the antenna Notes: Note that the entire reading area of the antenna is larger than the three- dimensional area shown in the drawing (Fig. 4). This means tags can be detected outside the reading area.
- Page 20 Identification Installation ID ISC.ANT.U500/270–DM To achieve three-dimensional reading of the tag in the reading area drawn above (Fig. 4), the following conditions must be fulfilled: Use of modern sensitive tags Tag length not below 9cm The antenna should be at least 50 cm away from any metal parts and more than 1m for larger metal parts Supplementary equipment (e.g.
-
Page 21: Antenna Configuration And Setup The Antenna
5.2 Antenna Configuration and Setup the Antenna 5.2.1 Required Components To set up the gate you need the following components: Qty. 1 ID ISC.ANT.U500/270-DM Qty. 1 ID ISC.NET24V-B Power Supply Unit Power cable, interface cable LAN TCP/IP USB to USB mini cable... -
Page 22: Configuration Of The Antenna
Identification Installation ID ISC.ANT.U500/270–DM 5.2.2 Configuration of the Antenna The antenna should be mounted in that way that the cable connections show to the floor if wall mounted or to the side /wall if ceiling mounted. If wall mounted it should be installed in high of 85cm (distance from floor to the bottom side of the antenna). -
Page 23: Interface Connections
Identification Installation ID ISC.ANT.U500/270–DM 5.2.3 Interface Connections 5.2.3.1 LAN / TCP/IP The Reader has an integrated 10 / 100 Base-T network port for an RJ-45. Connection is made on X1 and has an automatic “Crossover Detection” according to the 1000 Base-T Standard. -
Page 24: Usb Mini Interface On Connector X3
Identification Installation ID ISC.ANT.U500/270–DM 5.2.3.1 USB Mini Interface on connector X3 The reader is equipped with a USB on-the-go interface. This can either be used to connect the reader to a host system or by means of a special on-the-go adaptor for connection of a USB mem- ory stick to the reader. -
Page 25: Digital Input / Output
ID ISC.ANT.U500/270–DM 5.2.4 Digital Input / Output The ID ISC.ANT.U500/270-DM has one digital Input and one digital Output which could be used. 5.2.4.1 Digital Input on connector X4 The optocoupler on Terminal X4 are galvanically isolated from the Reader electronics and must therefore be externally supplied. -
Page 26: Digital Output On Connector X4
Identification Installation ID ISC.ANT.U500/270–DM 5.2.4.1 Digital Output on connector X4 The transistor connections, collector and emitter, of the optocoupler output are galvanically isolated from the Reader electronics and are carried to the outside without any internal ancillary circuitry on Terminal X4. The output must therefore be powered by an external power supply. -
Page 27: Dc Output On Connector X4
Identification Installation ID ISC.ANT.U500/270–DM 5.2.4.1 DC Output on connector X4 If needed the 24V DC output at X4 could be used to supply external devices or the digital Input / Output of the reader with the needed power. Power supply unit... -
Page 28: Reader/Antenna Configuration
Identification Installation ID ISC.ANT.U500/270–DM 5.2.5 Reader/Antenna Configuration To configure the antennas, open the ISOStart software and read out the current configuration of the Reader: Step Action Note Start ISO Start Software Select „Detect“ Use USB Port or default TCP/IP address 192.168.10.10... - Page 29 Identification Installation ID ISC.ANT.U500/270–DM Step Action Note Select „Options => Program“ Select „Expert Mode“ and confirm with OK. Select “Logical View” FEIG ELECTRONIC GmbH Page 29 of 48 M71110-0e-ID-B.doc...
- Page 30 Identification Installation ID ISC.ANT.U500/270–DM Afterwards set the Interface settings and the operating mode: Step Action Note Select “Configuration” Select -HostInterface -LAN Set LAN settings. Set by clicking on „Apply“. Select command “System reset Confirm with “Send” Select -Operating Mode -Mode Set to Buffered Read Mode Set by clicking on „Apply“.
- Page 31 Identification Installation ID ISC.ANT.U500/270–DM Step Action Note -Region Set right “Region”. Set by clicking on „Apply“. FEIG ELECTRONIC GmbH Page 31 of 48 M71110-0e-ID-B.doc...
-
Page 32: Testing The Gate Antenna
Identification Installation ID ISC.ANT.U500/270–DM 5.3 Testing the Gate Antenna After configuring and installing the gate antenna, you can check for proper function using a reader, the ISOStart service software and a Transponder. 5.3.1 Reading a Serial Number Step Action Note... -
Page 33: Testing The Performance
Identification Installation ID ISC.ANT.U500/270–DM 5.3.2 Testing the performance In this test the capture area of the antenna is checked. For different tags or other configurations the ranges and read areas may differ. Regarding used tags please refer to 5.1 Project Notes Antenna. -
Page 34: Reducing False Readings
Identification Installation ID ISC.ANT.U500/270–DM 5.3.3 Reducing false readings By creating a blacklist, all transponders placed in the surrounding of the antenna will be read and stored in the blacklist, this will reduce/avoid false readings. Step Action Note Start ISOStart Software Select “Configuration”... - Page 35 Identification Installation ID ISC.ANT.U500/270–DM Among other information a blacklist overflow is indicated FEIG ELECTRONIC GmbH Page 35 of 48 M71110-0e-ID-B.doc...
-
Page 36: Using The Trigger Function With The Digital Input
Identification Installation ID ISC.ANT.U500/270–DM 5.3.4 Using the Trigger function with the digital Input By using the digital input, the antenna could be triggered to switch on/off the RF-field, if a motion detector or light barrier is connected to this input. - Page 37 Identification Installation ID ISC.ANT.U500/270–DM Click on “Start” Walk in front or under the antenna in both directions by passing the light barrier or the motion detector with a valid transponder Transponder data will be displayed. FEIG ELECTRONIC GmbH Page 37 of 48...
-
Page 38: Activating The Automatic Mode
Identification Installation ID ISC.ANT.U500/270–DM 5.4 Activating the Automatic Mode The antenna has to be used in one of the Automatic Modes (Buffered Read or Notification Mode) to get a maximum performance. Otherwise the reading performance will be significantly reduced. For more information, see System Manual ID ISC.LRU1002 Which mode the most suitable is for your application has to be defined in advance. - Page 39 Identification Installation ID ISC.ANT.U500/270–DM Walk in front or under the antenna in both directions with a valid transponder. Transponder data will be displayed. FEIG ELECTRONIC GmbH Page 39 of 48 M71110-0e-ID-B.doc...
-
Page 40: Configuration And Test In Notification Mode
Identification Installation ID ISC.ANT.U500/270–DM 5.4.2 Configuration and Test in Notification Mode In Notification Mode the Reader sends the People Counter Data automatically to the Host. The following configuration hast o be done: Step Action Note Select „Configuration“ Operating Mode Select -Notification Mode Confirm with „Apply“... - Page 41 Identification Installation ID ISC.ANT.U500/270–DM Set right Port number, e.g. 20001; value defined from Computer that shall receive the antenna data Click on “Apply” Walk in front or under the antenna in both directions with a valid transponder. Transponder data will be displayed.
-
Page 42: Reader Diagnostic
Identification Installation ID ISC.ANT.U500/270–DM 5.5 Reader Diagnostic An error of the reader/antenna will be displayed by the diagnostic LED in the type DM antenna. Detailed information about the error could be analyzed with the ISO-Start program. Step Action Note Reader Diagnostic Select “Commands”... - Page 43 Identification Installation ID ISC.ANT.U500/270–DM Step Action Note Coding: FEIG ELECTRONIC GmbH Page 43 of 48 M71110-0e-ID-B.doc...
-
Page 44: Configure The Reader In Accordance With National Rf Regulations
** Correction Factor to convert the radiated power from e.r.p to e.i.r.p. an Excel file „Calc-RF-Power.xls“ can be used. For the calculation of the reader output power P Available from Feig Electronic GmbH. Example: ** linear antenna = „0“, circular antenna = „1“... - Page 45 Identification Installation ID ISC.ANT.U500/270–DM 0m cable 0dB loss for the antenna Cable loss: For EU region the max. allowed reader output power is: 0.8W for antennas 1 and 2 EU region (max. 2 W e.r.p) Recommended Max. allowed...
-
Page 46: Fcc Reader According To Fcc 47 Part 15
According to the FCC approval, Title 47, Part 15 the maximum output power of the reader is limited to 1 W (30dBm). The maximum radiated power of the antenna must not be more than 4 W e.i.r.p, (corresp. to 36dBm e.i.r.p or 33.75 dBm e.r.p. resp). As for ID ISC.ANT.U500/270-DM-FCC: Antenna: 9dBic, circularly polarised 0m cable ... -
Page 47: Technical Data
Identification Installation ID ISC.ANT.U500/270–DM Technical Data 7.1 Antenna ID ISC.ANT.U500/270 Type DM Mechanical Data Housing UV stabilized ABS and steel Dimensions ( W x H x D ) 506 mm x 275 mm x 103 mm 3 mm –... - Page 48 Identification Installation ID ISC.ANT.U500/270–DM Permissible overall transmitting power per antenna gate – EU-territory (per EN 302 208) 0.8 W for Ant. 1 and 3 – USA (per. FCC Part 15) 1.0 W for Ant. 1 and 3 Outputs –...
Need help?
Do you have a question about the ID ISC.ANT.U500/270 and is the answer not in the manual?
Questions and answers