Advertisement
Quick Links
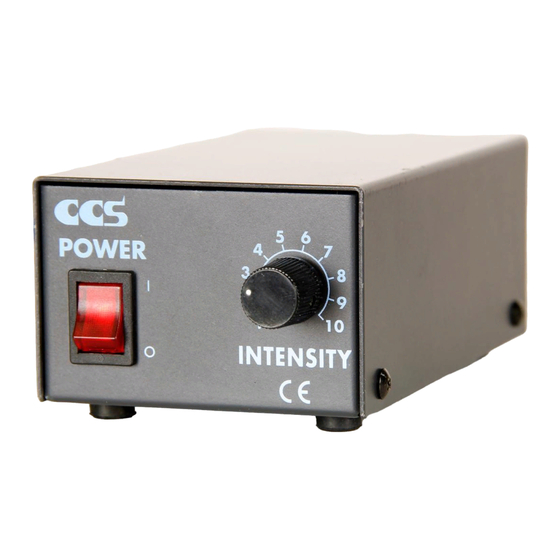
Analog Power Supply for LED Lights
P S B
Series
Instruction Guide
0mm以 上、 左 右
Thank you for purchasing a CCS product. To ensure proper use of the product,
please read this instruction guide before use and keep it for your future reference.
50mm
20m m
1
Features
The product is a analog power supply for controlling CCS LED lights. It controls LED lights principally
横置き
used for machine vision and industrial inspections. Do not use the product for other applications.
Description of Model Names
PSB -
1
固定穴
1
Output power
2
Output voltage
引き抜くと
5
1 2
が取れます
5W
1 0
2 4
10W
3 0
30W
*1) The power supply can be used for a lighting power consumption of 5, 10, or 30 W.
*2) The power supply can be used for a lighting input voltage of 12 or 24 V.
*3) This function locks the intensity control knob.
*4) Models with this functionality can be used worldwide.
2
Important Information for Equipment Safety
Incorrect usage of the product may result in fire, electric shock, or other serious damages.
Please ensure to follow the conditions below.
The following symbols are used in this instruction guide to indicate and classify the relative
importance of warnings and cautions.
Indicates that incorrect usage may
Warning
result in serious injury or death.
The following symbols in the instruction guide indicate and classify the precautions.
PROHIBITED
DISASSEMBLY
DO NOT TOUCH
PROHIBITED
WITH WET HANDS
These symbols mean the prohibited action.
Do not disassemble or modify the product.
Doing so may result in fire or electric shock.
Make sure that the product is free of moisture or any
liquid. Exposure to water may result in fire, electric
shock, or product failure.
Do not touch the power cords during lightning.
This may result in electric shock.
Before use the power cord, make sure it satisfies the specification of the region where you are going to use.
100 to 120V range: SVT or SJT type, AWG18, length: 3m max., dielectric strength: 125V min.
200 to 240V range: H05VV-F type, AWG18, length: 3m max., dielectric strength: 250V min.
Make sure that the length of the extension cable is less than 5m. If the extension cable is longer than 5m, the voltage
applied to both ends of the LED light will drop due to the DC resistance of the cable. The rated voltage will not be
attained for 100% radiant ability, and the radiant quantity will drop as a result.
When mount the unit in a system rack or case, the portion of the screws penetrating the case must be less than 5mm
long. If this portion is longer, internal components may be short-circuited.
Do not use lighting that is not manufactured by CCS.
Doing so may cause product failure. Use of non-CCS
lighting voids the warranty on the product.
Do not use user-made cables.
Doing so may cause product failure.
Do not place product under direct sunlight or in a high
humidity environment. Doing so may result in fire due
to internal temperature rise.
Do not bundle product cables with high-voltage lines
or power lines. Doing so may cause the product to
malfunction. Keep the product cables as far away
from such lines as possible.
Do not drop or subject the product to impact.
Doing so may cause the product to malfunction.
Do not bend or jam cables when wiring product.
Doing so may cause product failure.
To avoid product surface discoloration or
deterioration, do not wipe product with volatiles such
as paint thinner or benzene.
V B
-
2
3
4
Omitted for a 5W model
and worldwide model.
3
Lock
No
12V
L
Lock
24V
Indicates that incorrect usage may
Caution
result in injury or property damage.
DO NOT SUBJECT
INSTRUCTED
TO MOISTURE
These symbols mean the necessary action must obey.
Warning
Do not touch the product with wet hands.
Doing so may result in electric shock.
DISASSEMBLY
PROHIBITED
Turn off the power switch when connecting or
disconnecting the product and peripherals.
Otherwise it may cause fire and/or electric shock.
DO NOT SUBJECT
TO MOISTURE
If abnormal condition occurs such as fuming,
heat, smell, noise, or so on, stop using the product
immediately, and turn off the power switch. A fire or
PROHIBITED
electric shock may result if the product is kept used.
Caution
Plug the power cord directly into the wall socket.
Please use the product within electricity voltage/
current specifications. Otherwise it may cause fire
PROHIBITED
and/or electric shock.
Be sure to ground the product before using it. Not
doing so may cause the product to malfunction due
to static change.
PROHIBITED
Make sure that connected lighting is within the
power rating of the product. Not doing so may cause
product failure.
PROHIBITED
Always place product on a stable and flat location.
Not doing so may result in the product falling or
toppling, which may cause bodily injury and the
PROHIBITED
5
6
5
4
6
7
4
product to malfunction.
3
7
3
8
2
8
2
9
Make sure to hold and pull from the plugs when
1
9
1
10
0
10
0
L2
disconnecting the cables. Not pulling from the plugs may
L1
Int en sit y
damage the cable and result in fire or electric shock.
Po we r
Co ntr ol
PROHIBITED
Ra ng e
Re mo te
Hi
Before moving product, disconnect cables.
A
Damaging the cables may result in fire or electric
PJ -15 05 -2C
Ma nu al
Lo
shock.
PROHIBITED
Use a dry cloth to remove dust or other foreign
matter from the plug electrodes. Failure to do so
may result in fire.
PROHIBITED
3
Wire Connection
Warning
Caution
Caution
1
To secure the product, remove the rubber feet and insert M3 installation screws* into the
installation screw holes on the bottom and tighten them.
*Insert depth of 5 mm max., Tightening torque: 0.3 N•M max.
2
Connect the LED Lights to the output connector.
3
Ground the FG terminal.
Use a wire of approximately 0.5 to 1.25 mm
4
Connect power cord to wall socket.
*For the worldwide model, connect power cord to the AC inlet and wall socket.
Front
4
Worldwide model
No
Power switch
W W
The power
supply can
be used
worldwide.
Rubber foot
- Read Before Use -
UNPLUG
4
Operating Instructions
DO NOT TOUCH
WITH WET HANDS
1
Power On
INSTRUCTED
Flip the power switch up to turn ON the power supply.
UNPLUG
2
Light Control
Turn the intensity control knob clockwise to make the light
brighter, and turn it counterclockwise to make the light
INSTRUCTED
dimmer.
INSTRUCTED
Note: Because the light intensity is controlled using a
INSTRUCTED
INSTRUCTED
Models with Locking Intensity Control Knob
INSTRUCTED
INSTRUCTED
Use a flat-blade screwdriver
INSTRUCTED
to change the light intensity.
To lock the intensity knob,
INSTRUCTED
t u r n a n d s e c u r e t h e M 3
push screw on the body of
the knob with a hexagonal
INSTRUCTED
wrench.
INSTRUCTED
Before connection, make sure that the power is turned OFF.
Making connections with the power ON may result in a fire or electric shock.
Do not bundle product cables with high-voltage lines or power lines. Doing so
may cause the product to malfunction. Keep the product cables as far away
from such lines as possible.
Please install the product to locations with following conditions.
Incorrect installation location may cause product failure.
In a flat and stable location with minimal vibration.
Well-ventilated places with minimal dust.
Places that are not subject to sudden
temperature changes.
2
(AWG20 to AWG16) for the FG terminal.
Intensity control knob
Installation screw hole
Installation screw (M3)
1
va r i a b l e vo l t a g e, t h e u n l i t a r e a m a d e w i d e n
depending on the Light Unit. Also, Light Units with
a low forward voltage (e.g., the HLV2/HLV Series)
will still be lit at the minimum light intensity.
Intensity control knob
Flat-blade screwdriver
Places free from any water, oil, liquid, chemical, or steam.
Places free from corrosive or combustible gas.
Places away from water faucets, boilers,
humidifiers, air conditioners, heaters, or stoves.
Rear
Output connector
Rubber plug
FG terminal
3
FG cable
2
4
LED light connector
Power cord
Output Connector Configuration
1
2
3
30W model: Two output connectors
Pin No.
12V output
24V output
1
Output+ (+12V)
Output+ (+24V)
2
Output -
NC
3
Output -
Connector
SMP-02V-BC
SMP-03V-BC
Side Cross-sectional View
Lock
Hexagon wrench
Advertisement

Related Manuals for CCS PSB Series


Summary of Contents for CCS PSB Series
- Page 1 To secure the product, remove the rubber feet and insert M3 installation screws* into the installation screw holes on the bottom and tighten them. The product is a analog power supply for controlling CCS LED lights. It controls LED lights principally *Insert depth of 5 mm max., Tightening torque: 0.3 N•M max.
- Page 2 (installation screw holes) WARRANTY TERMS (SMP-03V-BC) 1 CCS Inc. WILL REPAIR OR REPLACE THE PRODUCT FREE OF CHARGE IF IT SHOULD FAIL TO FUNCTION UNDER USE ON Rubber plug 100V AC OUR SPECIFIED CONDITION IN ACCORDANCE WITH THE INSTRUCTION GUIDE AND OTHER WRITTEN CAUTIONS DURING (Option: 3.5-dia.
Need help?
Do you have a question about the PSB Series and is the answer not in the manual?
Questions and answers