
Related Manuals for Xerox N60w


Summary of Contents for Xerox N60w
- Page 1 AUGUST 2020 05-0987-000 ® Xerox N60w Scanner ® Scanner User Guide for Microsoft Windows.
- Page 2 Design © 2020 Xerox Corporation. All rights reserved. Xerox® is a registered trademark of Xerox Corporation in the United States and/or other countries and are used under license from Xerox Corporation. Visioneer is a trademark licensee of Xerox®. BR32004 Content © 2020 Visioneer, Inc. All rights reserved. The Visioneer brand name and OneTouch®...
-
Page 3: Table Of Contents
Environmental Health and Safety Contacts ...................1-4 2-Welcome .................................2-1 What’s in the Box............................2-1 System Requirements ..........................2-1 Documentation............................2-2 Xerox ® N60w Scanner..........................2-3 3-Scanner Setup...............................3-1 Connect the Scanner Power Cord ......................3-1 Setting up the LCD Language .......................3-2 Setting up the Date and Time.......................3-2 Date ................................3-3 Time ................................3-3 4-Wired and Wireless Network Connection..................4-1... - Page 4 ® Xerox N60w Scanner Table of Contents The Bind button............................6-2 Shortcuts .................................6-3 Create a New Shortcut .........................6-3 7-Cloud.................................7-1 8-Email .................................8-1 Setting up the Mail Server........................8-1 Enable Authentication..........................8-1 Setting up the Address Book........................8-2 Adding a new contact...........................8-2 Editing A Contact............................8-2 Deleting a Contact ..........................8-3 Creating a Contact Group........................8-3...
- Page 5 ® Table of Contents Xerox N60w Scanner 14-Loading Documents to Scan ......................14-1 Supported Document Types ....................... 14-1 Documents to Avoid Scanning......................14-2 Unsupported Document Types ......................14-2 Scanning from the Automatic Document Feeder (ADF)............14-3 Scanning Regular Documents......................14-3 Scanning Dot Matrix Printer Paper....................
- Page 6 Uninstalling Your Scanner......................... 16-20 Xerox ® N60w Scanner Specifications................... 16-21 Xerox N60w Scanner Parts List ..................... 16-24 ® 17-PC Installation............................17-1 Install the Software and Connect the Scanner................17-1 Installing the Scanner Driver ......................17-3 Connect the USB Cable........................17-4 Installing Visioneer OneTouch.......................
-
Page 7: 1-Safety
Equipment and supplies have been designed and tested to meet strict safety requirements. These include safety agency examination, approval, and compliance with established environmental standards. ® To ensure the continued safe operation of your Xerox Equipment, follow these safety guidelines at all times: Do these: •... -
Page 8: Electrical Information
Plug the power cable directly into a correctly grounded electrical outlet. If you are not sure whether or not an outlet is correctly grounded, consult an electrician. ® Do not use an adapter to connect any Xerox Equipment to an electrical outlet that lacks a ground connection terminal. -
Page 9: Disconnect Device
® Safety Xerox N60w Scanner WARNING: This equipment must be connected to a protective earth circuit This equipment is supplied with a plug that has a protective earth pin. This plug will only fit into an earthed electrical outlet. This is a safety feature. If you are unable to insert the plug into the outlet, contact your electrician to replace the outlet. -
Page 10: Environmental Health And Safety Contacts
Safety Environmental Health and Safety Contacts Contact Information ® For more information on Environment, Health, and Safety in relation to this Xerox Product and supplies, please contact the following customer help lines: North America & Europe (Phone): 1-800-ASK-XEROX North America & Europe (Fax): 1-585-422-8217... -
Page 11: 2-Welcome
What’s in the Box Before proceeding, check the contents of the box. If items are missing or damaged, contact the dealer where you purchased the scanner. Xerox® N60w Scanner Xerox® N60w Scanner Tray Installation Guide Power Supply Power Cord USB 3.1 Gen 1 Cable •... -
Page 12: Documentation
® Xerox N60w Scanner Welcome – 32-bit or 64-bit Windows 10 • Minimum of 2 gigabyte (GB) of internal memory (RAM) • Minimum available hard disk space: – 350 MB for the scanner driver – 1 GB for Visioneer OneTouch –... -
Page 13: Xerox ® N60W Scanner
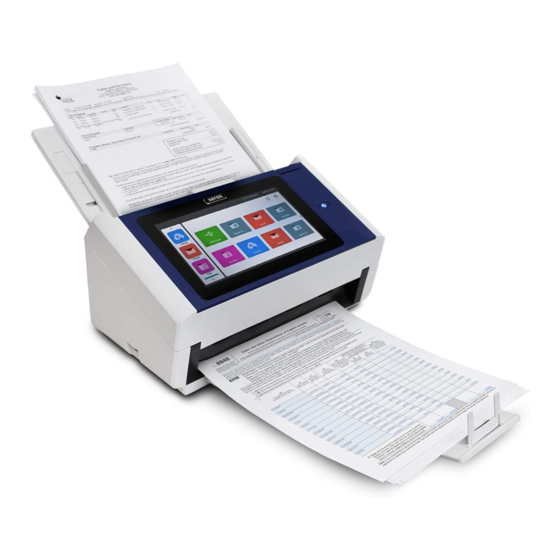
® Welcome Xerox N60w Scanner ® Xerox N60w Scanner Input Tray—Holds the documents in the Automatic Document Feeder for scanning. – Extension—Pull out to support various document lengths. – Paper Guides—Slide to adjust to document width. Automatic Document Feeder (ADF) Cover Release—Pull to open the Automatic Document Feeder. - Page 14 ® Xerox N60w Scanner Welcome User Guide...
-
Page 15: 3-Scanner Setup
Scanner Setup Remove the scanner from the shipping box, verify all parts listed on What’s in the Box are in the box. We recommend that you keep the original packing materials in case you need them later. Remove any shipping tape from the scanner as indicated in the following illustration(s). The above illustrations are for example purposes only. -
Page 16: Setting Up The Lcd Language
® Xerox N60w Scanner Scanner Setup Plug the power cord into the power supply and into a wall outlet. Note: When powering off the scanner, you will be presented with two options: Reboot, to reset the scanner or, Power Off to turn off the scanner (you will be prompted to confirm power off). -
Page 17: Date
® Scanner Setup Xerox N60w Scanner Date On the LCD screen, choose Settings > Device Management Note: Login to Settings with the default credentials Login Name: admin and Password: admin. See Changing your Login Credentials to customize these. Scroll down to locate the Date option. - Page 18 ® Xerox N60w Scanner Scanner Setup Scroll to the correct hour and minute. The highlighted blue values will be set as the current time. It is a 24-hour clock. Tap Save to retain the settings. Note: Once you have set your time, you can easily adjust the time to reflect any time zone.
-
Page 19: 4-Wired And Wireless Network Connection
Wired and Wireless Network Connection Connect your scanner to the network for standalone use to send scanned images via email, cloud service, or to store them in a 24-hour public folder, which can be pin-protected, available on Scanner’s Web Interface. Connecting to the Network using a Ethernet LAN Cable (Wired) This is the scanner’s default network mode. - Page 20 ® Xerox N60w Scanner Wired and Wireless Network Connection Tap on the Wireless Client option. In a second, current wireless networks near you will be displayed as shown below. Select a wireless network. Enter the network password, if requested. In a few seconds, if the connection is successful, the IP address of the scanner will be displayed on the top of the LCD.
-
Page 21: 5-Scan Settings And Preview
Scan Settings and Preview For each standalone filing option, Cloud, Email, File and Scancast, you can define specific scan settings. Alternatively, you can create File Profiles in Device Settings. Scan Settings These settings are available for each filing option. Item Description Basic Document Side... -
Page 22: Preview
® Xerox N60w Scanner Scan Settings and Preview Item Description Quality/File Choose the quality level of your scanned image. The higher the quality, the larger file Size size. Select: Normal Quality/Small File (default), Higher Quality/Larger File, Highest Quality/ Largest File Document Choose your document type. -
Page 23: 6-Lcd Buttons And Shortcuts
LCD Buttons and Shortcuts Once you have launched your scanner. The scanner LCD home screen will appear. The left panel of the scanner LCD lists the scanner’s filing options, a quick access to OneTouch functions (if OneTouch is installed), the scanner Hotspot information and the Settings. Note: Login to Settings with the default credentials Login Name: admin and Password: admin. -
Page 24: Resize Shortcuts
® Xerox N60w Scanner LCD Buttons and Shortcuts Resize shortcuts Hides the shortcut details. Expand the shortcut details. The Home Button Choose to leave current screen and return to the main operational screen. The Scan button This frequently used button will start scanning the document. It is also used to confirm the scan... -
Page 25: Shortcuts
® LCD Buttons and Shortcuts Xerox N60w Scanner Shortcuts At any time, from the LCD main window, tap the Scan button to quickly initiate a scan from your preferred filing method. By default, Scan to USB and to Scan to Public Folder. To modify or add shortcuts please refer to the sections below. - Page 26 ® Xerox N60w Scanner LCD Buttons and Shortcuts User Guide...
-
Page 27: 7-Cloud
Cloud Send your scanned images to a cloud server. Note: An internet connection is required see “Wired and Wireless Network Connection” for additional details. Have your cloud service credentials ready. From the LCD menu, tap the Cloud button. The Cloud screen will be displayed on the right panel. - Page 28 ® Xerox N60w Scanner Cloud User Guide...
-
Page 29: 8-Email
Email Email scanned images directly from your scanner. To do so, you must first setup the mail server. Setting up the Mail Server To send the scanned image to a recipient via email, you need to specify your mail server information in the scanner settings. -
Page 30: Setting Up The Address Book
® Xerox N60w Scanner Email Setting up the Address Book To save the time in typing the email address, you can create your address book to speed up the process. To set up or modify the address book: Go to Settings > Network > Address Book Note: Login to Settings with the default credentials Login Name: admin and Password: admin. -
Page 31: Deleting A Contact
® Email Xerox N60w Scanner Edit the contact information. Click Save to retain the changes. Deleting a Contact Select the contact from the list. The contact will be highlighted and the delete icon will appear. Touch the Delete icon. A prompt will appear. Click OK to confirm. The contact is now deleted. -
Page 32: Deleting An Email Group
® Xerox N60w Scanner Email Deleting an Email group To delete a current email group: Select the group which you want to remove from the list then tap Delete. A prompt will appear. Click OK to confirm removing the file profile or Cancel to exit. -
Page 33: Email Options
® Email Xerox N60w Scanner Email Options Item Description From Enter the From address of your outgoing mails from the product. If an email can not be sent, notification is returned to this address. If the administrator has not set the device’s email account in the Mail Server settings, you can enter the email address... - Page 34 ® Xerox N60w Scanner Email User Guide...
-
Page 35: 9-File
File Send your scanned images to a Network Folder, USB Flash Drive or Public Folder. Note: To send your scanned images to a network folder such as FTP, FTPS, or SMB, make sure you have access to the network folders. For example, you need to create a login name and password first. - Page 36 ® Xerox N60w Scanner File User Guide...
- Page 37 Scancast The Scancast (scan and broadcast) feature allows you to scan a document first and then send to many destinations respectively. From the LCD menu, tap the Scancast button. The Cloud screen will be displayed on the right panel. If desired, enter the file name prefix in the File Name field for the scanned document and adjust the Scan Settings.
- Page 38 ® Xerox N60w Scanner Scancast Repeat step 5 to select a second destination. Press the Scan button to send the scanned images to the destination. Repeat as often as necessary. 10-2 User Guide...
- Page 39 OneTouch OneTouch must be installed for this filing function to available. For installation details, see Installing Additional Applications. On the LCD, tap the OneTouch button. The OneTouch screen will be displayed on the right panel. Select a function to initiate a scan. Note: The functions that appear on the screen are associated to those that appear in the OneTouch button panel on your computer.
- Page 40 ® Xerox N60w Scanner OneTouch 11-2 User Guide...
-
Page 41: Setting Up The Scanner As A Hotspot
Hotspot Setting Up the Scanner as a Hotspot In Hotspot mode, your mobile devices and the scanner are connected wirelessly without an additional AP (Access Point) since the scanner itself works as an AP. On the Home Screen of the LCD Touch Panel, tap Hotspot. The SSID and IP Address will be displayed. - Page 42 ® Xerox N60w Scanner Hotspot 12-2 User Guide...
-
Page 43: 13-Device Settings
Device Settings To access or modify your scanner’s settings, create file profiles, build your address book and more. Many of these settings can also be modified in theThe Scanner’s Web Interface. Login with the default credentials Login Name: admin and Password: admin See Changing your Login Credentials to customize these. -
Page 44: Network
® Xerox N60w Scanner Device Settings Item Description Function Lock Enable or disable any of the following functions: Scan to USB, Scan to Public Folder, App plug-in, App Scan, Virtual Scanner Link. Select: On/Off Network Specify the scanner’s network settings. -
Page 45: Email Default
® Device Settings Xerox N60w Scanner Email Default Specify the scanner’s default scan settings for the email function. The default scan settings include 5 tabs: Basic, Email Options, Advanced Options, Layout Adjustment. For more details on the options of each tab, please refer to Scan Settings. -
Page 46: Editing A File Profile
® Xerox N60w Scanner Device Settings To create a new file profile: Tap New. Setup your scan profile information and define your scan settings. See Scan Settings detailed information. Tap Save when complete. Item Description Profile Name Enter your profile name. -
Page 47: Shortcut
® Device Settings Xerox N60w Scanner Shortcut Set up shortcuts displayed on the LCD touch panel. This can also be done directly from the individual filing option. See Create a New Shortcut. Item Description Shortcut Name This indicates the given name of the shortcut that appears on the LCD home screen. - Page 48 ® Xerox N60w Scanner Device Settings Item Description Reset to Resets settings to default. Default Reset Admin: Reset the login user name and password of the product’s web page. Reset Network Settings: Resets the network settings to factory default. Reset Admin and Network: Reset both the login information and the network settings to default.
-
Page 49: 14-Loading Documents To Scan
Loading Documents to Scan Always remove any staples or paper clips from documents before inserting them into the scanner. Staples and paper clips can jam the feed mechanism and scratch the internal components. Also remove any labels, stickers, or Post-It™ notes that may come off during the scanning process and get stuck in the scanner. -
Page 50: Documents To Avoid Scanning
® Xerox N60w Scanner Loading Documents to Scan Documents to Avoid Scanning The documents in this list can be scanned, but please note that scanning documents of this type will reduce the life of the scanner. Maintenance will be required more often and replaceable parts will wear faster. -
Page 51: Scanning From The Automatic Document Feeder (Adf)
® Loading Documents to Scan Xerox N60w Scanner Scanning from the Automatic Document Feeder (ADF) Scanning Regular Documents Make sure the paper guide switch is in the correct position for scanning regular documents, as indicated in the following illustration. When the paper guide switch is in the down position, the paper guides can be adjusted to a maximum of 8.5 inches (216 mm) wide. -
Page 52: Scanning Dot Matrix Printer Paper
Scanning Dot Matrix Printer Paper ® With the Xerox N60w Scanner you can scan dot matrix printer paper without removing the perforated sides from the page. Separate the pages so that you have a stack of single pages. Do not place a stack of connected paper in the input tray. The paper will tear when the separation roller attempts to separate the current page from the rest of the stack. -
Page 53: Scanning Interfaces
® Loading Documents to Scan Xerox N60w Scanner Scanning Interfaces • OneTouch from the LCD—On the LCD, tap the OneTouch button. The OneTouch screen will be displayed on the right panel.The functions that appear on the screen are associated to those that appear in the OneTouch button panel on your computer. - Page 54 ® Xerox N60w Scanner Loading Documents to Scan • TWAIN and WIA Interface—This option uses your scanner’s TWAIN interface to scan. Select scanning options before scanning, put the document in the scanner, then click the Scan button in the TWAIN interface window.
-
Page 55: 15-The Scanner's Web Interface
The Scanner’s Web Interface Customizing the Scanner’s Configurations on the Web Interface You can also customize many of your scanner’s settings directly on the LCD, see Device Settings. Open your browser. Locate your scanner’s IP address, you can view it on the scanner LCD home screen. Type the IP address of the scanner in the URL field of your browser and then press enter on your keyboard. -
Page 56: Scanner Information
® Xerox N60w Scanner The Scanner’s Web Interface Scanner Information Item Description Scanner Model Name Displays the scanner model name. Host Name Displays the product’s host name. Serial Number Displays the scanner’s serial number. Firmware Displays the currently installed firmware version. -
Page 57: Changing Your Login Credentials
For example, the address book, File Profiles, and default systems settings of one Xerox N60w ® Scanner can be first exported to a file as a backup and then import these files to other Xerox N60w Scanner. Follow the procedure described below to export and then import your system data. -
Page 58: Accessing The Public Folder
® Xerox N60w Scanner The Scanner’s Web Interface On the importing option, select Choose File to locate the system data which have been previously exported. Select Import Now to start importing the system data to your scanner. The current system data will be overwritten. -
Page 59: Safety Precautions
Maintenance This section contains information about maintenance, troubleshooting, uninstalling, scanner specifications, and spare parts. Safety Precautions When servicing the scanner you should take the following precautions to ensure your safety and prevent damage to the scanner. Do These • Wear protective gloves when cleaning the scanner with Isopropyl rubbing alcohol. Rubbing alcohol may irritate sensitive skin. -
Page 60: Scanner Information
® Xerox N60w Scanner Maintenance To open the scanner hardware properties page: • Windows 7 and later—from the Windows Control Panel, open Hardware and Sound and then Devices and Printers. Right-click on the scanner and then select Scan properties from the list. -
Page 61: Driver Settings
® Maintenance Xerox N60w Scanner Power Settings Sleep mode—sleep mode is the low-power state when the scanner is not in use. You can • adjust the amount of time you want the scanner to wait before it goes into low power. -
Page 62: Hardware Features
® Xerox N60w Scanner Maintenance Hardware Features The options in this panel are for disabling or enabling the scanner’s hardware image processing (HW IP) options. Only advanced users should modify any of the options in this section. Options that are not available for your scanner will be grayed out and disabled. -
Page 63: Cleaning The Scanner
® Maintenance Xerox N60w Scanner Remove the jammed paper and close the cover. To reduce the number of paper jams, smooth and straighten the paper before scanning, adjust the guides to the paper size, and insert the paper evenly into the ADF. -
Page 64: Replacing The Reverse (Separation) Roller
® Xerox N60w Scanner Maintenance Wipe clean the rollers and glass in the scanner body. Rotate the rollers to clean the entire surface. Wipe clean the rollers and glass in the underside of the ADF door. Rotate the rollers to clean the entire surface. - Page 65 ® Maintenance Xerox N60w Scanner Replacement parts can be purchased from the Supplies & Accessories page for your scanner at www.xeroxscanners.com. Open the scanner. Locate the roller cover in the ADF door. Pinch the sides of the roller cover and pull it down to access the roller.
-
Page 66: Replacing The Adf (Feed) Roller
® Xerox N60w Scanner Maintenance Remove the replaceable roller from the bar. Discard the roller, it cannot be repaired or reused. Take the new roller out of its packaging. Clean any dust off the roller before installing it. Slide the new roller onto the bar. Make sure the struts on the bar line up to the slots in the end of the roller. - Page 67 ® Maintenance Xerox N60w Scanner Replacement parts can be purchased from the Supplies & Accessories page for your scanner at www.xeroxscanners.com. Open the Automatic Document Feeder cover. Locate the roller cover in the body of the scanner. Move the paper guides to the side and then pull the feed roller cover away from the scanner.
- Page 68 ® Xerox N60w Scanner Maintenance The lower roller is held in place with a lock tab that rotates to lock and unlock it. To unlock the tab, rotate it until the small lock flange is completely free. Carefully angle the roller up and out of the scanner and then discard it, it cannot be repaired.
-
Page 69: Troubleshooting
Did you select another image source in the scanning software? If you use multiple imaging devices with your computer, such as a camera, all-in-one printer, or another scanner, ® you may have selected another source for images. Make sure Xerox N60w Scanner is selected as the scanner. - Page 70 They may be interfering with the installation and OneTouch options, and you need to ® remove those other drivers and re-install your Xerox Scanner. You can remove these programs from the Windows Control Panel. Please refer to the user manual provided with your other scanner hardware for instructions about removing the driver and software for that unit.
-
Page 71: Error Light Troubleshooting Codes
Make sure the USB cable is plugged into the scanner and computer. Make sure the power cord is plugged into the scanner and into a wall outlet. Contact Xerox Technical Support if you experience a different blinking pattern. User Guide... - Page 72 ® Xerox N60w Scanner Maintenance Error Problem Description Solution Code 59000 Device internal failure Reboot the machine, and try again. If the error persists, contact technical service. 59030 59040 59060 59100 Check “Mail server” setting. 592301 Mail server is NULL Contact your network administrator for further help.
- Page 73 ® Maintenance Xerox N60w Scanner Error Problem Description Solution Code Check To address 533551 SMTP [551] User not local: From address and To address must be different please try again. Contact your network administrator for further help. Check To address...
- Page 74 ® Xerox N60w Scanner Maintenance Error Problem Description Solution Code 541001 Command exceeds maximum Reboot the machine, and try later. If the error persists, size of 256 technical service. 542001 543001 544001 545001 546001 547001 548001 541002 The command transfer fails Check network environment.
- Page 75 ® Maintenance Xerox N60w Scanner Error Problem Description Solution Code 544450 Requested file action not taken The file already exists and is locked by Windows. 546450 548450 546452 Requested action not taken. Ask FTP administrator to increase allotted storage space, Insufficient storage space in or delete unnecessary files.
- Page 76 ® Xerox N60w Scanner Maintenance Error Problem Description Solution Code 002013 Paper jam Open the ADF cover and remove the jammed page. See 003205 Clearing Paper Jams. 003206 003207 003101 Multiple paper feed Multiple pages have fed through the scanner at one time.
- Page 77 ® Maintenance Xerox N60w Scanner Error Problem Description Solution Code 003211 Misfeed Remove the paper from input tray. Fan the documents. Load the document with its edges slightly touching the paper guides. Rescan. 002015 ADF no paper Load paper into the auto document feeder.
-
Page 78: Uninstalling Your Scanner
Windows 7 and later: Open Programs and Features Uninstalling the scanner driver: ® In the list of installed programs click on Xerox N60w Scanner driver. Click the Change/Remove or Uninstall button. Click Yes when asked to confirm that you want to remove the driver. -
Page 79: Xerox ® N60W Scanner Specifications
“asset” you will still need to uninstall the main Visioneer Acuity utility. ® Xerox N60w Scanner Specifications Scanner Specifications Document Requirements Minimum Item Size 2 x 2 inches (51 x 51 mm) Maximum Item Size 9.5 x 236 inches (241 x 5994 mm) at 200 dpi... - Page 80 ® Xerox N60w Scanner Maintenance Scanner Specifications Operating 5° ~ 35° C Temperature Relative Humidity 15% ~ 85% Scanner Dimensions (Trays Collapsed) Width 12.5 inches (316 mm) Depth 7.5 inches (191 mm) Height 6.6 inches (168 mm) Weight 10.3 pounds (4.7 kg)
- Page 81 ® Maintenance Xerox N60w Scanner Scanner Specifications Bundled Software Visioneer OneTouch® Visioneer Acuity Module Visioneer Capture SE Visioneer Organizer AI Wireless Network Specification Standard IEEE 802.11 b/g/n standards compliant Wireless LAN 1T1R Mode Frequency Range 2.412 ~ 2.484GHz (subject to local regulations)
-
Page 82: Xerox ® N60W Scanner Parts List
M-PDF (Multi-Page PDF) (default), Searchable PDF, PDF/A(M-PDF), PNG Resolution 100 dpi, 150 dpi, 200 dpi, 300 dpi, 400 dpi, 600 dpi Maximum Number of File Profiles ® Xerox N60w Scanner Parts List Part Name Part Number Maintenance Kit 96-X330-000 • ADF (Feed) Roller 65-2609-000 •... - Page 83 ® Maintenance Xerox N60w Scanner Part Name Part Number Ethernet Cable 35-0265-000 User Guide 16-25...
- Page 84 ® Xerox N60w Scanner Maintenance 16-26 User Guide...
-
Page 85: 17-Pc Installation
PC Installation Please make sure of the following before you begin installation: • If you are prompted to reboot during installation, please select No. Finish installing the rest of the software, then close all open windows and reboot your computer. •... - Page 86 ® Xerox N60w Scanner PC Installation Select your scanner from the list, Click Proceed. The Select Language window opens. Click the drop-down menu arrow and select the language to use. Click OK. Make sure the boxes for Scanner Driver and Visioneer OneTouch are selected, as well as any other applications you want to install.
-
Page 87: Installing The Scanner Driver
The scanner driver installation will start first. The Welcome screen for the scanner driver Setup Wizard opens. Click Next. On the Xerox License Agreement window, read the license agreement. If you accept the terms, select I Agree then click Next. -
Page 88: Connect The Usb Cable
® Xerox N60w Scanner PC Installation Note: If you do not see this on-screen diagram for connecting the scanner, stop and follow the instructions below. Connect the USB Cable If you did not connect the scanner earlier, proceed with the instructions below. It is recommended that the cable provided with the scanner is the one used. -
Page 89: Installing Visioneer Onetouch
® PC Installation Xerox N60w Scanner Installing Visioneer OneTouch The Visioneer OneTouch software installation will start automatically after you click Close on the driver Installation Complete window. Click Next on the Welcome to the OneTouch Setup Wizard. On the Visioneer License Agreement window, read the license agreement. If you accept the terms, select I Agree then click Next. -
Page 90: Installing Additional Applications
® Xerox N60w Scanner PC Installation Installing Additional Applications Return to the Main menu and click Install software. If a version of the software is already installed on the system, the option will be greyed out. However, if there is a newer version available, it will be possible to download and install. -
Page 91: Register Your Scanner
® PC Installation Xerox N60w Scanner When you’re finished, click Main menu to return to the Main menu window and click Exit. Register Your Scanner Registering your scanner is important as it provides you with access to our free telephone support service. - Page 92 ® Xerox N60w Scanner PC Installation 17-8 User Guide...
-
Page 93: Basic Regulations
(1) This device may not cause harmful interference, and (2) this device must accept any interference received, including interference that may cause undesired operation. Changes and modifications to this equipment not specifically approved by Xerox may void the user’s authority to operate this equipment. -
Page 94: Turkey (Rohs Regulation)
Xerox N60w Scanner Appendix A: Regulatory Information A full declaration of conformity, defining the relevant directives and referenced standards, can be obtained from your Xerox Limited representative or by contacting: Environment, Health and Safety Xerox(NL) Sint Jansweg 15 NL-5928 RC... -
Page 95: Canada
® Appendix A: Regulatory Information Xerox N60w Scanner Certificates of Citizenship or Naturalization. (Foreign Naturalization Certificates may be photographed.) Passports. (Foreign Passports may be photographed.) Immigration Papers. Draft Registration Cards. Selective Service Induction Papers that bear any of the following Registrant’s information:... -
Page 96: Other Countries
® Xerox N60w Scanner Appendix A: Regulatory Information The above list is provided for your convenience and assistance, but it is not all inclusive, and no liability is assumed for its completeness or accuracy. In case of doubt, consult your solicitor. -
Page 97: Product Recycling & Disposal
Product Recycling & Disposal USA & Canada ® If you are managing the disposal of your Xerox Product, please note that the product may contain lead, mercury, Perchlorate, and other materials whose disposal may be regulated due to environmental considerations. The presence of these materials is fully consistent with global regulations applicable at the time that the product was placed on the market. -
Page 98: Energy Star For The Usa
Energy Program Compliance ® The Xerox N60w Scanner is ENERGY STAR qualified under the ENERGY STAR Program Requirements for Imaging Equipment. The ENERGY STAR and ENERGY STAR MARK are registered United States trademarks. The ENERGY STAR Imaging Equipment Program is a team effort between U.S., European Union and Japanese governments and the office equipment industry to promote energy-efficient copiers, printers, fax, multifunction machine, personal computers, and monitors.
Need help?
Do you have a question about the N60w and is the answer not in the manual?
Questions and answers