Table of Contents
Advertisement
Advertisement
Table of Contents

Related Manuals for Rittal PC 4650.150


Summary of Contents for Rittal PC 4650.150
- Page 1 PC-Schranksystem VX SE PC enclosure system VX SE Armoires PC VX SE PC 4650.150 PC 5366.250 PC 5368.050 PC 5366.050 PC 5366.350 PC 5386.050 PC 5366.150 PC 5366.450 Montage- und Bedienungsanleitung Assembly and operating instructions Notice de montage et d’emploi...
-
Page 2: Table Of Contents
Inhaltsverzeichnis Contents Sommaire Seite Page Page Hinweise zur Dokumentation Notes on documentation Remarques relatives à la documentation CE-Kennzeichnung CE labelling Certifi cation CE Aufbewahrung der Unterlagen Storing the documents Conservation des documents Verwendete Symbole Symbols used Symboles utilisés Mitgeltende Unterlagen Other applicable documents Autres documents applicables Normative Verweise... - Page 3 Inhaltsverzeichnis Contents Sommaire 4 – 17, 34 – 39 18 – 19 26 – 27 31 – 32 33 – 34 PC-Schranksystem VX SE / PC enclosure system VX SE / Armoires PC VX SE...
-
Page 4: 1.1 Ce Labelling
The declaration of conformity according to 1.1 Certifi cation CE Die Konformitätserklärung nach EN 62 208 EN 62 208 can be downloaded from the Rittal La déclaration de conformité selon la norme steht als Download auf der Homepage von homepage. -
Page 5: Safety Instructions
Intended use These Rittal products serve as both an empty enclosure for low voltage switching device combinations with a maximum voltage rating of 1000 V AC or 1500 V DC, and for measuring and control technology in indoor spaces. Should you have any special requirements, and for outdoor installation, the suitability of the product must be verifi... - Page 6 Impiego conforme alle norme Questi prodotti Rittal sono involucri vuoti per apparecchiature assiemate di protezione e di manovra per bassa tensione (quadri BT) con una tensione nominale di massimo 1000 V CA o 1500 V CC e tecnica di regolazione, comando e misurazione in interno. Per particolari requisiti e per l’installazione all’aperto, Rittal ne deve confermare l’idoneità.
- Page 7 номинално напрежение от максимум 1000 V AC или 1500 V DC и контролно-измервателни прибори и са предназначени за употреба на закрито. За специални изисквания и монтаж на открито трябва да се обърнете към Rittal за потвърждение на пригодността им за съответната употреба.
- Page 8 Domeniul de utilizare Aceste produse Rittal sunt carcase goale destinate utilizarii in spatii interioare, pentru aparatura de comutație de joasă tensiune cu tensiune nominala de maxim 1000 V c.a. sau 1500 V c.c., pentru aparataj de măsură, comandă și control. Pentru cerințe speciale și variante de exterior, este necesara verifi...
- Page 9 Naudojimas pagal paskirtį Šie „Rittal“ gaminiai yra tušti korpusai žemos įtampos skirstomiesiems įrenginiams, kurių didžiausia vardinė įtampa yra 1000 V AC (kintamoji srovė) arba 1500 V DC (nuolatinė srovė), ir matavimo, kontrolės bei valdymo įrangai, skirti naudoti vidaus patalpose. Ar gaminys atitinka specialius reikalavimus ir yra tinkamas naudoti lauko sąlygomis, turi patvirtinti „Rittal“.
- Page 10 Predvidena uporaba Ti izdelki Rittal so ohišja za kombinacije nizkonapetostnih stikalnih naprav z nazivno napetostjo največ 1000 V izmeničnega toka ali 1500 V enosmernega toka ter merilno, krmilno in regulacijsko tehniko v notranjem prostoru. Za posebne zahteve in namestitev na prostem mora ustreznost potrditi družba Rittal.
- Page 11 2. Sicherheitshinweise 2. Veiligheidsvoorschriften 2. Instrucciones de seguridad 2. Safety instructions 2. Säkerhetsinstruktioner 2. Consignes de sécurité 2. Istruzioni di sicurezza Warnung vor der Waarschuwing voor Atención, Warning against Danger dû à la Prestare attenzione Schließbewegung de sluitbeweging Varning för movimiento de closing movements fermeture de pièces...
- Page 12 2. Turvallisuusohjeet 2. Wskazówki dotyczące 2. Инструкции за безопасност bezpieczeństwa 2. Sikkerhedsanvisninger 2. Меры безопасности 2. Bezpečnostní pokyny 2. Υποδείξεις ασφαλείας Предупреждение Предупреждение Προειδοποίηση Uwaga na Advarsel mod за движение об опасности πριν από την κίνηση Varoitus koneen/ zamykające się lukkebevægelse af Výstraha před от...
- Page 13 2. Instrucțiuni de siguranță 2. Biztonsági utasítások 2. Drošības norādījumi 2. Sigurnosne upute 2. Saugos nurodymai 2. Varnostni napotki 2. Ohutusjuhised Avertizare cu privire Upozorenje Gép/berendezés Įspėjimas dėl Hoiatus la mișcarea de Uzmanieties Opozorilo na opasnost od mechanikai mašinos / įrenginio masina/seadme închidere a pieselor iekārtas/mašīnas...
- Page 14 2. Bezpečnostné pokyny 2. Instruções de segurança Cuidado quando as Dávajte pozor na partes mecânicas zatvárací pohyb de uma máquina/ mechanických častí insta lação se stroja/zariadenia fecham Dávajte pozor Cuidado com as na pohyblivé partes mecânicas mechanické časti móveis Varovanie pred Cuidado com o prevrátením risco de queda pelo...
-
Page 15: Device Description
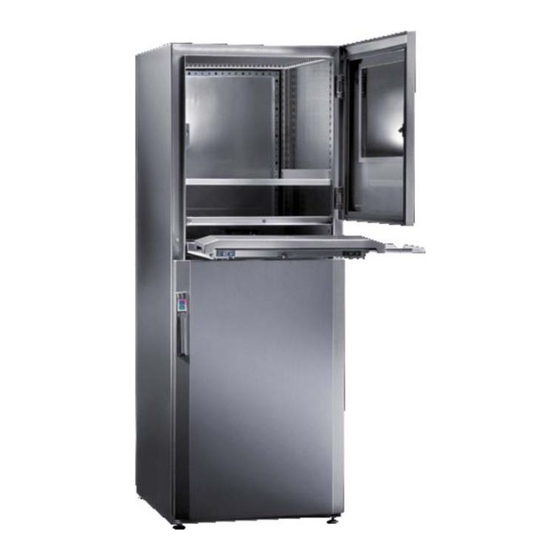
3. Gerätebeschreibung 3. Device description 3. Description de la baie 3.1 Funktionsbeschreibung 3.1 Function description and components 3.1 Description fonctionnelle et éléments und Bestandteile The PC enclosure VX SE is a fl oor standing L’armoire PC VX SE est conçue comme une Der PC-Schrank VX SE ist als Standschrank enclosure suitable to accommodate electrical, armoire indoor pour l’installation de matériel... -
Page 16: Composition De La Livraison
3. Gerätebeschreibung 3. Device description 3. Description de la baie 3.3 Lieferumfang / 3.3 Scope of supply / 3.3 Composition de la livraison PC Stahlblech/PC sheet steel/ 5366.050 5366.150 5366.250 5366.350 5366.450 5368.050 5386.050 – Armoire PC en tôle d’acier PC Edelstahl/PC stainless steel/ –... -
Page 17: Assembly And Siting
Assembly instructions Des accords particuliers doivent être signés Hinweise zur Montage Observe the load capacities specifi ed entre Rittal et l’utilisateur en cas de conditions Halten Sie die auf der Seite 37 vorgege- on page 37. d’exploitation particulières. benen Belastungsangaben ein. -
Page 18: Unlocking Points
4. Montage und Aufstellung 4. Assembly and siting 4. Montage et implantation 4.2 Entriegelungspunkte 4.2 Unlocking points 4.2 Points de déverrouillage PC-Schrank mit Tastaturschublade PC enclosure with keyboard drawer Armoire PC avec tiroir-clavier Diese Entriegelung gilt für Best.-Nr. 5366.050/5366.450/5368.050/ 5386.050/4650.150 Unlocking applicable for model no. -
Page 19: Pc Enclosure With Folding Keyboard
4. Montage und Aufstellung 4. Assembly and siting 4. Montage et implantation 4.2 Entriegelungspunkte 4.2 Unlocking points 4.2 Points de déverrouillage PC-Schrank mit Klapplade PC enclosure with folding keyboard Armoire PC avec tablette rabattable Diese Entriegelung gilt für Best.-Nr. 5366.150 Unlocking applicable for model no. -
Page 20: Dismantling/Fi Tting The Monitor Or Large/Small Mounting Compartment
4. Montage und Aufstellung 4. Assembly and siting 4. Montage et implantation 4.3 Demontage/Montage Monitorfeld bzw. Einbaufeld groß/klein 4.3 Dismantling/fi tting the monitor or large/small mounting compartment 4.3 Démontage / montage du compartiment d’écran ou bandeau de montage, grand / petit format Entriegelung Monitorfeld siehe Seite 18 –... -
Page 21: Dismantling/Fi Tting The Trim Panel
TX20 4. Montage und Aufstellung 4. Assembly and siting 4. Montage et implantation 4.4 Demontage/Montage Blende 4.4 Dismantling/fi tting the trim panel 4.4 Démontage / montage du cache Entriegelung Monitorfeld siehe Seite 18 – 19 Monitor compartment unlocking, see pages 18 – 19 Déverrouillage du compartiment à... -
Page 22: Keyboard Drawer - Cable Routing
4. Montage und Aufstellung 4. Assembly and siting 4. Montage et implantation 4.5 Tastaturschublade – Kabelführung 4.5 Keyboard drawer – Cable routing 4.5 Tiroir-clavier – Guidage des câbles 4. Montage und Aufstellung 4. Assembly and siting 4. Montage et implantation 4.6 Klapplade –... -
Page 23: Dismantling/Fi Tting The Desk Section
SW10 TX20/25 4. Montage und Aufstellung 4. Assembly and siting 4. Montage et implantation 4.7 Demontage/Montage Pultvorbau 4.7 Dismantling/fi tting the desk section 4.7 Démontage / montage du pupitre en avant-corps 1 10 1 10 = 1 – 2 Nm M5 x 12 = 1 –... - Page 24 4. Montage und Aufstellung 4. Assembly and siting 4. Montage et implantation 4.8 Demontage/Montage Fronttür unten 4.8 Dismantling/fi tting the bottom front door 4.8 Démontage / montage de la porte avant inférieure PC-Schranksystem VX SE / PC enclosure system VX SE / Armoires PC VX SE...
-
Page 25: Positioning The Component Shelf
TX30 4. Montage und Aufstellung 4. Assembly and siting 4. Montage et implantation 4.9 Versetzen des Gerätebodens 4.9 Positioning the component shelf 4.9 Déplacement de la tablette d’appareillage ST5,5 x 13 M5 x 13 (V2A) Edelstahl/Stainless = 5 Nm steel/Acier inoxy- dable M = 3 Nm ST5,5 x 13... -
Page 26: Démontage / Montage De La Porte Arrière
TX30 4. Montage und Aufstellung 4. Assembly and siting 4. Montage et implantation 4.10 Demontage/Montage Rücktür (1 + 5) 4.10 Dismantling/fi tting the rear door (1 + 5) 4.10 Démontage / montage de la porte arrière (1 + 5) 4.11 Türanschlagwechsel Rücktür (2 – 4) 4.11 Switching the rear door hinges (2 –... - Page 27 TX25 4. Montage und Aufstellung 4. Assembly and siting 4. Montage et implantation 4.11 Türanschlagwechsel Rücktür 4.11 Switching the rear door hinges 4.11 Inversion du sens d’ouverture de la porte arrière M5 x 8 = 2 Nm PC-Schranksystem VX SE / PC enclosure system VX SE / Armoires PC VX SE...
-
Page 28: Du Dispositif De Verrouillage
TX25 4. Montage und Aufstellung 4. Assembly and siting 4. Montage et implantation 4.12 Wechsel des Verschluss-Einsatzes 4.12 Changing the lock insert 4.12 Remplacement du dispositif de verrouillage 7 mm 8611.100 8 mm 8611.110 6,5 mm 8611.220 7 mm 8611.120 M5 x 8 M5 x 25 8 mm... -
Page 29: Du Cadre De Porte Tubulaire
SW13 4. Montage und Aufstellung 4. Assembly and siting 4. Montage et implantation 4.13 Demontage/Montage Türrohrrahmen 4.13 Dismantling/fi tting the tubular door frame 4.13 Démontage / montage du cadre de porte tubulaire Edelstahl/Stainless = 5 Nm steel/Acier inoxy- dable M = 3 Nm PC-Schranksystem VX SE / PC enclosure system VX SE / Armoires PC VX SE... -
Page 30: Montage Des Plaques Passe-Câbles
TX30 4. Montage und Aufstellung 4. Assembly and siting 4. Montage et implantation 4.14 Montage Bodenbleche 4.14 Fitting the gland plates 4.14 Montage des plaques passe-câbles 2 cm 10 x 4 10 x 4 Edelstahl/Stainless = 5 Nm steel/Acier inoxy Stahlblech/Sheet steel/ dable M = 3 Nm... -
Page 31: Mise À La Masse Et Équipotentialité
SW13 TX30 4. Montage und Aufstellung 4. Assembly and siting 4. Montage et implantation 4.15 Erdung und Potenzialausgleich 4.15 Earthing and potential equalisation 4.15 Mise à la masse et équipotentialité = 8 – 10 Nm = 10 – 12 Nm M8 x 20 = 10 –... -
Page 32: Du Pupitre En Avant-Corps
SW13 TX30 4. Montage und Aufstellung 4. Assembly and siting 4. Montage et implantation 4.16 Erdung und Potentialausgleich Pultvorbau 4.16 Earthing and potential equalisation for the desk section 4.16 Mise à la masse et équipotentialité du pupitre en avant-corps = 10 – 12 Nm = 10 –... -
Page 33: Montage Des Anneaux De Transport
4. Montage und Aufstellung 4. Assembly and siting 4. Montage et implantation 4.18 Transportösen montieren 4.18 Fitting transport eye-bolts 4.18 Montage des anneaux de transport Edelstahl/Stainless steel/ Tôle inoxydable SZ 4568.000, SZ 4568.500 5. Transport 5. Transport 5. Transport SZ 4568.000, SZ 4568.500 ¼... - Page 34 5. Transport 5. Transport 5. Transport Die Gehäuse müssen während Transport, Enclosures must be secured against tipping Lors du transport, du montage et de Auf- und Ausbau gegen Umkippen gesichert over during transportation, assembly and l’équipement, les armoires doivent être werden.
-
Page 35: Mise À La Masse Et Équipotentialité 35
For the internal or exter- au châssis est prévue par la conception de elektrisch betriebenem Rittal Zubehör (Kühl- nal mounting of electrically powered Rittal l’armoire. Pour équiper ou monter des acces- geräte, Filterlüfter etc.) in oder auf Rückwand accessories (cooling units, fan-and-fi... -
Page 36: Inspection Et Entretien
Rittal touch-up paint des dommages, appliquer la peinture de den Rittal Ausbesserungslack aufbringen (2K-PUR acrylic paint). retouche Rittal soit avec un crayon pour (alternativ: 2K-PUR Acryllack) ◾ Surface damage to stainless steel enclo- retouches, un pinceau ou une bombe –... -
Page 37: Caractéristiques Techniques / Indices De Protection
10. Lagerung 10. Storage 10. Stockage Bei der Lagerung des Gehäuses ist zu When storing the enclosure, ensure that Pour le stockage de l’armoire électrique, beachten, dass ◾ the ambient temperature is not higher than il faut veiller à ce que ◾... -
Page 38: Puissance Dissipée
11. Verlustleistung 11. Heat loss 11. Puissance dissipée Best.-Nr. PC = 25°C Model No. PC = 45°C Schrank / Enclosure / Armoire Référence PC = 0 W W ( T = 20 K) W mm H mm D mm 5366.050 1600 5366.150 1600... -
Page 39: Pièces De Rechange
The conditions named in the sales and delivery Les conditions générales de vente des repré- dingungen der jeweiligen Rittal Vertriebs- und conditions of the associated Rittal agents and sentations et fi liales Rittal sont contractuelles. Tochtergesellschaften genannten Bedingun- subsidiaries apply. - Page 40 ◾ Climate Control ◾ IT Infrastructure ◾ Software & Services You can fi nd the contact details of all Rittal companies throughout the world here. www.rittal.com/contact RITTAL GmbH & Co. KG Auf dem Stuetzelberg · 35745 Herborn · Germany Phone +49 2772 505-0...
Need help?
Do you have a question about the PC 4650.150 and is the answer not in the manual?
Questions and answers