Table of Contents
Advertisement
Advertisement
Table of Contents

Related Manuals for DT SWISS O.D.L


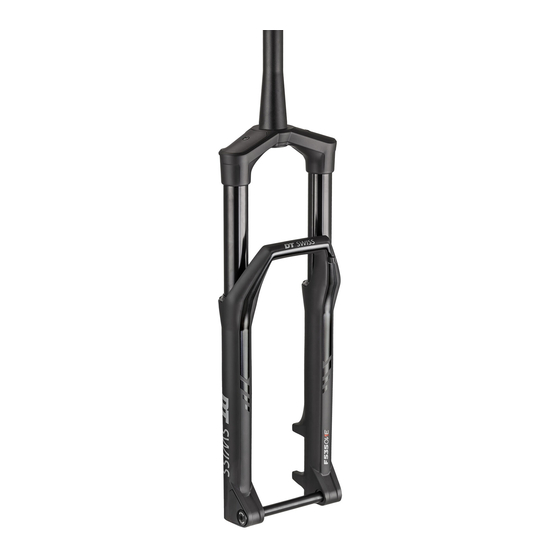
Summary of Contents for DT SWISS O.D.L
- Page 1 FORKS O.D.L Technical Manual V2016.10...
-
Page 2: Table Of Contents
Damping: O.D.L (OPEN, DRIVE, LOCK) ........ - Page 3 Small Service ............46 Trouble Shooting O.D.L - Technical Manual...
-
Page 4: General
The cover page and the footing provide information about the type of product and manual as well as the ver- sion of the manual. The backside provides a list of the DT Swiss service centers. A list of all DT Swiss service centers can be found at www.dtswiss.com. - Page 5 In addition to the general guarantee required by law, DT Swiss AG based in Biel/Switzerland, provides a gua- rantee for 24 months from the date of purchase. DT Swiss AG shall reject any liability for both indirect damage caused by accidents and consequential damage.
- Page 6 To take advantage of this warranty, the product or part must be returned for examination, postage prepaid, to the dealer where you bought the product or to a DT Swiss service center. Proof of purchase date and an expla- nation of the complaint must accompany the product. If our inspection discloses a defect, DT Swiss will either repair or replace the product or refund the purchase price, if we cannot readily and quickly provide a repair or replacement.
-
Page 7: General Maintenance Information
The operations described in this manual should only be performed by experts. The user is liable for any damage or consequential damage caused by wrong maintained or wrong installed components. If you have doubts, ple- ase contact a DT Swiss service center. O.D.L - Technical Manual... -
Page 8: Description
Damping: O.D.L (OPEN, DRIVE, LOCK) The O.D.L damping unit is a closed system. The damping oil is separated from the air in the fork by a preloaded floating piston. This prevents the oil from foaming and ensures a constant damping performance even on long, rough downhills. -
Page 9: Compression - Function In Detail
Shims at the end of the blow-off channel open the access to the HSC channel at a defined oil pressure. The blow-off itself does not represent a damping function, it protects rider and material from big hits. O.D.L - Technical Manual... -
Page 10: Low-Speed Rebound (Lsr)
LSR (because of fast deflection of the fork and thus big displacement of the oil generated by the piston) flows through the oil channels of the HSR. This ensures separate damping characteristics on small and medium or on fast rebound speeds. O.D.L - Technical Manual... -
Page 11: Installation
• Use torque wrenches with an appropriate adjustment range. • Consider the torque values of each component. The lowest values are decisive, but it may not be fallen below values given by DT Swiss. Shortening the Steerer The length of the steerer essentially depends on the headset and the stem. It is mandatory to consult the instruction manual of the headset and the stem. -
Page 12: Shortening A Carbon Steerer
24 teeth per inch sandpaper grain min. 400 as required cleaner Motorex Swissclean 2300 as required 1. Put adhesive tape around the steerer where the steerer needs to be cut. This prevents the carbon fibers to fringe. O.D.L - Technical Manual... - Page 13 4. Grind the cutting edges on the inside and the outside of the steerer using sand paper. The carbon fibers on the cutting edge must not fringe. 5. Check the inner surface of the steerer for dirt and clean it if necessary. O.D.L - Technical Manual...
-
Page 14: Shortening An Aluminum Steerer
1. Cut the steerer to the required length. DT Swiss recommends using a pipe cutter. 2. Deburr the steerer on the inside and on the outside using a file. 3. Drive the star nut into the steerer using a suitable tool. -
Page 15: Mounting The Steerer Expander
3.2.1, page 15 Installation, see chap. 3.2.2, page 16 The DT Swiss steerer expander increases the length of the steerer about 2 mm. DANGER Risk of injury when using a star nut in combination with a carbon steerer! No star nut shall be used in combination with a carbon steerer. -
Page 16: Installation Of The Steerer Expander [Type 1]
2. Hold the expander by hand. 3. Use a 6 mm Allen key to tighten the screw that fast, that the expander does not turn itself. The maximum torque of 7 Nm must not be exceeded. O.D.L - Technical Manual... -
Page 17: Installation Of The Steerer Expander [Type 2]
The grooves on the expander must be aligned with the ribs in the steerer. 4. Tighten the screw for the steerer expander to a maximum torque of 8 Nm. O.D.L - Technical Manual... -
Page 18: Installing The Fork
• Only use crown race reducers of the respective headset manufacturer. • DT Swiss forks are built for a stem clamp without thread. Do not add any holes or threading, nor make any kind of technical alterations to the fork. - Page 19 Installing the Stem and the Spacers 1. Add the spacers onto the steerer to set the required height of the stem. 2. Carbon steerer: Apply a thin layer of DT Swiss carbon fitting lubricant onto the contact area of the stem and the steerer.
- Page 20 Do not exceed the maximum torque mentioned by the stem manufacturer. • The steerer expander delivered with the fork has to be mounted during these operations. Closing Steps Link Installing the brake. chap. 3.4, page 20 Inflating the fork. chap. 4.2, page 24 O.D.L - Technical Manual...
-
Page 21: Installing The Brake
Link not required DT Swiss O.D.L forks are compatible with brake discs with a maximum diameter of 210 mm. All DT Swiss Forks from 2009 on are equipped with Post Mount (PM) brake mounting standard for 160 mm. For usage of brake discs with a diameter bigger than 160 mm, an appropriate adapter is needed. -
Page 22: Installing The Front Wheel
Before every ride, ensure that the wheel is securely mounted in the fork. Ensure that the RWS lever is tightened to at least 15 Nm. Using a Quick Release Install the front wheel in accordance with the instructions of the manufacturer of the quick release. O.D.L - Technical Manual... - Page 23 3. Check if the tire touches any part of the fork while it is fully compressed. Is this the case, the tire or the wheel must not be used! 4. If necessary, reduce the tire pressure to the required operating pressure. Closing Steps Link Check the correct installation of the fork and function of the brake. O.D.L - Technical Manual...
-
Page 24: Operating And Setting
The DT Swiss shock pump has a pressure gauge (1) which can be used to precisely adjust the fork's pressure. A release valve (2) allows the pressure in the fork to be reduced. A valve lever (3) on the pump head (4) allows the shock pump to be unscrewed without any loss of pressure. -
Page 25: Setting The Air Pressure
110 / 245 8,4 / 122 8,3 / 120 8,2 / 119 8,1 / 117 7,8 / 113 12 / 174 12 / 174 12 / 174 12 / 174 12 / 174 Max. Air Pressure O.D.L - Technical Manual... - Page 26 3. Sit on the bike with full equipment (backpack, helmet, shoes...). 4. Sit on the bike as you would sit during the ride. The fork goes down because of your own weight. Avoid impact loads. O.D.L - Technical Manual...
- Page 27 Setting the Air Pressure In all DT Swiss forks, the air spring is located in the left stanchion. By adjusting the air pressure, the spring rate will be affected. The higher the air pressure, the harder the spring. Adjusting the air pressure to the weight of the rider can slightly change the total length of the fork.
-
Page 28: Setting The Damping
If the weight of the rider is more than 75 kg/165 lbs, the rebound should be closed additional 2 to 5 clicks. If the weight of the rider is clearly lower than 75 kg/165 lbs, the rebound should be opened additional 2 to 5 clicks. O.D.L - Technical Manual... -
Page 29: Compression
«blow-off», protects the system against damages caused by impacts on the fork while the lockout is activated. The lock out supports a sporty riding style on flat ground or tarmac uphills. The force of the rider can be fully converted into speed. O.D.L - Technical Manual... -
Page 30: Apt (Adaptable Progression Tune)
The "stock setting" offers a more progressive suspension curve for sporty riders looking for direct riding beha- viour. The "+1 setting" offers a progressive suspension curve for aggressive riders looking for very direct riding beha- viour. O.D.L - Technical Manual... -
Page 31: Mounting / Dismounting Volume Spacers
Link Clean the area of the air chamber cap. DANGER Risk of injury due to high air pressure! • The valve must face away from your body while releasing the air! 1. Unscrew the valve cap. O.D.L - Technical Manual... - Page 32 1. Ensure, the valve cap is removed and the air is released. 2. Unscrew the air chamber cap using a 15 mm socket wrench. 3. Remove the air chamber cap. Ensure that no dirt gets into the air chamber. O.D.L - Technical Manual...
- Page 33 1. Clean the thread of the air chamber cap and the thread of the air chamber. 2. Slightly grease the thread and the O-ring of the air chamber cap. 3. Screw the air chamber cap onto the air chamber by hand. O.D.L - Technical Manual...
- Page 34 The air pressure should be set to your personal preferences and to the correct SAG (see chap. 4.2, page 24). 2. Screw on the air chamber cap. Closing Steps Link Check the proper function of the fork. O.D.L - Technical Manual...
-
Page 35: Converting The Control Elements
6 Converting the Control Elements DT Swiss forks are available with manual or remote control elements. The following chapters describe the conversion between these versions and the installation of the remote levers. • Conversion from remote to manual operation: chap. 6.1, page 34 •... - Page 36 2. Put the springs into the index caps. TIP: Put some grease onto the springs so that they stick inside the index caps. 3. Put all three index caps with the springs into the bores of the damping unit. O.D.L - Technical Manual...
- Page 37 In the position «DRIVE», the lever must face in drive direction. The lever must lock in the three positions. 10. Check the damping function of the positions «OPEN», «DRIVE» and «LOCK» by compressing the fork. O.D.L - Technical Manual...
- Page 38 Required thread lock, see table on page 34. 13. Put on the compression wheel and tighten the fixing nut with a torque of 0.5 Nm using a T8 Torx key. Closing Steps Link Check all functions of the fork. O.D.L - Technical Manual...
-
Page 39: Converting From Manual To Remote Operation
2. Remove the compression wheel and the fixing screw. 3. Unscrew the fixing nut of the lever anti-clockwise using an 8 mm socket wrench (or ring spanner). 4. Remove the lever, fixing nut, O-ring and index. O.D.L - Technical Manual... - Page 40 The O-ring must rest equally in the whole cir- cumference of the groove. Required grease, see table on page 34. 3. Slightly grease the lockout pin. Required grease, see table on page 34. O.D.L - Technical Manual...
- Page 41 The rise of the cable guide prevents that the remote wheel turns backwards. 9. Push the remote wheel down in the engaged position and hold it in this position. 10. Remove the Allen key. 11. Screw the fixing nut onto the pin by hand. O.D.L - Technical Manual...
- Page 42 T8 Torx key. 19. Tighten the fixing screw hand-tight with a max. torque of 0.5 Nm. Closing Steps Link Install the remote lever. chap. 6.3, page 42 Check all functions of the fork. O.D.L - Technical Manual...
-
Page 43: Installing The Remote Lever
There are different DT Swiss remote levers available: The lightweight lever and the Two In One lever. The lightweight lever can only operate a single DT Swiss fork while the Two In One lever can operate a DT Swiss fork and a DT Swiss shock at the same time. -
Page 44: Installing The Remote Lever [Two In One]
6.3.2 Installing the Remote Lever [Two In One] General Information: Two In One-Lever: • The remote lever can be used for DT Swiss forks and/or DT Swiss shocks. • The remote lever must be installed on the left top side of the handlebar. - Page 45 Dismount the remote wheel and position the lockout pin again (see step 1, page 35). 10. Cut the cable to the required length and attach a cable end cap. Closing Steps Link not required O.D.L - Technical Manual...
-
Page 46: Service And Care
After cleaning, lubricate the sliding surface of the remote lever on the handlebar. Service Intervals If service intervals are not respected, any warranty claims can be denied. Action Interval Big service by a DT Swiss service center annually or after 200 operating hours* Small service (see following) 50 operating hours*... -
Page 47: Small Service
Small Service This manual describes a small service. Further service works will be executed by a DT Swiss service center. A small service should be carried out in the following cases: • bad performance • after rides in extreme conditions •... - Page 48 4 mm Allen key. 2. Collect the leaking oil using a suitable container. Right dropout: 3. Unscrew the fixing screw of the rebound wheel on the right dropout using a 2.5 mm Allen key. 4. Remove the rebound wheel. O.D.L - Technical Manual...
- Page 49 Right dropout: 5. Screw the hexagonal screw into the dropout clockwise using an 8 mm hexagon spanner. 6. Remove the lowers carefully. 7. Collect the leaking oil using a suitable container. O.D.L - Technical Manual...
- Page 50 The foam rings should be replaced on every service. 3. Lever out the wiper seal using a metal tire lever. Caution: The lowers must not be damaged. Remove the spring rings before dismounting the wiper seals. O.D.L - Technical Manual...
- Page 51 4. Remove the wiper seals. 5. Remove the second wiper seal the same way. O.D.L - Technical Manual...
- Page 52 If the valve insert faces downwards, the oil can escape through the valve. 4. Clean the NCS unit using a dry textile cloth. Do not use paper towels. Small fibers can lead to air leakages. O.D.L - Technical Manual...
- Page 53 Required grease, see table on page 46. 3. Position the upper unit so that the open end faces slightly upwards. 4. Fill 2 ml DT Swiss Factory Lube Fluid into the left stanchion. Required oil, see table on page 46.
- Page 54 Wind the ring by pressing down around the cir- cumference until the entire ring is inserted into the groove. [C]. d) Check if the ring is installed properly [D]. 8. Check if the NCS unit is fixed properly. O.D.L - Technical Manual...
- Page 55 6. Put the O-ring protection tool onto the thread of the connecting piece. Required tool, see table on page 46 7. Slide the new O-ring onto its seat on the connec- ting piece. Required material, see table on page 46 8. Remove the tool. O.D.L - Technical Manual...
- Page 56 4. Carefully tap in the wiper seal. 5. Remove the tool from the wiper seal. 6. Mount the second wiper seal the same way. 7. Leave the lowers for minimum 15 minutes and allow the wiper seals to seat. O.D.L - Technical Manual...
- Page 57 3. Slide the SAG O-ring onto the upper unit 4. Slide the lower unit about 2 cm onto the upper unit. 5. Fill 7 ml DT Swiss Fork Oil into the air side of the lower unit. Required oil, see table on page 46.
- Page 58 13. Put on the rebound wheel. 14. Put thread lock onto the thread of the fixing screw. Required thread lock, see table on page 46. 15. Screw in the fixing screw and tighten it hand tight. O.D.L - Technical Manual...
- Page 59 Dispose the oil in an environmentally compatible manner. Inflate the fork. chap. 4.2, page 24 Clean the fork. Set the damping. chap. 4.3, page 27 Check all functions of the fork. The maintenance of the fork is complete. Enjoy the Ride! O.D.L - Technical Manual...
-
Page 60: Trouble Shooting
Functional check: Check if all functions are working correctly. • Acoustic check: Listen for unusual noises during slow riding or braking in a secure area. Do not use a defective fork! Contact your local dealer or the responsible DT Swiss service center to repair the damage! Bushing Clearance DT Swiss forks use bushings in combination with oil lubrication. - Page 61 Remote Lockout: The lockout cable Check the proper fixation and the is not tensioned correctly. tension of the lockout cable. If the problem cannot be solved, contact a DT Swiss service center! O.D.L - Technical Manual...
- Page 62 F - 06620 Le Bar sur Loup E-Mail: service.fr@dtswiss.com DT Swiss (Asia) Ltd. No. 26, 21st Road Industrial Park Taichung City E-mail: info@dtswiss-asia.com www.dtswiss.com Subject to technical alterations, errors and misprints excepted. All rights reserved. © by DT Swiss AG...
Need help?
Do you have a question about the O.D.L and is the answer not in the manual?
Questions and answers