
Subscribe to Our Youtube Channel
Related Manuals for IDS NXT rio


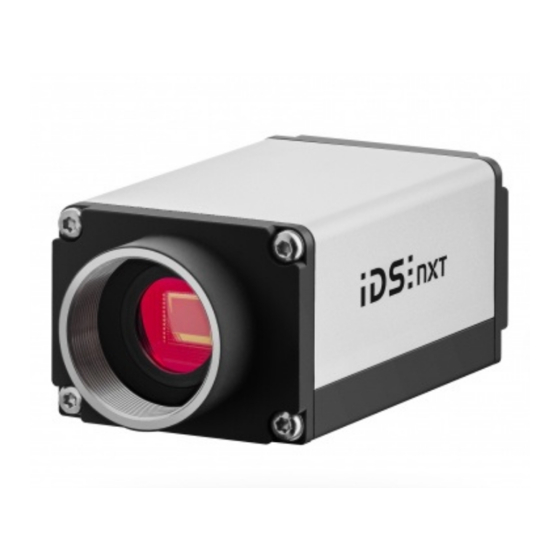
Summary of Contents for IDS NXT rio
- Page 1 IDS NXT Setup IDS NXT rio IDS Imaging Development Systems GmbH Dimbacher Str. 6-8 D-74182 Obersulm, Germany T: +49 7134 96196-0 E: info@ids-imaging.com W: http://www.ids-nxt.com...
- Page 2 4 Standards and directives ........................8 5 IDS NXT rio ............................9 5.1 Ambient conditions ........................9 5.2 Connecting a IDS NXT rio ......................10 6 Electrial specifications ........................11 6.1 Pin assignment GigE connector (RJ45) ..................11 6.2 Pin assignment I/O connector ..................... 11 7 Status LED ............................
- Page 3 IDS NXT: Setup IDS NXT rio Index ..............................29 2021-04-13...
- Page 4 Please contact your local IDS distributors for first level support in your language. For a list of IDS distributors worldwide please go to our website http://www.ids-nxt.com.
- Page 5 IDS NXT: Setup IDS NXT rio 2 Symbols and hints This symbol indicates hints with useful information for better understanding and using features and functions. This symbol indicates important warnings for product safety to prevent damage. This symbol indicates important warnings for personal safety to prevent injury.
- Page 6 All warranty will be spoiled in this case. Intended use IDS industrial cameras are to be used to capture images for visualization and image processing tasks. They are designed for use in industrial environments. Observe the requirements for the proper use of this product.
- Page 7 IDS NXT: Setup IDS NXT rio · Keep packing materials like films away from children. Abuse may result in suffocation. Operation and power supply The camera power supply must meet the requirements for SELV (safety extra low voltage)/LPS (limited power source) or ES1/PS2.
- Page 8 IDS NXT: Setup IDS NXT rio 4 Standards and directives (only valid for devices with housing) IDS Imaging Development Systems GmbH hereby confirms that this product has been developed, designed and manufactured in compliance with the following European directives ·...
- Page 9 55 °C (131 °F). Notes on ambient conditions · Avoid high air humidity levels and rapid temperature changes when using IDS cameras. · Temperatures below +4 °C (39 °F) combined with excessive relative air humidity levels can cause icing.
- Page 10 IDS NXT: Setup IDS NXT rio Vibration and shock resistance Vibration and shock resistance of the cameras corresponds to EN 60068-2-6 and EN 60068-2-27. 5.2 Connecting a IDS NXT rio Fig. 1: IDS NXT rio · 1: Pin assigmnet GigE connector (RJ45, 8-pin) ·...
- Page 11 Bl_DC- socket, camera Bl_DB- rear view Bl_DD+ Bl_DD- The RJ45 socket of the IDS NXT rio complies with the IEC 60603-7 standard. 6.2 Pin assignment I/O connector 12-pin M12 connector (Attend 216A-12MSR) Signal Description VBUS Power supply: 12-24 V DC +20 %...
- Page 12 Choose the size of the cable in such a way that the supply voltage available at the input of the camera is at least 12 V. To supply the IDS NXT rio camera with power using PoE or PoE+, you can use PoE injectors or switches that are compatible with IEEE standard 802.3af or IEEE standard 802.at.
- Page 13 IDS NXT: Setup IDS NXT rio 7 Status LED Fig. 4: Status LEDs The camera has two LEDs that indicate information of the current status. · LED 1: camera status (two-color) · LED 2: Network status (two-color) LED 1 Camera is off/no power...
- Page 14 After logging on to the camera, you can assign a static IP address in IDS NXT cockpit, see Network configuration in IDS NXT cockpit. 8.3 Starting IDS NXT cockpit Start the IDS NXT cockpit. · Windows: either via the icon on the desktop or under "Start > All Programs > IDS > IDS NXT cockpit“. 2021-04-13...
- Page 15 After launching, you will be in the Finder ("device overview"). IDS NXT cockpit scans the network for IDS NXT cameras and lists them in this overview. A login to IDS NXT cameras is possible by direct entry of an IP address.
- Page 16 By default, the password for each user class is "ids". At the first login, you have to change the password to be able to log on. When you log on with the administrator profile, you can change the passwords for the user classes "Service"...
- Page 17 If the IP address of the camera is not set correctly, the camera is displayed in the Finder with an exclamation mark. With IDS NXT cockpit version 2.2 or higher, you can change the IP address of the camera in IDS NXT cockpit.
- Page 18 8.6 Network configuration in IDS NXT cockpit After logging onto a IDS NXT camera, you will see the “Dashboard” which displays various device information. To set the network parameters select "Configuration > Network". · The "Obtain IP address automatically (DHCP)" option is activated by default. It is recommended to keep this setting.
- Page 19 Note: If you still use the default password for login, you will not see a live image (applies to cameras with IDS NXT OS 1.2 and higher). You must first change the password in IDS NXT cockpit (see manual IDS NXT cockpit).
- Page 20 CA. For uploading to an IDS NXT camera, you need an encrypted SSL package (*.NXT_SSL). You create this via <%NXT-IDE%> using a script.
- Page 21 IDS NXT: Setup IDS NXT rio 2. Unpack the archive into the shared folder under “C:/Users/<user name>/Documents/NXT/customsslcerts”. The archive contains the following file: generate_nxt_package.py Creating SSL package 1. Create a folder named "myCertificates" under "C:/Users/<username>/Documents/NXT/customsslcerts" where you place your SSL certificate files.
- Page 22 ~/share/customsslcerts 8. Run the script to build the SSL package: python3 generate_nxt_package.py -b ./myCertificates The SSL package "package.NXT_SSL" has been created and can be uploaded to the camera via IDS NXT REST interface. 10.2 Uploading certificate to camera To upload the SSL package to the camera, use the IDS NXT REST interface.
- Page 23 IDS NXT: Setup IDS NXT rio 11 Updating IDS NXT OS The IDS NXT rio cameras are based on the Vision standard and are updated using a GUF file, just like a Vision camera. Use the IDS NXT cockpit 2.0 version 2.2 (or higher) to update IDS NXT OS: ·...
- Page 24 Updating cameras with IDS NXT OS 1.0 If a camera is to be updated that is still running IDS NXT OS 1.0, it is recommended that the camera gets its IP address via DHCP, since the camera uses DHCP in service mode by...
- Page 25 · When logging on to IDS NXT cockpit, it is checked if the firmware on the camera is up-to-date. If this is not the case, a message is displayed. How to update IDS NXT OS on the camera is described in...
- Page 26 · Resetting the camera to factory settings deletes the camera settings and vision apps. You have to reinstall the vision apps you want to use. You can download the vision apps in the download area of the IDS website: https://en.ids-imaging.com/downloads.html 12.1 Booting the camera in service mode...
- Page 27 Using command line Use the "ids_devicecommand" tool to reset the camera to the factory settings. The "ids_devicecommand" tool can be found in the installation directory of the IDS NXT cockpit, e.g. under "C:/Program Files/IDS/ids_nxt_cockpit_2_0/visiontools". Fig. 15: Resetting to factory settings 1.
- Page 28 IDS NXT: Setup IDS NXT rio Fig. 16: Boot in runtime mode 1. Open the "ids_devicecommand" tool at the command prompt. 2. You can first display all available cameras to identify the serial number: ids_devicecommand --list-devices 3. You use the serial number to define which camera should boot into runtime firmware: ids_devicecommand -s 4103616675 --reset-to-runtime The camera powers off briefly and is booted in runtime mode.
- Page 29 IDS NXT: Setup IDS NXT rio - A - - M - Ambient conditions mode runtime 25, 27 Authorization admin service 25, 26 service - N - user Network - C - cable card Camera factory setting 25, 26 initial setup...
Need help?
Do you have a question about the NXT rio and is the answer not in the manual?
Questions and answers