Table of Contents
Advertisement
Quick Links
Before using the unit, ensure that its system program is at the most recent version. For information on available upgrades for the
system program, see the Roland website (https://proav.roland.com/).
You can check the system program version by Pressing the [MENU] button0"SYSTEM"0"VERSION. "
Before using this unit, carefully read "USING THE UNIT SAFELY" and "IMPORTANT NOTES" (the leaflet "USING THE UNIT SAFELY" and the
Startup Guide (p. 11, 12)). After reading, keep the document(s) where it will be available for immediate reference.
Checking the Included Items
Check that all of the included items are present. If any of
the included items are missing, contact your dealer.
* Startup Guide
* V-1HD
+
unit
* Leaflet "USING THE UNIT SAFELY"
* AC adaptor
* Power cord
PDF Manual
(download from the Web)
For details on operation and a list of menus, refer to
"Reference Manual" (PDF).
Downloading
1.
Access the Roland website.
https://proav.roland.com/
2.
Move to the product page0click "Support"0
download the applicable PDF file.
Startup Guide
© 2020 Roland Corporation
Advertisement
Table of Contents

Related Manuals for Roland V-1HD+


Summary of Contents for Roland V-1HD+
- Page 1 Before using the unit, ensure that its system program is at the most recent version. For information on available upgrades for the system program, see the Roland website (https://proav.roland.com/). You can check the system program version by Pressing the [MENU] button0“SYSTEM”0“VERSION. ”...
-
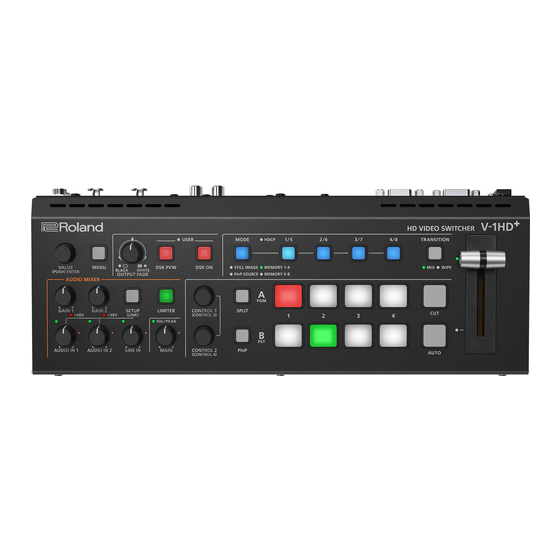
Page 2: Panel Descriptions
Panel Descriptions Top Panel [OUTPUT FADE] knob USER [DSK PVW] button The final output video and audio fade in/out. When this is on (lit), it makes the DSK compositing Rotating the knob counterclockwise fades to black, results the preview output. and rotating the knob clockwise fades to white. - Page 3 Panel Descriptions [MODE] button, [1/5]–[4/8] buttons HDCP indicator Use the [MODE] button to select the function of the [1/5]–[4/8] This indicator is lit, blinking, or unlit buttons. An indicator located below the [MODE] button is lit to according to the HDCP (copy protection) indicate the current function.
-
Page 4: Rear Panel (Connecting Your Equipment)
Panel Descriptions Rear Panel (Connecting Your Equipment) * To prevent malfunction and equipment failure, always turn down the volume, and turn off all the units before making any connections. DC IN jack OUTPUT 1, 2 connectors Connect the included AC adaptor to this jack. These output video. - Page 5 Panel Descriptions * Do not block the ventilation openings (the slits located on the front and side panels, etc.). If the ventilation openings are blocked, the internal temperatures may rise, causing malfunctions due to excessive heat. AUDIO IN 1, 2 jacks/LINE IN L, R jacks Phantom power settings These input audio.
- Page 6 Panel Descriptions Side Panel (Connecting Your Equipment) MIC/AUX IN jack Plug-in Power settings This inputs audio. Connect a mic, audio mixer, CD players, or other such audio equipment. If you’re using a Plug-in Power type mic, turn plug-in power on. * Plug-in Power type mics are supported.
-
Page 7: Basic Operations
Basic Operations Turning the Power On/Off Operating the Menu Once everything is properly connected, be sure to Here’s how to access the menu, and make video/ follow the procedure below to turn on their power. If audio settings and settings for this unit. you turn on equipment in the wrong order, you risk The menu is shown on the monitor that’s connected causing malfunction or equipment failure. -
Page 8: Switching The Video
Basic Operations Switching the Video You can switch between the videos of the A/PGM bus and B/PST bus to specify the final output. Setting the Operation Mode Switching in the A/B Mode There are two operation modes for switching the Slide the video fader all the way to the top or video: the “PGM/PST mode”... - Page 9 Basic Operations Switching in the PGM/PST Mode Using the [AUTO] or [CUT] button to switch video Slide the video fader all the way to the top or bottom. You can use the [AUTO] or [CUT] button to switch video, without using the video fader. The video on the A/PGM bus is the * You can perform operations using the [AUTO] and final output.
-
Page 10: Adjusting The Audio
Basic Operations Adjusting the Audio Adjusting the Input Gain (Sensitivity) Adjusting the Volume Balance Here’s how to adjust the input gain so that the audio Here’s how to adjust the volume balance of each is at the appropriate level. input and the overall volume. Here we explain using the AUDIO IN 1 audio as an Move the [MAIN] knob to a position near the example. -
Page 11: Using The Unit Safely
USING THE UNIT SAFELY WARNING CAUTION Concerning the Auto Off function Handle the ground terminal carefully The power to this unit will be turned off If you remove the screw from the ground automatically after a predetermined amount terminal, be sure to replace it; don’t leave it of time has passed since it was last used for lying around where it could accidentally be playing music, or its buttons or controls were operated... -
Page 12: Important Notes
• Any data stored within the unit can be lost as the Co., Ltd. in Japan. result of equipment failure, incorrect operation, etc. To • Roland is an either registered trademark or trademark protect yourself against the irretrievable loss of data, of Roland Corporation in the United States and/or other try to make a habit of creating regular backups of the countries.
Need help?
Do you have a question about the V-1HD+ and is the answer not in the manual?
Questions and answers