
Related Manuals for KNF FP 70


Summary of Contents for KNF FP 70
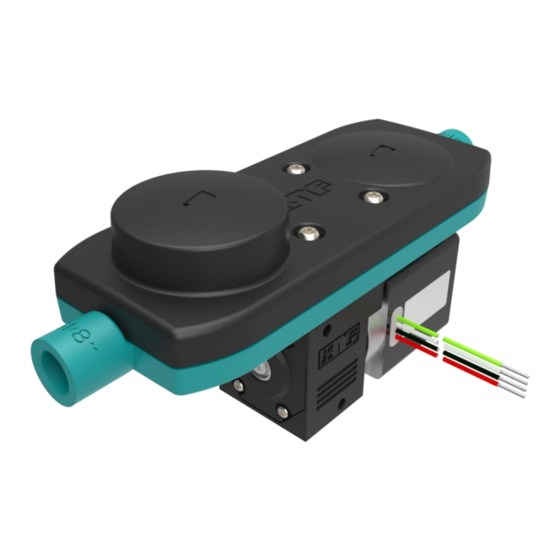
- Page 1 FP 70 INSTALLATION INSTRUCTIONS DIAPHRAGM PUMP Before operating the pump and the accessories, please read the Installation Instructions and safety precautions.
-
Page 3: Table Of Contents
Installation Instructions FP 70 Contents Table of contents Page General ..................4 Information about the instructions Warnings Disclaimer Manufacturer’s address Supporting documents Safety ..................6 Intended use Reasonably foreseeable misuse Responsibility of the user Product-specific risks Customer service and repairs Installation ................. -
Page 4: General
General Installation Instructions FP 70 1 General 1.1 Information about the instructions Content The Installation Instructions describe the requirements for installing the product correctly and safely into the complete machine. Storage location These Installation Instructions are a part of the product. The safety- relevant information should be taken over for the documentation of the complete machine. -
Page 5: Disclaimer
The listed documents must also be observed. The valid versions are available at www.knf.com. ▪ Data sheet ▪ 3D model The following must also be observed: ▪ Local T&Cs ▪ Sales documents and agreement between KNF and the cus- tomer ▪ Drive specification KNF Flodos 330352_MA_FP70_EN_00... -
Page 6: Safety
Safety Installation Instructions FP 70 2 Safety 2.1 Intended use The pump is intended solely for the following uses: ▪ Transferring liquids and gases ▪ For operation in accordance with the operating parameters specified in the technical data of the supporting documents 2.2 Reasonably foreseeable misuse... -
Page 7: Customer Service And Repairs
➢ Install a shut-off valve in the fluid circulation system. 2.5 Customer service and repairs All repairs to the pumps must be carried out by the responsible KNF customer service team. Use only genuine parts from KNF for servicing work. KNF Flodos 330352_MA_FP70_EN_00... -
Page 8: Installation Location
Installation Installation Instructions FP 70 3 Installation WARNING Danger from incorrect installation Injuries or damage to property from leaking media ➢ After installation, check the system for leaks with a safe medium. ➢ Observe the requirements for intended use. ➢ Take precautions in the design of the end device so that leaking liquids cannot come into contact with live compo- nents. -
Page 9: Mechanical Mounting
▪ Guiding rail (1) for side mounting of clip. See accessory in chapter 7. ▪ Holes (2) for standard M3 screws. Hole spacing and depth of holes see data sheet FP 70. 3.3 Connecting the fluid system Figure 2: Mounting Use suitable means to check the fluid connection for leaks. -
Page 10: Initial Start-Up
Initial start-up Installation Instructions FP 70 4 Initial start-up The product must not be started up until it has been ensured that the machine in which the product is to be installed meets the re- quirements of the Machinery Directive 2006/42/EC, if applicable. - Page 11 Installation Instructions FP 70 Initial start-up CAUTION Danger from hot surfaces The pump becomes hot during operation. Burns from hot surfaces or injuries from uncontrolled movements are possible. ➢ Do not touch the pump while it is operating. ➢ Ensure a sufficient supply of cool air and keep a safe dis- tance between the pump and neighboring components.
-
Page 12: Maintenance
Maintenance Installation Instructions FP 70 5 Maintenance Ask your KNF representative about the availability of spare parts for this product. Use only genuine parts from KNF for servicing work. 5.1 Cleaning WARNING Danger due to dangerous substances in the pump Depending on the medium transferred, chemical burns or poison- ing is possible. -
Page 13: Preparing For Dismantling
Installation Instructions FP 70 Maintenance 5.2 Preparing for dismantling 1. Rinse the pump with a suitable neutralizing liquid and make sure that there are no dangerous substances left in the pump (see warnings above). 2. Pump the unit empty. 3. Disconnect electrical connections. - Page 14 Maintenance Installation Instructions FP 70 Place the resonating diaphragm (10) on the head plate (12). Make sure that the ridge on the underside is properly placed in the groove of the head plate (12). Additionally, make sure that the protruding part of the resonating diaphragm is placed on the side of the dampening element.
-
Page 15: Rectifying Transfer Problems
Leak on pump head Damage to the valve O- Replace the O-rings. rings Diaphragm damaged Replace the diaphragm. Resonating diaphragm Replace resonating diaphragm. damaged If the malfunction cannot be rectified, contact your local KNF repre- sentative (www.knf.com). KNF Flodos 330352_MA_FP70_EN_00... -
Page 16: Accessories
Accessories Installation Instructions FP 70 7 Accessories Mounting clip Material Bestell-Nr. Name material Order-No. Clip PP GF30% 330541 Figure 6: Mounting clip 8 Spare parts Spare parts kit “soft” Pieces Pieces Pieces Pos Name Material Order-No. in set in set... -
Page 17: Returning The Pump
Installation Instructions FP 70 Returning the pump 9 Returning the pump KNF undertakes to repair the pump only on condition that the customer provides a certificate of the pumped medium and cleaning of the pump. For this, please follow the instructions on www.knf.com/repairs. - Page 18 www.knf.com...
Need help?
Do you have a question about the FP 70 and is the answer not in the manual?
Questions and answers