Advertisement
Quick Links
Han
ES Press
®
Verwendete Artikel / Parts to be used
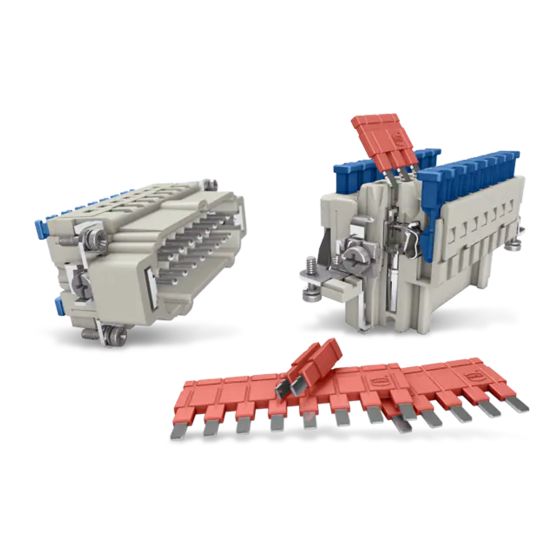
Bild / Product photo
Bezeichnung /
Identification
Han
ES Press
®
Han
ES Press
®
Steckbrücke /
Plug-in jumper*
Abisolierzange /
Stripping tool
Schraubendreher /
Screwdriver
(0.4 x 2.5 mm)
* 2, 3, 5, 8 oder 12 Pole (Farben: rot, blau, schwarz) /
2, 3, 5, 8 or 12 poles (colours: red, blue, black)
Ⓐ
Ⓓ
DE
Montageanleitung
Artikelnummer
Lesen Sie die folgenden Hinweise, bevor Sie das Bauteil einset-
/ Part no.
zen. Bewahren Sie diese Anleitung gut auf.
09 33 xxx xxxx
Allgemeine Sicherheitshinweise
Bei der Montage, Instandhaltung und Demontage von Han
bindern müssen Sie folgende Sicherheitshinweise beachten:
Voraussetzungen für Personal
Alle Arbeiten zu Montage, Instandhaltung und Demontage von Han
09 33 000 9xxx
Steckverbindern dürfen nur von entsprechend qualifiziertem Personal
durchgeführt werden. In der EU darf nur qualifiziertes Fachpersonal
gemäß DIN EN 50110-1/-2 sowie IEC 60 364 die Arbeiten ausführen.
Zudem sind die nationalen Unfallverhütungsvorschriften einzuhalten.
09 99 000 0808
Schutz gegen elektrischen Schlag
Bei allen Arbeiten zur Montage, Instandhaltung und Demontage von
Han
Steckverbindern besteht Gefahr durch offenliegende elektrische
®
Komponenten.
Lebensgefahr durch Stromschlag!
09 99 000 0836
▶ Steckverbinder sind elektrische Bauteile, die nur von Fachpersonal
(Set)
montiert werden dürfen.
▶ Nicht unter elektrischer Spannung stecken oder ziehen!
▶ Anwender müssen den Schutz gegen elektrischen Schlag durch
die Einbauart des Steckverbinders sicherstellen. Dazu können sie
die von HARTING angebotenen Steckverbindergehäuse verwen-
den oder andere geeignete Maßnahmen beim Einbau ergreifen.
Ⓑ
Erklärung der verwendeten Formate für Warnhinweise*
HINWEIS
Ⓒ
Situation, die zu Sach- und Umweltschäden führen könnte.
*nach ANSI Z 535.6
Übersicht
Ⓐ Kontaktkammer
Ⓒ Betätiger
Steckver-
®
Hinweis
warnt vor einer möglicherweise gefährlichen
Ⓑ Öffnung für Steckbrücken
und Prüfspitze
Ⓓ Befestigungsschraube
1
EN
Assembly instructions
Read the following instructions before using these components.
Keep these instructions in a safe place.
General safety instructions
Before starting to assemble, maintain or remove Han
you must pay attention to the following safety instructions:
Requirements for staff
All works relating to the assembly, maintenance and removal of the
®
Han
connectors must be performed by qualified, trained staff. Within
®
the EU, this work must be carried out by qualified personnel in ac-
cordance with DIN EN 50110-1/-2 and IEC 60364. The relevant natio-
nal accident prevention regulations must also be observed.
Protection against electrical shock
All works relating to the assembly, maintenance or removal of Han
connectors pose the danger of being exposed to electrical compo-
nents.
Danger to life due to electrical shock!
▶ Industrial connectors are electrical components that must be ins-
talled exclusively by qualified personnel.
▶ Never plug or unplug connectors while under load!
▶ The provision of protection against electric shock is the responsibi-
lity of the user. The necessary degree of protection can be achie-
ved by using HARTING hoods and housings or by using other
appropriate installation methods.
Special formats of warning messages*
NOTICE
Notice
warns of a potentially dangerous situation that
could lead to property or environmental damage.
*according to ANSI Z 535.6
Overview
Ⓐ Contact chamber
Ⓑ Opening for plug-in jumper and
measuring tip
Ⓒ Actuator
Ⓓ Fixing screw
connectors,
®
®
2016-04-22
Advertisement

Subscribe to Our Youtube Channel
Summary of Contents for HARTING Han ES Press
- Page 1 * 2, 3, 5, 8 oder 12 Pole (Farben: rot, blau, schwarz) / die von HARTING angebotenen Steckverbindergehäuse verwen- ved by using HARTING hoods and housings or by using other 2, 3, 5, 8 or 12 poles (colours: red, blue, black) den oder andere geeignete Maßnahmen beim Einbau ergreifen.
- Page 2 ES Press ® Montage Han ES Press Assembly of Han ES Press ① ® ® Schritt 1: Step 1: Isolieren Sie die Leiter auf einer Länge von 9 - 11 mm ab. Strip the cable at a length of 9 - 11 mm. ②...
- Page 3 ES Press ® Schritt 5: Step 5: Schließen Sie alle nicht verwendeten Betätiger, bevor Sie den Before mounting the insert into the hood/housing, push-in all the ⑤ Kontakteinsatz in das Gehäuse einbauen. unused actuators. Demontage Han ES Press Removal of Han ES Press ®...
- Page 4 ES Press plug-in jumper has to be removed manually ® öffnung. Ein Werkzeug ist nicht erforderlich. from the opening. No tool is required. HARTING Electric GmbH & Co KG, 32339 Espelkamp, Germany · Country specific contact data and local languages see www.HARTING.com...


Need help?
Do you have a question about the Han ES Press and is the answer not in the manual?
Questions and answers