Table of Contents
Advertisement
NOTE
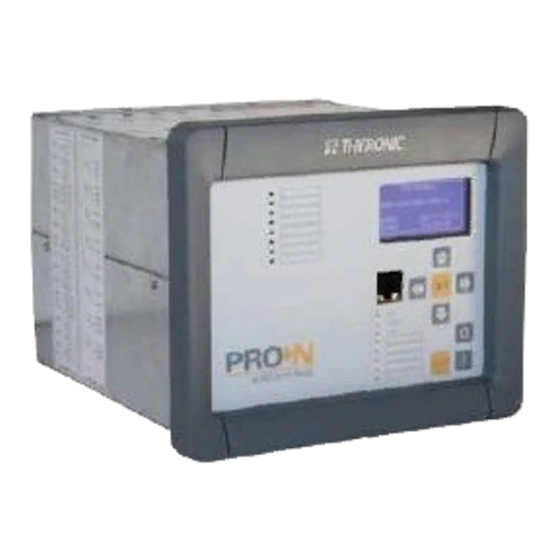
NVA100X
THE COMPREHENSIVE SOLUTION FOR FEEDERS AND UTILITIES PROTECTION
TABLE OF CONTENTS
Packaging ...................................................................................................................................................................................................................1
Contents .....................................................................................................................................................................................................................1
Technical support ......................................................................................................................................................................................................1
Mounting .....................................................................................................................................................................................................................2
Flush mounting ...........................................................................................................................................................................................................2
I/O diagram .................................................................................................................................................................................................................4
Electrical connections ..............................................................................................................................................................................................5
Output relays ..............................................................................................................................................................................................................6
Binary Inputs ..............................................................................................................................................................................................................6
Ethernet Ports ............................................................................................................................................................................................................7
Local Port ....................................................................................................................................................................................................................7
RS485 port ...................................................................................................................................................................................................................8
MMI Password management ..................................................................................................................................................................................9
MMI (Man Machine Interface) .............................................................................................................................................................................11
Reading variables (READ) ......................................................................................................................................................................................11
Setting modifying (SET) ..........................................................................................................................................................................................12
TEST ...........................................................................................................................................................................................................................13
COMMUNICATION ..................................................................................................................................................................................................13
Circuit breaker commands .....................................................................................................................................................................................13
MMI menu structure ...............................................................................................................................................................................................14
- Packaging
- Contents
- Technical support
Flush mounting
This document does not replace the instruction manual.
Some functions described may be not available in all NVA100X models.
ProNext devices must be stored within the required temperature limits; the relative humidity should
not cause condensation or formation of frost.
It is recommended that the devices are stored in their packaging; in the case of long storage, especial-
ly in extreme climatic conditions, it is recommended that the device is supplied with power for
some hours before the commissioning, in order to bring the circuits to the rating conditions and to
stabilize the operation of the components.
• Getting started
• Test report
• Screws
Full documentation is available on the www.thytronic.it website; for information and purchase of licen-
ses for oscillographic recording function please contact THYTRONIC.
Rack mounting with
MAR support
NVA100X - Getting started - 01 - 2018
GETTING STARTED
I
5A
1A
5A
n
I
1A
5A
1A
En
U
110-230 Vac/dc
AUX
NVA100X#P2J00TE0
Inductive CTs-VTs
I
630 A
np
I
1A
5A
1A
En
U
110-230 Vac/dc
AUX
NVA100X#P2000TE2
ThySensor inputs versions
2
9
U
100V
En
U
100V
n
U
20 kV
NP
Advertisement
Table of Contents

Subscribe to Our Youtube Channel
Related Manuals for Thytronic NVA100X


Summary of Contents for Thytronic NVA100X
-
Page 1: Table Of Contents
— Contents • Getting started • Test report • Screws — Technical support Full documentation is available on the www.thytronic.it website; for information and purchase of licen- ses for oscillographic recording function please contact THYTRONIC. 100V 100V 110-230 Vac/dc NVA100X#P2J00TE0... -
Page 2: Installation
3 mm, to ensure an adequate tolerance and gasket space between adjacent relays. The depth dimension, as indicated in the drawing, must be increased by as much as needed to allow room for the wiring. NVA100X - Getting started - 01 - 2018... - Page 3 • Remove the two vertical frames for access the holes for the fi xing screws; the frames are snapped. • Insert the device into the slot. • Fit the device to the panel with four screws.. • Replace the vertical frames. NVA100X - Getting started - 01 - 2018...
-
Page 4: I/O Diagram
(optical fiber), TX + TX or FX + FX. A version with two simultaneously active Local Ethernet Ethernet FX ports with RSTP protocol is available. Note [2] A version with 10 indipendent input is available. NVA100X - Getting started - 01 - 2018... -
Page 5: Electrical Connections
Electrical connections should be made by referring to the connection diagram; Devices must be installed by qualified personnel only. CAUTION No liability is accepted from Thytronic due to improper use. CT-VT input versions For the A1...A8 and B1...B10 , screw terminals with following characteristics are available: •... -
Page 6: Output Relays
The input circuits are voltage-free; activation requires the application of a power source, preferably the same auxiliary voltage present in the switchboard. The inputs are dimensioned for a wide range of operation and does not require any hw and / or sw NVA100X - Getting started - 01 - 2018... -
Page 7: Ethernet Ports
The link must be enabled by means ThySetter sw and local connection: • Set the IP address (Host IP address and IP net mask) n order that the NVA100X and PC parame- ters are matched. • Set to OFF parameters Autonegotiation on relay. -
Page 8: Rs485 Port
120 Ω ETH-2 ETH-2 RS232 RS232 1 - DTR 1 - DTR ≅ ≅ 2 - GND 2 - GND 3 - RX 3 - RX 4 - TX 4 - TX NVA100X - Getting started - 01 - 2018... -
Page 9: Programming And Settings
If you continue navigating the menus without entering the password, you can view all settings, but it NVA100X - Getting started - 01 - 2018... - Page 10 The command Set default settings restores the factory settings, all user- defined adjustments are cleared. Be carefully to enter the correct parameter ! The device serial number should be set to avoid IP address conflicts for devices con- nected to the Ethernet network. NVA100X - Getting started - 01 - 2018...
-
Page 11: Mmi (Man Machine Interface)
“PILOT WIRE DIAGNOSTIC >>” “SELECTIVE BLOCK BLOCK2 >>” “INTERNAL ELECTIVE BLOCK BLOCK4 >>” “FAULT RECORDING >>” “EVENTS RECORDING >>” Note 1 LSetting changes are enabled when the Enabling setting by MMI parameter is set NVA100X - Getting started - 01 - 2018... -
Page 12: Setting Modifying (Set)
(Enter) button for a few seconds; new message appears: “Confirm settings?” • Answer to the message ENTER: YES to confirm changes or RESET: NO to abord The end of the LED START blinking points out the end of procedure. NVA100X - Getting started - 01 - 2018... -
Page 13: Test
The committed output relays must be enabled inside the Circuit Breaker supervision \ LEDs-relays allocation menu. Note 1 Instantly all the relays are switched in rest state, including relays programmed as “normally energized” NVA100X - Getting started - 01 - 2018... -
Page 14: Mmi Menu Structure
MMI MENU STRUCTURE I menù illustrano tutte le funzioni di protezione NOTA Le funzioni effettivamente presenti dipendono dalla versione di NVA100X-x (x = B, V, P, G o C) THYTRONIC PRO-NVA100X-VM00-a DATE: 19/06/2013 TIME: 17:29:59 Start Synchro check? START <<No Yes>>... - Page 15 IEC>>> OFF BLK1 CPhi1< OFF Trip IEC>>> OFF >> Start CPhi2< OFF IEC>>> OFF Trip CPhi2< OFF BLK1 IEC>>> OFF BLK1 CPhi2< OFF BLK2IN IEC>>> OFF BLK4IN IEC>>> OFF PROCEED READ MENU’ NVA100X_menuread1a.ai NVA100X - Getting started - 01 - 2018...
- Page 16 >> BLK1 74TCS Trip Int/Ext Start IBF> Start IEBF> >> Start Trip BLK1 Block 74VT Alarm 74VT 74VT >> BLK1 74VT Start Trip S< 74CT >> BLK1 S< PROCEED READ MENU’ NVA100X_menuread1b.ai NVA100X - Getting started - 01 - 2018...
- Page 17 Event 2 IN1-16...IN1-1: EVENTS RECORDING Power down 0000000000000000 18/06/2013 >> IN2-16...IN2-1: 08:00:27:137 0000000000000000 Relay Event ... KC1-8...KC1-1: Settings 00000000 18/06/2013 KC2-8...KC2-1: 06:48:27:254 00000000 Event 299 Settings 18/06/2013 06:48:27:254 PROCEED READ MENU’ NVA100X_menuread2.ai NVA100X - Getting started - 01 - 2018...
- Page 18 ParTr-f<<<cnt ParBk1-f<<<cnt ParTr74TCScnt ParSt-f<<<<cnt 74TCS Counters >> ParBk1-74TCScnt 0 ParTr-f<<<<cnt ParBk1-f<<<<cnt CB Counters >> N.OpenCBcnt ParTr74VTcnt 74VT Counters >> ParBk1-74VTcnt ParTr74CTcnt 74CT Counters >> ParBk1-74CTcnt ParStBFcnt ParTrTrcnt BF Counters >> ParBk1BFcnt NVA100X_menuread3.ai NVA100X - Getting started - 01 - 2018...
- Page 19 TotTr-f<<<cnt TotBk1-f<<<cnt TotTr74TCScnt TotSt-f<<<<cnt 74TCS Counters >> TotBk1-74TCScnt 0 TotTr-f<<<<cnt TotBk1-f<<<<cnt CB Counters >> N.OpenCBcnt TotTr74VTcnt 74VT Counters >> TotBk1-74VTcnt TotTr74CTcnt 74CT Counters >> TotBk1-74CTcnt TotStBFcnt TotTrTrcnt BF Counters >> TotBk1BFcnt NVA100X_menuread4.ai NVA100X - Getting started - 01 - 2018...
- Page 20 20/06/2013 14:23:38:000 Event 2: Settings 19/06/2013 06:48:27:584 EVENTS RECORDING >> Event 3: KC1-2 off 19/06/2013 06:28:52:168 Event 4: KC1-2 on 19/06/2013 06:28:35:711 Event x: Power up xx/xx/xxx xx:xx:xx:xxx PROCEED SET MENU’ NVA100X_menuread5.ai NVA100X - Getting started - 01 - 2018...
- Page 21 U<BF U<<BLK1 Relays U< U<disbyU<< U<ST-K U<<BF U<TR-K Relays U<< LEDs U< U<<ST-K U<ST-L U<<TR-K U<TR-L LEDs U<< U<<ST-L U<< Element >> U<<TR-L PROCEED SET MENU’ PROCEED PROFILE A MENU’ NVA100X_menuset1.ai NVA100X - Getting started - 01 - 2018...
- Page 22 Relays I2>> I2>BF (the same as for 46LT) I2>>ST-K Relays I2> I2>>TR-K I2>ST-K I2> Element >> LEDs I2>> I2>TR-K I2>>ST-L LEDs I2> I2>>TR-L I2>ST-L PROCEED SET MENU’ PROCEED PROFILE A MENU’ I2>TR-L NVA100X - Getting started - 01 - 2018...
- Page 23 1 In ICLP>>>def 2 In t>>>def I>>>BLK1 I>>>BLK2IN I>>> Element >> I>>>BLK2OUT I>>>BLK4 I>>>2ndh-REST I>>>BF I>disbyI>>> I>>disbyI>>> Relays I>>> I>>>ST-K I>>>TR-K LEDs I>>> I>>>ST-L I>>>TR-L NVA100X_menuset3.ai PROCEED SET MENU’ PROCEED PROFILE A MENU’ NVA100X - Getting started - 01 - 2018...
- Page 24 1.00 s I-I/U>TR-K I-I/U>>BLK1 LEDs I-I/U> I-I/U>>BLK2IN I-I/U>ST-L I-I/U>>BLK2OUT OFF I-I/U>TR-L I-I/U> Element >> I-I/U>BF I-I/U>disbyI-I/U>> Relays I-I/U>> I-I/U>>ST-K I-I/U>>TR-K LEDs I-I/U>> I-I/U>>ST-L I-I/U>>TR-L PROCEED SET MENU’ PROCEED PROFILE A MENU’ NVA100X_menuset3a.ai NVA100X - Getting started - 01 - 2018...
- Page 25 IPD>>disbyIPD>>> OFF IPD>disbyIPD>>> OFF IPD>>>disbyIPD>>>> OFF IPD>>disbyIPD>> OFF Relays IPD>>>> Relays IPD>>> IPD>>>>ST-K IPD>>>ST-K IPD>>>>TR-K IPD>>>TR-K LEDs IPD>>>> LEDs IPD>>> IPD>>>>ST-L IPD>>>ST-L IPD>>>>TR-L IPD>>>TR-L NVA100X_menuset4.ai PROCEED SET MENU’ PROCEED PROFILE A MENU’ NVA100X - Getting started - 01 - 2018...
- Page 26 Relays f<<< f<<<<BF f<<<ST-K f<disbyf<<<< f<<<TR-K f<<disbyf<<<< LEDs f<<< f<<<disbyf<<<< OFF f<<<ST-L Relays f<<<< f<<<TR-L f<<<<ST-K f<<<<TR-K f<<<< Element >> LEDs f<<<< f<<<<ST-L f<<<<TR-L PROCEED SET MENU’ PROCEED PROFILE A MENU’ NVA100X_menuset5.ai NVA100X - Getting started - 01 - 2018...
- Page 27 CBclose-L SumI 5000 In^2s allocation >> CBopen-L Mode-tOpen CIRCUIT BREAKER CBdiag-K Ktrig-break SUPERVISION >> tbreak> CB Diagnostic >> Relays N.Open-K SumI-K SumI^2t-K tbreak-K LEDs N.Open-L SumI-L SumI^2t-L tbreak-L PROCEED SET MENU’ NVA100X_menuset6.ai NVA100X - Getting started - 01 - 2018...
- Page 28 Sede: 20139 Milano - Piazza Mistral, 7 - Tel. +39 02 574 957 01 ra - Fax +39 02 574 037 63 Stabilimento: 35127 Padova - Z.I. Sud - Via dell’Artigianato, 48 - Tel. +39 049 894 770 1 ra - Fax +39 049 870 139 0 www.thytronic.it www.thytronic.com...
Need help?
Do you have a question about the NVA100X and is the answer not in the manual?
Questions and answers